

I spent two years making flat pancakes and blaming the recipe.
The first time, I thought it was the baking powder — so I bought a new box. Still flat. Then I thought it was the pan — so I bought a better one. Still flat. Then I decided I just was not a pancake person and gave up for six months.
The actual problem? I was overmixing the batter. Every single time.
I stirred until the batter was perfectly smooth — no lumps, no streaks, completely uniform. I thought that was what good cooking looked like. What I was actually doing was developing the gluten network in the flour until it was so tight and elastic that when the CO2 bubbles from the baking powder tried to expand and lift the pancake, the gluten squeezed them out. Flat pancake. Every time.
This Fluffy Pancake Recipe is built around the science of what actually makes pancakes tall and fluffy — not just a list of ingredients, but the specific reasons behind every step. Stop stirring too much. Rest the batter. Watch the bubbles. Flip once. That is genuinely all it takes.
Let’s make pancakes that are actually worth getting out of bed for.
Why This Is the Best Fluffy Pancake Recipe
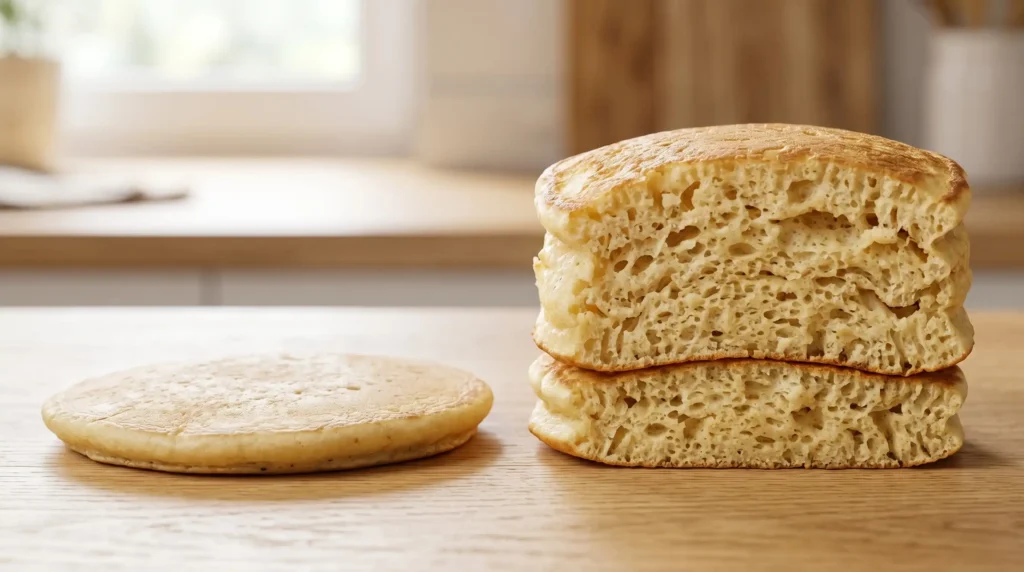
The lumps are intentional and essential. A smooth, lump-free batter means the gluten has been overdeveloped — and overdeveloped gluten squeezes out the CO2 bubbles that make pancakes rise. A lumpy batter means the gluten is relaxed and the CO2 has room to expand during cooking. Lumps = fluffy. Smooth = flat.
The 5-minute rest is not optional. When batter rests after mixing, two things happen simultaneously: the gluten strands relax (making the pancake more tender), and the baking powder begins its first CO2 release — distributing bubbles evenly through the batter before it hits the pan. Rest the batter and the bubbles are already there waiting. Skip the rest and the bubbles form unevenly during cooking, creating pancakes that rise in patches instead of uniformly.
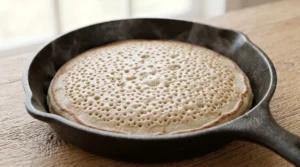
The bubble test tells you exactly when to flip. No timer needed, no guessing. When bubbles form across the entire surface and the edges look set — not glossy — the pancake is ready. Flip too early and the center is raw. Flip too late and the bottom burns. The bubbles are the timer.
Buttermilk makes a noticeably better pancake. The lactic acid in buttermilk reacts with the baking soda to produce extra CO2 — more lift than plain milk alone. It also partially tenderizes the gluten, creating a softer, more tender crumb. And the slight tang balances the sweetness of maple syrup in a way that plain milk cannot.
Better than any diner version. Made fresh, at home, with ingredients you control. No gummy centers from batter that sat too long. No metallic aftertaste from aluminum-containing baking powder. Just tall, golden, fluffy stacks that taste like the best breakfast of the week
The History of the Pancake — Older Than You Think
Pancakes are one of the oldest prepared foods in human history. Archaeological evidence suggests that pancake-like flatbreads made from ground grains and water were cooked on hot stones as far back as 30,000 years ago during the Stone Age. Otzi the Iceman — the 5,300-year-old mummy discovered in the Alps — had einkorn wheat flatbreads in his stomach at the time of his death.
The modern fluffy American pancake — thick, leavened, served in tall stacks with maple syrup — is distinctly North American in character, shaped by the availability of wheat flour and chemical leavening in the 19th century. Before baking powder (invented in 1856), pancakes were either unleavened flatbreads or leavened with yeast — which required overnight planning. The invention of baking powder transformed pancakes from an occasional production into a quick, everyday breakfast. The griddle and the stacked presentation became American breakfast icons through the early 20th century.
The Science: Why Pancakes Are Flat and How to Fix Every Cause
This section explains exactly what is happening inside your batter — and why each step of this fluffy pancake recipe exists.
Why overmixing causes flat pancakes — the gluten network. Flour contains two proteins — glutenin and gliadin — that link together when hydrated and mixed to form gluten. The more you mix, the longer and more interconnected these gluten strands become. In bread, this is desirable — you want a strong, elastic gluten network to trap gas and create chew. In pancakes, it is disastrous. An overdeveloped gluten network is too rigid — when CO2 bubbles try to expand inside the batter during cooking, the tight gluten squeezes them out rather than stretching to accommodate them. As <cite index=”435-1″>overmixing the batter allows for more of those gridlike side-by-side gluten bonds, which make the cooked pancake turn out flatter.</cite> The correct technique: mix until you no longer see dry flour. Stop immediately. Lumps are not a problem — they are proof you stopped in time.
Why double-acting baking powder creates lift in two stages. Standard baking powder is “double-acting” — it releases CO2 in two distinct phases. The first release happens when the baking powder contacts the liquid ingredients — this is why the batter becomes slightly bubbly as it rests. The second, larger release happens when the batter contacts heat — the thermal reaction produces significantly more CO2 that expands rapidly and lifts the pancake. <cite index=”434-1″>When you pour batter onto a hot surface, steam forms from the liquid ingredients, while the baking powder kicks in to create carbon dioxide bubbles. These bubbles get trapped in the batter’s protein network, giving structure and lift.</cite> This is why fresh baking powder matters enormously — expired leavening cannot produce enough gas for either stage.
Why buttermilk makes fluffier pancakes — the acid-base reaction. Buttermilk is mildly acidic (pH 4.5–4.8) due to its lactic acid content. When lactic acid contacts baking soda (sodium bicarbonate), a chemical reaction produces CO2 gas, water, and sodium lactate. This is extra leavening on top of what the baking powder provides — meaning more total CO2 in the batter. Buttermilk also partially tenderizes the gluten proteins, creating a more yielding structure that allows CO2 bubbles to expand more freely. The result: taller, more tender pancakes than plain milk produces. The same lactic acid tenderizing effect appears in our Carrot Cake — same science, different application.
Why resting the batter matters — the dual benefit. Resting batter for 5–10 minutes does two important things simultaneously. First, the gluten strands that developed during mixing begin to relax — the network loosens, making the batter more yielding and the finished pancake more tender. Second, the first stage of baking powder activation distributes CO2 bubbles evenly through the batter — so when it hits the hot pan, the bubbles are already uniformly placed and expand consistently. <cite index=”432-1″>Resting the pancake batter allows the gluten to relax and the baking powder to activate fully. This results in a lighter, fluffier pancake. During the resting period, the flour absorbs the liquid, leading to a more cohesive batter. Furthermore, the resting period allows the carbon dioxide produced by the baking powder to distribute evenly throughout the batter.</cite> For the science behind this CO2 distribution, Scientific American’s guide to gluten and pancake science explains the molecular mechanics clearly.
Why pressing pancakes destroys them. When you press a pancake with a spatula — whether to “help it cook” or to flatten it — you are physically squeezing the CO2 bubbles out of the batter. Those bubbles are the structural scaffolding that holds the pancake tall and fluffy. Press them out and they escape into the air, leaving a dense, flat pancake with an unpleasantly chewy texture. Never press a pancake. Ever. One flip, no pressure, done.
Why the first pancake almost always fails — pan seasoning science. The first pancake in any batch is usually the worst one — too pale, unevenly cooked, sometimes slightly gummy. This is not a batter problem. It is a pan problem. The first pancake seasons the cooking surface — it deposits a thin layer of fat from the batter that regulates heat distribution for every subsequent pancake. The first pancake also helps you calibrate the actual temperature of your pan (which is rarely what the dial says). Eat the first pancake in the kitchen. The second one is where the stack begins. For more on the chemistry happening inside your batter, the Orlando Science Center’s pancake chemistry guide breaks down the reactions clearly.
What You Need
For the Fluffy Pancakes
- 1½ cups (190g) all-purpose flour
- 2 tbsp granulated sugar
- 1½ tsp baking powder (aluminum-free preferred — no metallic aftertaste)
- ½ tsp baking soda (works with buttermilk for extra lift)
- ½ tsp salt
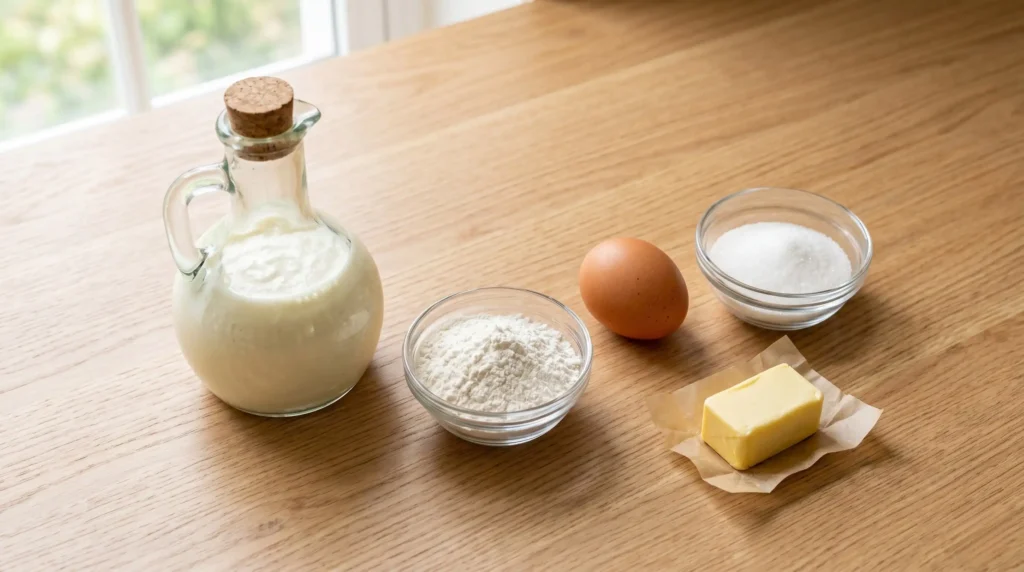
- 1¼ cups (300ml) buttermilk, room temperature (see Notes for substitute)
- 1 large egg, room temperature
- 3 tbsp unsalted butter, melted and slightly cooled
- 1 tsp pure vanilla extract
- Butter or neutral oil for the pan
Equipment: Large non-stick skillet, electric griddle, or cast iron skillet — mixing bowl, whisk, rubber spatula, ladle or ¼ cup measure Makes: 8–10 pancakes (serves 3–4)
How to Make the Best Fluffy Pancake Recipe — Step by Step
Mix the Dry Ingredients
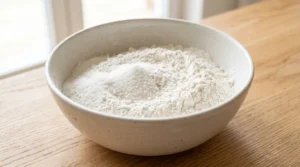
Whisk First: In a large mixing bowl, whisk together the flour, sugar, baking powder, baking soda, and salt until evenly combined — about 30 seconds. Whisking the dry ingredients first ensures the leavening is distributed evenly throughout the flour before any liquid touches it. Uneven distribution means some pancakes rise more than others.
Add the Wet Ingredients
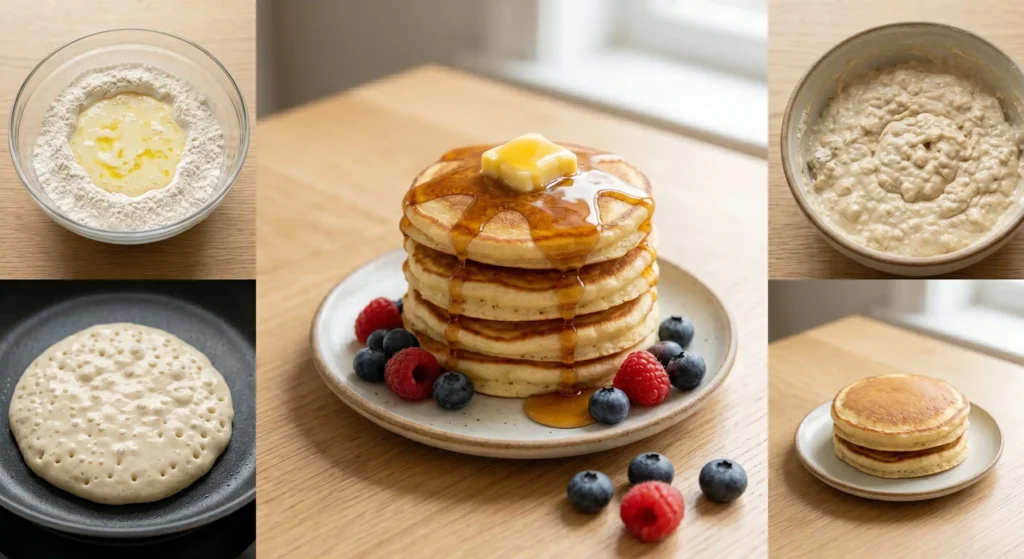
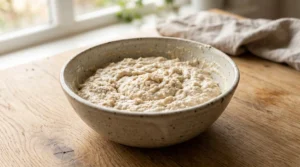
Combine Gently: In a separate smaller bowl or measuring jug, whisk together the room temperature buttermilk, egg, melted butter, and vanilla extract until combined. Pour the wet ingredients into the center of the dry ingredients all at once. Using a rubber spatula or fork, fold gently — just 10 to 12 strokes. Stop the moment you no longer see large streaks of dry flour. The batter will look lumpy, rough, and imperfect. This is exactly right. Do not mix further.
The lumps are gluten that has not been overdeveloped. Every extra stir you take now is developing more gluten bonds that will squeeze out CO2 bubbles during cooking. Put the spatula down when it looks too lumpy to be right — that is the correct moment to stop.
Rest the Batter — Do Not Skip
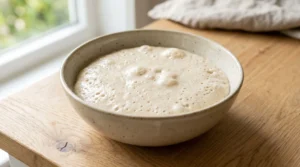
Wait 5 to 10 Minutes: Cover the bowl with a plate or plastic wrap and let the batter rest at room temperature for at least 5 minutes — 10 minutes is even better. During this rest, two things happen: the gluten strands relax and loosen, and the baking powder begins its first CO2 release, distributing bubbles evenly through the batter. After resting, the batter will look slightly puffed and a little thicker than before. Do not stir it again.
Prepare the Pan
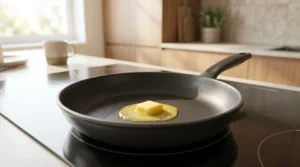
Heat and Test: Place your non-stick skillet, electric griddle, or cast iron skillet over medium heat. Let it preheat for 2 full minutes — a properly preheated pan is essential for tall, even pancakes. Test the temperature by flicking a few drops of water onto the surface. If they dance, skitter, and evaporate within 2 seconds — the pan is ready. If they sit still — too cold. If they immediately vanish with a loud sizzle — too hot, reduce heat slightly. Add a small knob of butter or a light film of oil and let it melt before adding batter.
375°F is the sweet spot for pancakes. At this temperature, the batter sizzles on contact and sets quickly — holding its height rather than spreading. Too low and the batter spreads flat before the structure sets. Too high and the outside burns before the inside cooks through.
Cook the Pancakes
Pour and Watch: For each pancake, use a ¼ cup measure or ladle to pour batter onto the pan. Do not spread it — pour from about 4 inches above the surface and let the batter find its natural shape. Leave space between pancakes.
Watch the Bubbles — This is Your Timer: Within 1–2 minutes, small bubbles will begin to appear on the surface of the pancake. Watch carefully:
- Bubbles just starting at edges: Not ready yet.
- Bubbles forming across the whole surface: Getting close — watch the edges.
- Bubbles across the whole surface AND edges look set (not glossy): Time to flip. Now.
Slide the spatula fully under the pancake and flip in one confident motion. Do not hesitate — a slow, uncertain flip causes the pancake to fold. Cook the second side for 1 to 1.5 minutes until golden brown. Remove from heat.
Never flip more than once and never press down. A second flip deflates the structure. Pressing squeezes out the CO2 bubbles that create the fluffiness. One flip, no pressure, done.
Keep Warm and Serve
Hold in the Oven: Preheat oven to 200°F (93°C). Place cooked pancakes on a baking sheet in the oven while you finish the batch. They will stay warm and fluffy for up to 30 minutes without drying out. Serve the entire stack together — not pancake by pancake — so everyone eats at the same time and every pancake is warm.
J.ZaiB’s Expert Touch
Brown the butter before adding it to the batter. Instead of simply melting the butter, cook it in the saucepan over medium heat for 2–3 minutes past the melting point — until the milk solids turn golden and the butter smells nutty. Cool it slightly before adding to the batter. Browned butter has undergone its own Maillard reaction, developing hundreds of new flavor compounds. The difference between regular melted butter and browned butter in pancakes is subtle but genuinely real — a deeper, more complex flavor that makes people ask what you did differently.
Test your baking powder before every batch. Expired or moisture-damaged baking powder is the single most common cause of consistently flat pancakes — and most people never suspect it. Add ½ teaspoon of your baking powder to ⅓ cup of hot water. It should bubble vigorously and immediately. If it bubbles weakly or not at all, buy a new can. Baking powder loses potency after being opened for 3 months, regardless of the printed expiration date.
Use room temperature buttermilk and egg. Cold buttermilk and cold eggs slow the baking powder’s first CO2 release during the rest period — you get fewer pre-formed bubbles in the batter before it hits the pan. Room temperature ingredients allow the full first-stage reaction to happen during the rest, giving you more lift when the batter hits the heat.
Do not use cooking spray on the pan. Cooking spray builds up a sticky residue over time that makes pancakes stick and burn despite the coating. A small knob of real butter, added fresh before each pancake, creates the right cooking surface AND adds flavor. Wipe the pan with a paper towel between batches if the butter starts to brown too quickly.
The first pancake is the test pancake — always. Every experienced pancake cook knows this. The first one calibrates your pan temperature and seasons the surface. It is rarely beautiful. Eat it immediately, adjust the heat if needed, and begin the real stack with the second one. This is not failure — it is protocol.
Variations to Try
Blueberry Pancakes: Scatter 5–6 fresh or frozen blueberries onto each pancake immediately after pouring the batter — before the bubbles form. Do not fold them into the batter or they will bleed and turn the batter purple. Press them in gently with a spoon so they are partially submerged. The blueberries burst during cooking and create jammy pockets in every bite.
Chocolate Chip Pancakes: Scatter 8–10 mini chocolate chips onto each pancake immediately after pouring. Mini chips distribute more evenly than standard size and melt more completely during the brief cook time. Add a pinch of espresso powder to the dry ingredients — it deepens the chocolate flavor without tasting like coffee.
Birthday Funfetti Pancakes: Fold ¼ cup of rainbow jimmies into the batter at the very last stir — immediately before pouring. Get them into the pan within 2 minutes. The same wax-coating principle we discussed in our Funfetti Cake Recipe applies here — jimmies resist bleeding, nonpareils turn the batter grey. A celebration breakfast that requires zero advance planning.
Banana Pancakes: Mash 1 very ripe banana and fold into the wet ingredients before combining with dry. Reduce sugar to 1 tablespoon — the banana adds its own sweetness. Add ½ tsp cinnamon to the dry ingredients. The banana adds moisture and natural sweetness that makes these pancakes genuinely exceptional.
Lemon Ricotta Pancakes: Replace ¼ cup of the buttermilk with whole milk ricotta. Add the zest of 1 lemon to the wet ingredients. The ricotta adds a creamy richness and the lemon zest brings brightness — the same limonene-in-zest principle from our Homemade Lemonade Recipe that makes fresh zest so impactful.
Gluten-Free Pancakes: Substitute the all-purpose flour 1:1 with a quality GF baking blend — Bob’s Red Mill 1:1 or King Arthur Measure for Measure both work well. The batter may be slightly thicker — add 1 to 2 extra tablespoons of buttermilk if needed. Check that your baking powder is certified gluten-free.
Serving Ideas

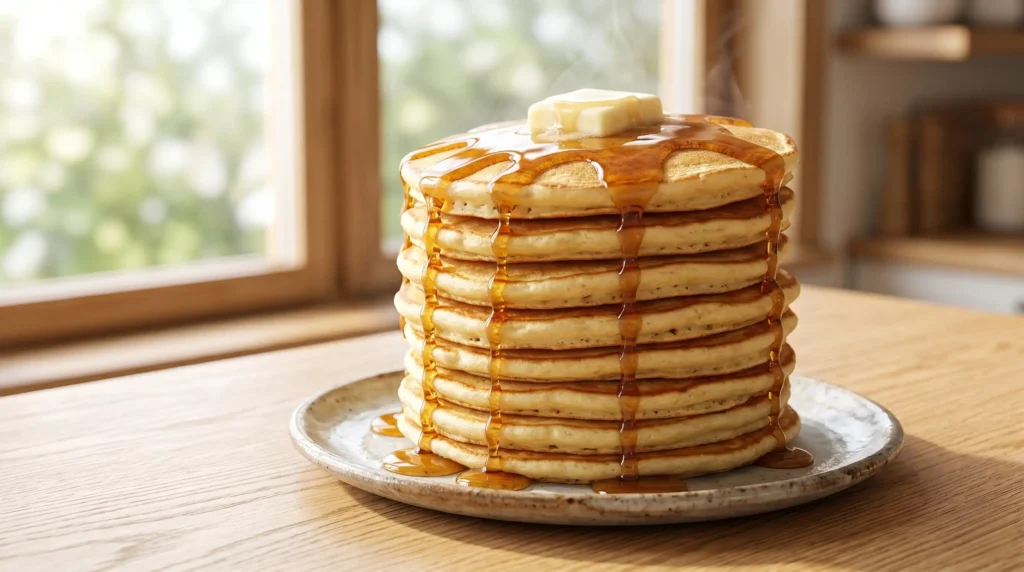
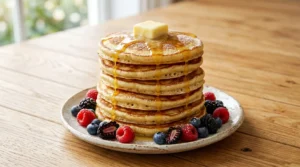
The Classic Stack: Three or four tall pancakes, a generous pat of cold butter melting on top, and real maple syrup — Grade A Dark Robust for the most intense flavor. That is the whole setup. Nothing needs to be added.
The Brunch Table: Pancake stack as the centerpiece alongside eggs, crispy bacon, and fresh fruit. Set out small pitchers of maple syrup, warmed honey, and fresh berry compote — let people pour their own. Pair with a cold glass of our Mango Lassi for a genuinely outstanding brunch drink combination, or a pitcher of our Homemade Lemonade for a lighter option.
For Kids: Pancakes cut into fun shapes using cookie cutters on the plate — hearts, stars, circles. Served with a small bowl of fresh strawberries and a drizzle of honey instead of syrup. The same pancake, completely different presentation that makes breakfast feel special on an ordinary Tuesday.
Weekend Upgrade: Top with a spoonful of Greek yogurt, a drizzle of honey, and toasted chopped pecans instead of maple syrup. The yogurt’s tang against the sweet pancake and the crunch of the pecans creates a texture and flavor contrast that genuinely elevates the experience.
Storage & Make-Ahead Guide
Leftover pancakes: Let cool completely, then stack with a small piece of parchment paper between each one to prevent sticking. Store in an airtight container in the refrigerator up to 3 days. Reheat in a toaster for crispy edges, or in a 300°F oven for 5 minutes for soft results. Microwave works but makes them slightly rubbery — not recommended.
Freezer: Stack cooled pancakes with parchment paper between each one. Wrap the stack tightly in plastic wrap and place in a sealed freezer bag. Freeze up to 2 months. Reheat directly from frozen in a toaster or 300°F oven — no thawing needed.
Batter make-ahead: The dry ingredients can be whisked together and stored in an airtight container up to 1 week. The wet ingredients can be combined and refrigerated separately up to 24 hours. Combine them fresh in the morning — only 1 minute of mixing required. Do not store fully mixed batter overnight — the leavening activates and deflates, producing flatter pancakes the next morning.
Keeping warm for a crowd: Cooked pancakes on a baking sheet in a 200°F oven stay warm and fluffy for up to 30 minutes. Any longer and they begin to dry out slightly. For large batches, cover the baking sheet loosely with foil.

Best Fluffy Pancake Recipe
Ingredients
Equipment
Method
- Whisk First: In a large bowl, whisk together the flour, sugar, baking powder, baking soda, and salt until evenly combined — about 30 seconds. Whisking the dry ingredients together first ensures the leavening is evenly distributed before any liquid touches it, so every pancake rises equally.

- Mix Gently — Stop Early: In a separate bowl, whisk together the room temperature buttermilk, egg, melted butter, and vanilla extract. Pour the wet ingredients into the center of the dry ingredients all at once. Using a rubber spatula or fork, fold together with just 10 to 12 strokes — stop the moment you no longer see large streaks of dry flour. The batter will look lumpy, rough, and uneven. This is exactly correct. Do not mix further — every extra stir develops more gluten and produces flatter pancakes.
- Wait 5 to 10 Minutes: Cover the bowl and let the batter rest at room temperature for 5 to 10 minutes. During this rest, the gluten relaxes and the baking powder distributes its first CO2 bubbles evenly through the batter. After resting, the batter will look slightly puffed and thicker. Do not stir it again.
- Preheat and Test: Place a non-stick skillet or griddle over medium heat and let it preheat for 2 full minutes. Test by flicking a few drops of water — if they dance and evaporate within 2 seconds, the pan is ready. Add a small knob of butter and let it melt, swirling to coat the surface. The butter should sizzle gently, not burn.
- Pour, Watch, Flip Once: Pour ¼ cup of batter per pancake onto the heated pan. Do not spread it — let the batter find its own shape naturally. Cook until bubbles form across the entire surface of the pancake AND the edges look set and no longer glossy — about 1.5 to 2 minutes. Slide the spatula fully under the pancake and flip in one confident motion. Cook the second side for 1 to 1.5 minutes until golden brown. Remove from pan and keep warm in a 200°F oven while you cook the remaining pancakes. Never flip more than once and never press the pancake down — pressing squeezes out the CO2 bubbles that create the fluffy height.
- Stack and Enjoy: Serve immediately with a generous pat of cold butter placed on top of the warm stack, a generous pour of real maple syrup, and fresh berries or sliced banana alongside. Pancakes are always best eaten hot off the pan — the texture is at its peak in the first 5 minutes.
Notes
- Stop mixing when lumpy. Lumps = relaxed gluten = fluffy pancakes. Smooth batter = overdeveloped gluten = flat, rubbery pancakes. Mix only 10 to 12 strokes after combining wet and dry. Stop before it looks “done.”
- Rest the batter — non-negotiable. 5 to 10 minutes of rest allows gluten to relax and baking powder to pre-activate. Do not skip and do not stir again after resting.
- Watch the bubbles, not the clock. Flip when bubbles cover the entire surface AND the edges look set. This is the only reliable “done” signal.
- Never press the pancake. Pressing with a spatula squeezes out CO2 bubbles — the pancake immediately deflates. One flip, no pressure.
- No buttermilk? Add 1 tablespoon of white vinegar or lemon juice to 1¼ cups whole milk. Let sit 5 minutes. Plain Greek yogurt thinned with a splash of milk also works well.
- Test your baking powder first. Mix ½ tsp baking powder into ⅓ cup hot water — it should bubble vigorously immediately. If it does not bubble, buy a fresh can. Opened baking powder loses potency after 3 months.
- Aluminum-free baking powder avoids any metallic aftertaste — especially noticeable in plain buttery pancakes. Bob’s Red Mill or Rumford brands are widely available.
- Room temperature ingredients matter. Cold buttermilk and eggs slow the baking powder’s first CO2 release during the rest period. Take them out of the fridge 30 minutes before starting.
- Brown the butter for deeper flavor: cook melted butter 2 to 3 minutes past the melting point until golden and nutty-smelling. Cool slightly before adding to batter.
- The first pancake is always the test pancake. It calibrates the pan temperature and seasons the surface. Eat it in the kitchen and adjust heat if needed before starting the real batch.
- Keep warm: Cooked pancakes on a baking sheet in a 200°F oven stay warm and fluffy for up to 30 minutes.
- Storage: Refrigerate cooled pancakes up to 3 days. Freeze up to 2 months with parchment between each pancake. Reheat in toaster or 300°F oven.
- Do not store mixed batter overnight. The baking powder depletes and pancakes will be flat. Store dry and wet ingredients separately — combine fresh each morning.
- UK/Australia notes: “All-purpose flour” = plain flour. “Baking soda” = bicarbonate of soda. “Buttermilk” = same term. “Skillet” = frying pan.
- Nutrition values are estimates. Actual values vary based on butter quantity used for cooking and toppings added.
NUTRITION
(Per 2 pancakes — without toppings)
| Nutrient | Amount |
|---|---|
| Calories | ~210 kcal |
| Total Fat | 7g |
| Saturated Fat | 4g |
| Cholesterol | 55mg |
| Sodium | 380mg |
| Total Carbs | 31g |
| Sugars | 6g |
| Fiber | 1g |
| Protein | 6g |
Note: Values are estimates without toppings. Adding maple syrup adds approximately 50 kcal per tablespoon.
Frequently Asked Questions
Why are my pancakes always flat?
The most common cause is overmixing — developing too much gluten so CO2 bubbles get squeezed out during cooking. Stop mixing the moment you no longer see dry flour streaks. Lumps are intentional and essential. Other causes: expired baking powder (test it in hot water — it should bubble vigorously), pan temperature too low (batter spreads before it sets), or batter sitting too long after mixing (CO2 depletes).
How do I know when to flip pancakes?
Watch the bubbles — not the clock. When bubbles appear across the entire surface of the pancake AND the edges look set rather than glossy and wet, it is time to flip. This usually takes 1.5 to 2 minutes on medium heat. Flip too early and the center is raw. Flip too late and the bottom burns. The bubbles are the most reliable timer there is.
Can I make fluffy pancakes without buttermilk?
Yes — add 1 tablespoon of white vinegar or lemon juice to 1¼ cups of regular whole milk. Stir and let sit for 5 minutes until it curdles slightly. This creates the same acid that makes buttermilk so effective — reacting with the baking soda for extra lift and tenderizing the gluten for a softer crumb. Full-fat plain yogurt thinned with a splash of milk also works well.
Why does my first pancake always come out wrong?
This is completely normal and happens to every cook. The first pancake seasons the cooking surface and helps calibrate the actual pan temperature — which is rarely what the dial indicates. Use the first pancake to adjust your heat up or down before starting the real batch. Eat it in the kitchen. The second pancake is almost always perfect.
Should I let pancake batter rest?
Yes — 5 to 10 minutes minimum. Resting allows the gluten to relax (making the pancake more tender) and allows the baking powder’s first CO2 release to distribute evenly through the batter. After resting, the batter will look slightly puffier and thicker. Do not stir it again after resting — you will deflate the bubbles that just formed.
Why are my pancakes rubbery and chewy?
Rubbery pancakes are caused by overmixing — the gluten has been developed too much, creating a tough, elastic structure that does not yield when you bite in. Unfortunately, overmixed batter cannot be fixed. The only solution is to start again and stop stirring much earlier next time. Alternatively, thin the overmixed batter with ¼ cup of extra buttermilk and cook them as thinner pancakes — they will still be slightly chewy but more edible.
Can I make pancake batter the night before?
Do not store fully mixed batter overnight — the baking powder activates during storage and the CO2 depletes, resulting in flatter pancakes in the morning. Instead, mix the dry ingredients together and store separately from the wet ingredients. Combine them fresh in the morning — takes less than 2 minutes and produces full-lift pancakes every time.
What is the best pan for pancakes?
A non-stick skillet or electric griddle set to 375°F gives the most consistent results. Cast iron works beautifully once it is properly preheated (5–7 minutes) — it retains heat evenly and creates a slightly crispier edge. Stainless steel pans tend to stick without very precise temperature control. Whatever pan you use, preheat it fully before adding any batter.
The Stack That Makes Weekends Worth It
A perfect Fluffy Pancake Recipe does not require a restaurant or a box mix. It requires understanding three things: do not overmix, rest the batter, and watch the bubbles.
Everything else in this recipe — the buttermilk, the browned butter, the aluminum-free baking powder — makes a good pancake great. But those three fundamentals are what separate a flat, disappointing Sunday morning from a tall, golden, impossibly fluffy stack that makes everyone at the table go quiet on the first bite.
Make it this weekend. Brown the butter. Rest the batter. Eat the first one yourself in the kitchen. And when that second pancake comes off the pan — tall, golden, perfectly round — you will understand exactly why this is the only breakfast recipe that genuinely cannot be improved by anything else.
Tag us on Instagram @viralfoodhacks706 when your stack is ready — I especially love the maple syrup pour shots! Save this to Pinterest so it is always there for next Sunday morning.