

Let me be honest with you. The first time I heard “tiramisu,” I immediately thought — nope, too fancy, too complicated, way above my skill level. Classic tiramisu has raw eggs, a double boiler, Italian mascarpone, and a technique that sounds like a cooking school exam.
Then I discovered these No-Bake Tiramisu Cups, and I genuinely could not believe how simple it actually is.
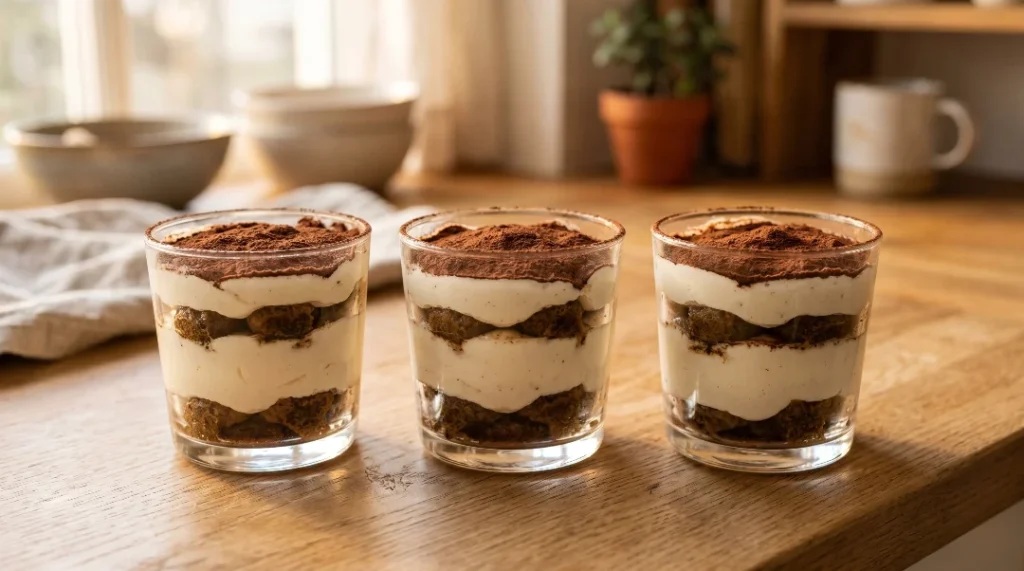
No oven. No raw eggs. No special equipment beyond a hand mixer and a couple of bowls. You’re looking at 15 minutes of actual work, a few hours in the fridge, and a dessert that looks like it came straight out of a restaurant. Individual portions, gorgeous layers of coffee-soaked ladyfingers and silky mascarpone cream, finished with a cloud of cocoa powder on top.
If you’ve ever been intimidated by tiramisu — this is your moment.
Why You’ll Be Making These No-Bake Tiramisu Cups on Repeat
These No-Bake Tiramisu Cups check every single box for a go-to dessert. They’re no-bake and egg-free, so zero worries about food safety. They’re individually portioned, which means no cutting, no scooping, no awkward serving at the dinner table — just hand someone their cup and watch their eyes light up. They’re make-ahead friendly, meaning you can prep them the night before and forget about dessert until it’s time to serve. And honestly? They look stunning in glass cups or mason jars. That layered cross-section of cream, coffee-soaked cookie, and cocoa powder is almost too pretty to eat.
Almost.
The Science Behind the Magic: Why Tiramisu Works
Here’s something most people don’t realize: tiramisu’s flavor is basically a lesson in contrast. You have the slightly bitter espresso-soaked ladyfingers sitting right next to the sweet, rich mascarpone cream — and that push-pull is exactly what makes every single bite so addictive.
The ladyfingers (called savoiardi in Italian) are designed to be dry and porous, which is why they absorb coffee so beautifully without turning to mush — as long as you dip them for just 1–2 seconds per side. Any longer and you’ll end up with a soggy bottom situation. The mascarpone is essentially an ultra-rich Italian cream cheese with a fat content around 60–75%, giving the cream layer its distinctive velvet texture that whipped cream alone can’t replicate. When you fold cold whipped cream into the mascarpone, you’re creating a mousse-like mixture — light, airy, but with that luxurious body.
And that final dusting of unsweetened cocoa powder? It’s not just for looks. The slight bitterness cuts through the richness of the cream and rounds out the whole dessert. Don’t skip it. If you love the science behind how simple ingredients create incredible desserts, you’ll want to check out our Moist Coconut Cake for another great example of that principle in action.
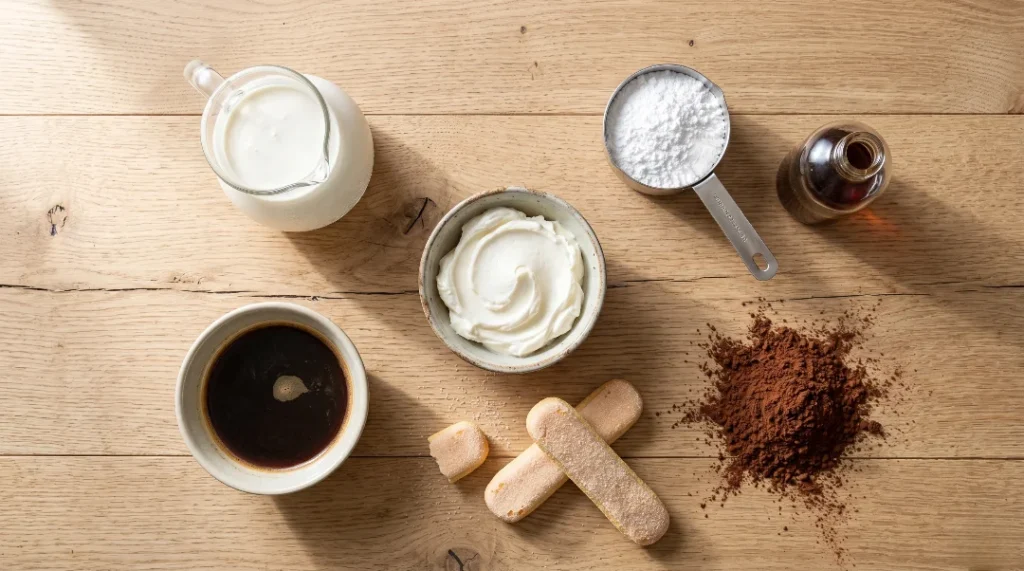
What You Need (Just 7 Ingredients)
For the Mascarpone Cream:
- 8 oz (1 cup) mascarpone cheese, at room temperature
- 1 cup heavy whipping cream, cold
- ¼ cup powdered sugar (confectioner’s sugar)
- 1 tsp vanilla extract
For the Coffee Soak:
- 1 cup strong brewed espresso or very strong coffee, cooled completely
- 1 tbsp Kahlúa, dark rum, or Marsala wine (optional but adds depth)
For Assembly:
- 20–24 ladyfinger cookies (Savoiardi)
- 2–3 tbsp unsweetened cocoa powder, for dusting
Serves: 6 individual cups
How to Make No-Bake Tiramisu Cups (Step-by-Step)
Step 1 — Make the Mascarpone Cream
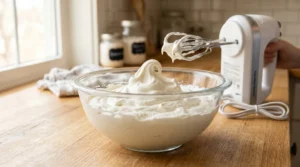
In a large bowl, combine the cold heavy whipping cream, powdered sugar, and vanilla extract. Using a hand mixer, beat on medium-high speed until soft peaks form — meaning the cream holds its shape when you lift the beater, but still has a gentle curve at the tip. Don’t over-whip; stiff peaks will make your cream dense instead of pillowy.
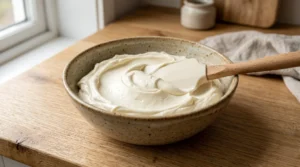
In a separate bowl, stir the room-temperature mascarpone until it’s smooth and lump-free. Now gently fold the whipped cream into the mascarpone in three additions, using a spatula in a slow, sweeping motion. You’re not stirring — you’re folding, which keeps all that air in the mixture. Once combined, set the cream aside.
Micro-tip: Make sure your mascarpone is truly at room temperature. Cold mascarpone will clump when you fold in the cream, giving you a grainy texture.
Step 2 — Prep the Coffee Soak
Pour your cooled espresso into a shallow bowl (wide enough to dip a ladyfinger flat). If you’re using liqueur, stir it in now. The coffee absolutely must be cool — dipping into hot coffee will make your ladyfingers fall apart before they even hit the cup.
Micro-tip: Don’t have espresso? Brew a very strong cup of regular coffee, or dissolve 2 teaspoons of instant espresso powder in 1 cup of hot water and let it cool.
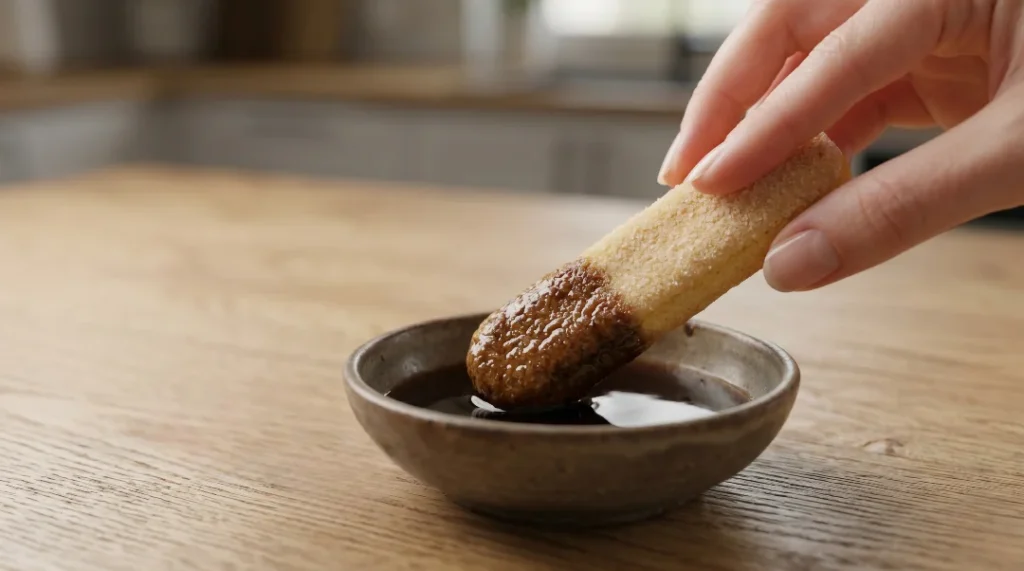
Step 3 — Dip the Ladyfingers
Hold one ladyfinger over the coffee bowl and dip it in for exactly 1–2 seconds per side. You want it saturated, not soggy. It should feel slightly firm when you pick it up — it will continue softening as it chills in the cup. Break ladyfingers in half if needed to fit your cups or glasses.
Micro-tip: Work fast with a gentle touch. These cookies absorb liquid quickly — the 1-2 second rule is non-negotiable.
Step 4 — Layer Your No-Bake Tiramisu Cups
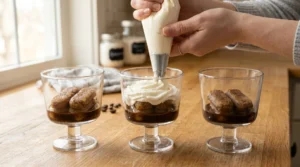
Add a small spoonful of mascarpone cream to the bottom of each cup. This acts as an anchor so the ladyfingers don’t slide around. Next, lay a single layer of dipped ladyfingers on top. Follow with a generous layer of mascarpone cream, spreading it to the edges. Repeat — another layer of dipped ladyfingers, another layer of cream. Finish with cream on top.
Micro-tip: A piping bag (or a zip-lock bag with the corner snipped) makes the cream layers look incredibly neat and professional — but a spoon works perfectly fine too.
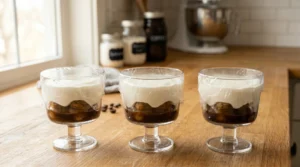
Step 5 — Chill (This Is the Secret Step)
Cover each cup tightly with plastic wrap and refrigerate for a minimum of 2 hours. Overnight is even better. This resting time is where the magic actually happens — the ladyfingers absorb the remaining moisture, the cream firms up, and all those flavors meld together into that unmistakably silky tiramisu texture.
Micro-tip: Don’t rush this step. A tiramisu cup assembled right before serving is not the same dessert as one that’s had time to chill and set.
Step 6 — Dust and Serve
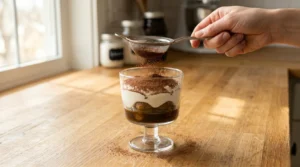
Right before serving, use a fine mesh sieve to dust a generous layer of unsweetened cocoa powder over each cup. Don’t add the cocoa during assembly — it absorbs moisture in the fridge and loses its visual impact. Serve cold.
J.ZaiB’s Expert Touch
After making these more times than I can count, here are the things that actually move the needle:
Use the coldest cream possible. Put your bowl and beaters in the freezer for 10 minutes before whipping. Cold cream whips faster, holds its shape better, and creates a more stable mousse layer.
Don’t skip the vanilla in the cream. Mascarpone on its own is very neutral. The vanilla is doing more work than you think — it rounds out the flavor and adds warmth without adding any obvious vanilla-ness.
Glass cups are always worth it. Clear cups or glasses show off those gorgeous layers. Mason jars, wine glasses, even plastic dessert cups all work. The visual impact is half the dessert experience.
Let them chill overnight. I know the recipe says 2 hours minimum, but tiramisu cups made the night before are genuinely a different — better — dessert. The flavors deepen, the texture becomes more unified, and it frees you up completely on the day you’re serving.
Variations to Try
Kid-Friendly Version: Leave out the alcohol and swap strong espresso for decaf. All the flavor, none of the caffeine or booze. Kids absolutely love these.
Strawberry Tiramisu Cups: Add a layer of sliced fresh strawberries between the cream and ladyfingers. Use strawberry-flavored syrup instead of some of the espresso for a lighter, fruity take. Speaking of strawberries, if you love a good fruit dessert, our Classic Strawberry Pie is a must-try for spring and summer.
Chocolate Lover’s Cups: Add a thin layer of Nutella right on top of the first ladyfinger layer, then proceed with the cream. Or finish each cup with shaved dark chocolate instead of just cocoa powder. Truly next level.
Baileys Tiramisu Cups: Swap the Kahlúa for Baileys Irish Cream. It makes the cream layer slightly richer and adds a warm, caramel-like note. A huge hit during the holidays.
No-Mascarpone Version: Can’t find mascarpone at your local store? Blend 8 oz of full-fat cream cheese with 3 tablespoons of heavy cream and 2 tablespoons of sour cream. It’s a solid swap — the flavor is slightly tangier, but paired with bold espresso, most people genuinely can’t tell the difference.
Serving Ideas
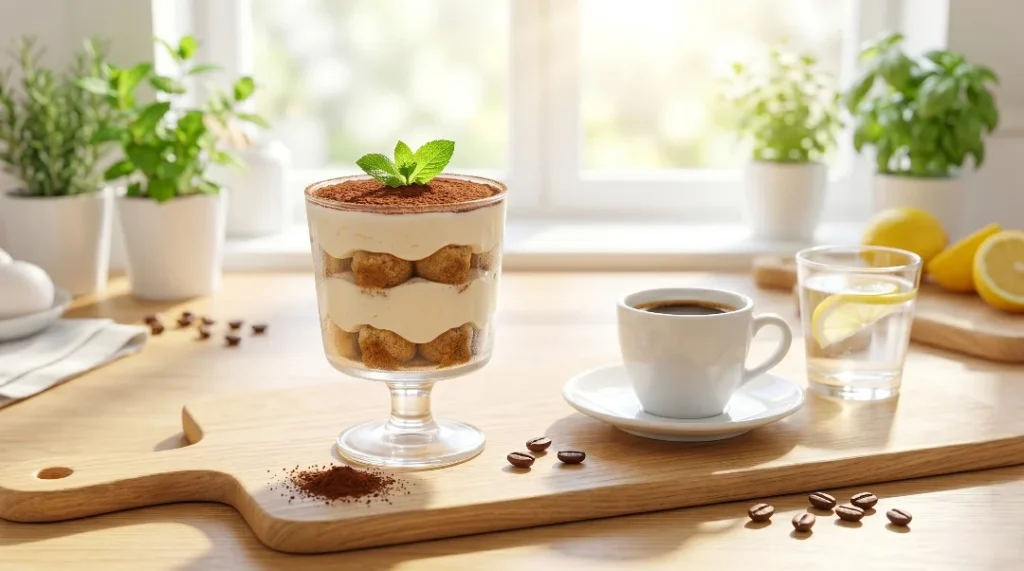
These No-Bake Tiramisu Cups are a natural closer for any dinner that leans Italian or comfort-food forward. Pair them after a cozy pasta night or a slow-cooker dinner — they complement hearty mains beautifully because they’re rich but not heavy. If you’re building a full dinner party menu, our Slow Cooker Leg of Lamb makes an incredible main course before these cups close out the meal on a high note.
For presentation, set out the cups on a wooden board or small tray with a few espresso beans scattered around for decoration. Serve each cup with a small long-handled spoon. If you want to go full Italian café vibes, serve alongside a shot of espresso.
Storage & Make-Ahead Guide
Refrigerator: Cover each cup tightly with plastic wrap and refrigerate for up to 3–4 days. The texture actually improves for the first 24 hours. If the cocoa powder looks a bit absorbed after a day or two, simply re-dust right before serving.
Freezer: These freeze surprisingly well! Assemble the cups without the cocoa powder dusting, cover tightly with plastic wrap and then foil, and freeze for up to 2–3 months. Thaw in the refrigerator overnight. Re-dust with cocoa powder before serving. The texture softens slightly but remains delicious.
Make-Ahead for Parties: You can make these up to 2 days in advance — which is exactly why they’re a party host’s dream. Do everything except the cocoa dusting, cover, refrigerate, and dust right before guests arrive.

No-Bake Tiramisu Cups – Easy 15-Minute Individual Dessert
Ingredients
Equipment
Method
- Whip the cream. In a large bowl, combine the cold heavy whipping cream, powdered sugar, and vanilla extract. Using a hand mixer, beat on medium-high speed until soft peaks form. The cream should hold its shape when you lift the beater, but still have a gentle curve at the tip. Do not over-whip.

- Prepare the mascarpone. In a separate bowl, stir the room-temperature mascarpone until smooth and completely lump-free.
- Fold together. Add the whipped cream to the mascarpone in three additions, folding gently with a rubber spatula each time. Use a slow, sweeping motion — you are folding, not stirring. Stop as soon as combined. Set the mascarpone cream aside.
- Make the coffee soak. Pour the cooled espresso into a shallow bowl. Stir in the liqueur if using. The coffee must be fully cooled before dipping.
- Dip the ladyfingers. Hold one ladyfinger over the coffee bowl and dip each side for exactly 1–2 seconds. You want it saturated but still slightly firm. Break ladyfingers in half if needed to fit your cups.
- Layer the cups. Add a small spoonful of mascarpone cream to the bottom of each cup as an anchor. Lay a single layer of dipped ladyfingers on top. Add a generous layer of mascarpone cream. Repeat with another layer of ladyfingers, then finish with a final layer of cream on top.
- Chill. Cover each cup tightly with plastic wrap. Refrigerate for a minimum of 2 hours — overnight is best for flavor and texture.
- Dust and serve. Just before serving, use a fine mesh sieve to dust a generous layer of unsweetened cocoa powder over each cup. Serve cold.


Notes
- Don’t rush the chill time. The minimum is 2 hours, but overnight makes this dessert dramatically better. Plan ahead!
- Mascarpone must be at room temperature. Cold mascarpone causes a grainy, curdled cream. Take it out 30–45 minutes before starting.
- The 1–2 second dip rule is non-negotiable. Ladyfingers absorb liquid very fast. Over-soaking = soggy cups.
- Add cocoa powder only before serving. If added earlier, it absorbs moisture in the fridge and looks dull.
- Freeze your bowl and beaters for 10 minutes before whipping cream for faster, more stable results.
- No-alcohol version: Skip the liqueur and add an extra splash of espresso or ½ tsp vanilla to the coffee soak.
- No mascarpone? Blend 8 oz cream cheese + 3 tbsp heavy cream + 2 tbsp sour cream as a substitute.
- No ladyfingers? Substitute with cubed pound cake, vanilla sponge cake, or angel food cake.
- Kid-friendly version: Use decaf espresso and leave out the alcohol entirely.
- Storage: Cover and refrigerate up to 3–4 days. Re-dust with cocoa powder before serving if needed.
- Freezer: Freeze (without cocoa dusting) up to 2–3 months. Thaw overnight in the fridge. Note: Nutrition values are estimates. Use a nutrition calculator with your exact brands for precise figures. Values will vary based on cup size and exact ingredient amounts used.
Frequently Asked Questions
Can I make tiramisu cups without ladyfingers?
Yes! If you can’t find ladyfinger cookies (look for them labeled as Savoiardi in the Italian or international foods aisle), you can substitute with cubed pound cake, vanilla sponge cake, or even angel food cake. The texture will be slightly softer, but the flavor is still excellent. King Arthur Baking also has a great homemade ladyfingers recipe if you want to go from scratch.
Do No-Bake Tiramisu Cups have raw eggs?
No — this recipe is completely egg-free. Traditional Italian tiramisu uses a cooked egg yolk custard called zabaglione, but these no-bake tiramisu cups skip that entirely and use whipped cream folded into mascarpone instead. Same richness, zero egg-related concerns, and safe for everyone at the table.
How long do I need to chill tiramisu cups before serving?
At minimum, 2 hours in the refrigerator. For the best texture and flavor, chill your no-bake tiramisu cups overnight. The ladyfingers need time to fully soften into that cake-like layer, and the cream needs time to set and meld with the coffee soak.
Can I make these non-alcoholic?
Absolutely. Just leave out the liqueur and replace it with an extra splash of espresso or a teaspoon of vanilla extract in the coffee soak. The cups are just as delicious and completely crowd-friendly for all ages.
Why did my mascarpone cream turn grainy?
This usually happens for one of two reasons: the mascarpone was too cold when you mixed it (causing it to clump), or the mixture was over-beaten. Always bring your mascarpone to room temperature before using, and fold the whipped cream in gently rather than beating it in.
Can I use regular coffee instead of espresso?
You can, but it should be very strong — brewed double strength or reduced slightly by simmering. If the coffee is too weak, the ladyfingers won’t have that bold coffee punch that makes these no-bake tiramisu cups so irresistible. Instant espresso powder dissolved in hot water is actually a great and easy shortcut here.
The Best Thing You’ll Make This Week
There’s something really satisfying about a dessert this beautiful that comes together this easily. No-Bake Tiramisu Cups are proof that you don’t need to be a pastry chef to put something genuinely impressive on the table. Whether you’re making them for a dinner party, a special weekend treat, or just because it’s Tuesday and you deserve something amazing — this is the recipe.
Make them tonight. Let them chill overnight. And tomorrow, when you pull one out of the fridge and take that first spoonful of coffee-soaked ladyfinger and silky mascarpone cream — you’ll understand exactly why this Italian dessert has survived centuries.
Tag me on Instagram @viralfoodhacks706 when you make yours. I genuinely love seeing your cups. Save this one to Pinterest for later — trust me, you’ll want to find it again.