

I spent an entire Saturday making croissants for the first time. Three hours of mixing, folding, resting, chilling, rolling, and shaping. I was genuinely proud of how they looked going into the oven.
They came out looking like slightly crescent-shaped dinner rolls. Dense, bready, pale. Not a single visible layer. Definitely not flaky.
What went wrong was almost entirely temperature. My kitchen was warm, and I kept touching and stretching the dough during lamination without putting it back in the fridge between folds. The butter, which should have stayed in distinct cold layers between the dough, had softened and blended into the dough itself. No separate layers, no steam separation in the oven, no flakiness.
The second time I understood the core rule of croissant making: everything depends on keeping the butter cold. Not cool. Cold. Below 60°F throughout the lamination process. When the butter stays cold and distinct, the oven turns the water in those butter layers into steam, and that steam physically pushes the dough layers apart, creating the honeycomb interior and shattering exterior that defines a great croissant.
This Homemade Croissants Recipe is built around managing that temperature at every step, plus a complete three-day timeline so you know exactly when to do each stage without rushing or guessing.
Why This Is the Best Homemade Croissants Recipe
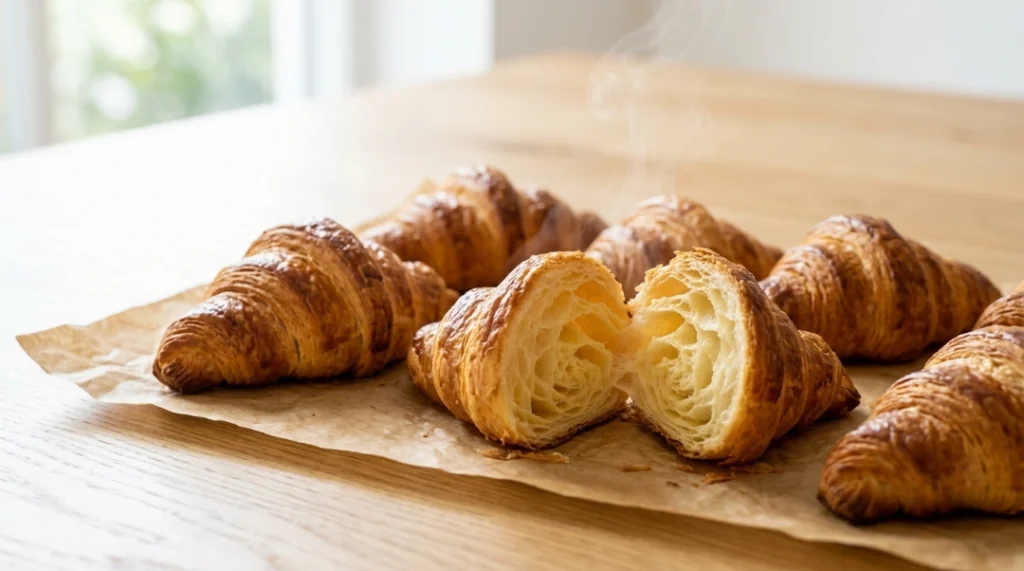
Every temperature-sensitive moment is flagged clearly. Most croissant recipes list the steps without emphasizing which moments are make-or-break for the layers. This recipe tells you exactly when to stop and chill and exactly why.
A complete 3-day timeline included. Croissants cannot be rushed. The timeline in this recipe shows you hour by hour when to mix, chill, laminate, shape, proof, and bake so you arrive at breakfast with fresh, perfect croissants without any last-minute stress.
The wobble test is properly explained. Most recipes say “proof until the croissants wobble when you shake the pan.” This recipe explains what the wobble actually means physically and why it is the correct indicator of proper proofing.
European butter fully justified. This recipe explains not just that European butter is better, but exactly why the higher fat content and lower water content changes the finished croissant, so you understand the investment.
A Quick History, Where Croissants Actually Come From
Despite being the symbol of French baking, the croissant has Austrian origins. Its ancestor is the kipferl, a crescent-shaped Austrian pastry dating back to the 13th century. Legend often ties the crescent shape to the defeat of the Ottoman Empire in the siege of Vienna in 1683, with bakers creating the shape to mimic the crescent moon on the Ottoman flag. Whether that legend is accurate or not, the crescent shape became associated with Austrian baking long before the French adopted it.
The transformation from the dense Austrian kipferl to the light, flaky, laminated croissant we know today happened in Paris in the 19th century, when Austrian bakers opened the first Viennese-style bakeries in the city. French bakers adapted the kipferl using laminated dough, the butter-folding technique they had developed for puff pastry, creating a pastry that was simultaneously richer, lighter, and more complex than its Austrian predecessor. For the full cultural and culinary history, Britannica’s entry on the croissant covers the journey from Vienna to Paris and beyond.
Today croissants are one of the most iconic baked goods in the world and one of the most technically demanding for a home baker to produce well. The reward, a genuinely flaky, layered, deeply buttery croissant still warm from your own oven, is one of the most impressive things home baking can produce.
The Science: Why Homemade Croissants Recipe Are Flaky and What Destroys the Layers
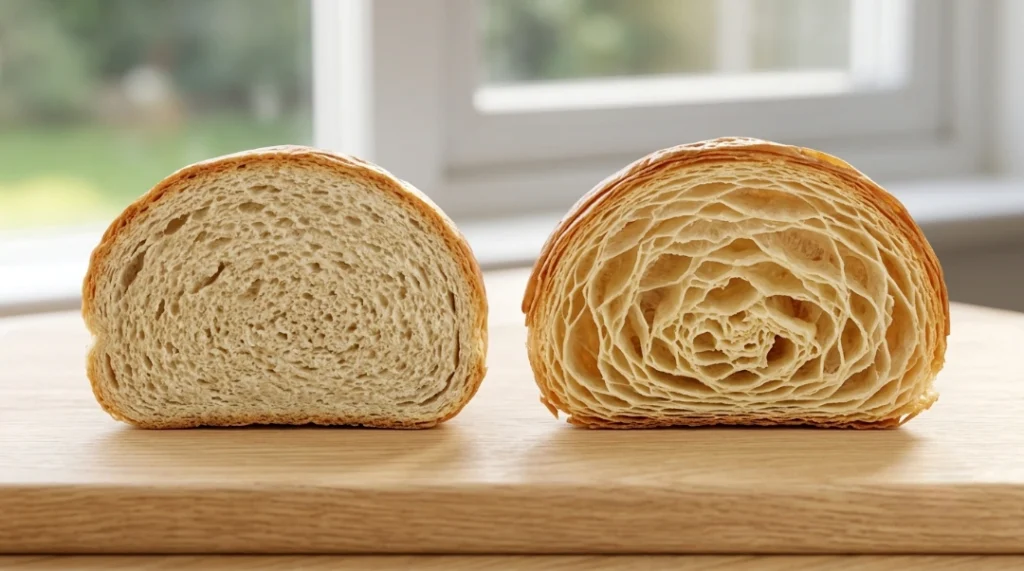
Here is what is happening inside the dough during lamination and baking, explained in plain terms.
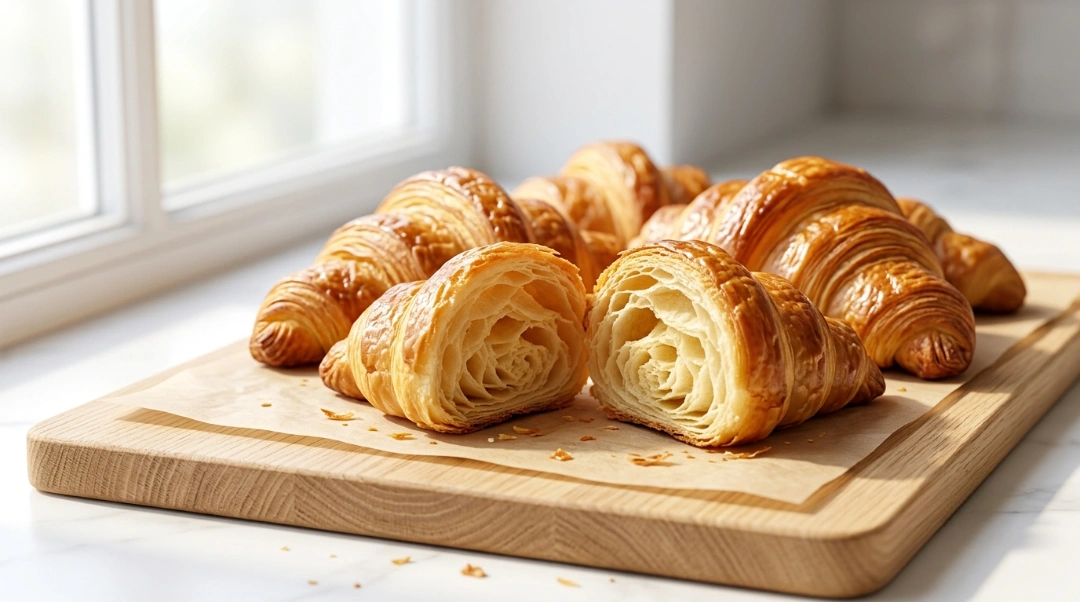
Why lamination creates layers. Lamination is the process of folding cold butter into dough repeatedly to create alternating sheets of butter and dough stacked on top of each other. As the butter’s water turns to steam in the oven, layers separate and create flakiness. A properly laminated croissant has between 27 and 81 distinct layers of dough and butter before baking. In the oven, the water content of each butter layer turns to steam simultaneously, and that steam physically pushes the surrounding dough layers apart. The dough then sets from the heat while the layers are separated, creating the characteristic honeycomb interior that you see when you split a good croissant open.
Why the butter must stay cold and separate throughout. If the butter melts too early because the room was too warm, or the layers are crushed because the rolling pin was used too aggressively, the croissant becomes heavy and brioche-like. When butter softens and begins merging with the dough during lamination, it stops being a distinct layer and becomes an enrichment distributed throughout the dough. The result looks and feels more like a rich bread than a croissant. No distinct butter layers means no steam separation in the oven, which means no flakiness, no honeycomb interior, and no shatter when you bite in.
Why European butter makes a genuinely better croissant. European-style butter has a high fat percentage of 82 to 84 percent, noticeably higher than standard American butter which contains around 80 percent fat and up to 18 percent water. European-style butter typically contains 82 to 84 percent fat and as little as 14 to 16 percent water. In croissant lamination, less water in the butter means less steam at lower temperatures during lamination, so the butter stays in its solid, sheet-like form longer and is easier to work with. The higher fat content also produces a richer, more intensely buttery flavor in the finished croissant. The difference between a croissant made with standard American butter and one made with European-style butter is noticeable in both texture and flavor. For more on lamination technique and its science, King Arthur Baking’s croissant recipe guide covers the key technical points clearly.
Why croissants proof at room temperature, not in a warm oven. Many home bakers try to speed up proofing by placing croissants in a warm oven or near a heat source. With most yeasted breads this works fine. With croissants it destroys the layers. The room temperature during proofing must stay below 77°F (25°C) to keep the butter layers solid. If the butter begins melting during the proof, it merges with the dough and the layering created during lamination is gone before the croissants even reach the oven. Room temperature proofing takes longer, typically 2 to 3 hours, but it is the only way to preserve the layers that all the previous work created.
What the wobble test actually means. When properly proofed croissants are placed on a sheet pan and the pan is gently shaken, the croissants will wobble and jiggle like soft gelatin. This wobble indicates that the internal gluten structure has relaxed fully and the yeast has produced enough gas to expand the dough to its maximum volume before baking. A croissant that does not wobble is underproofed. The internal structure is still tight and will not expand freely in the oven, producing a denser, less airy result. A croissant that wobbles excessively or looks slightly deflated is overproofed, which means the yeast has used up all its available energy and the dough will not rise further in the oven.
What You Need Make Homemade Croissants Recipe
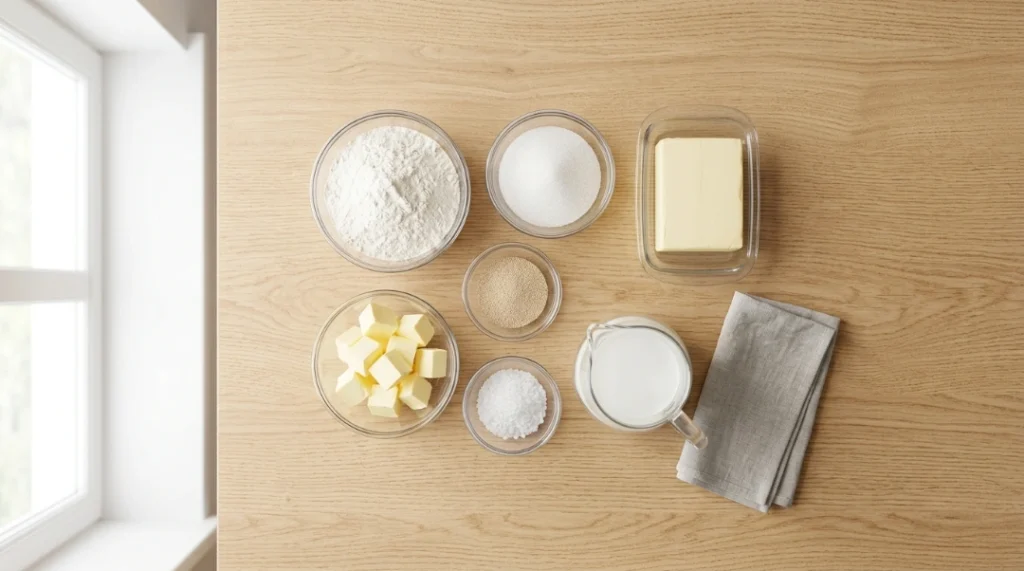
For the Dough (Detrempe)
- 500g (4 cups) bread flour (protein content 11 to 12 percent)
- 10g (2 tsp) fine sea salt
- 60g (5 tbsp) granulated sugar
- 7g (2¼ tsp) instant yeast or active dry yeast
- 300ml (1¼ cups) whole milk, cold
- 30g (2 tbsp) unsalted butter, softened
For the Butter Block (Beurrage)
- 280g (2½ sticks) European-style unsalted butter, cold (Plugra, Kerrygold, or Lurpak)
For the Egg Wash
- 1 large egg
- 1 tbsp whole milk
- Pinch of salt
Equipment: Stand mixer with dough hook, rolling pin, bench scraper, pastry brush, baking sheets, parchment paper, kitchen scale, plastic wrap Makes: 8 to 12 croissants
The 3-Day Timeline
DAY 1 EVENING (30 minutes active):
Make the dough. Refrigerate overnight.
DAY 2 MORNING (2 to 3 hours active with rests):
Make the butter block.
Complete all 3 lamination folds.
Refrigerate overnight.
DAY 3 MORNING (3 to 4 hours):
Shape the croissants.
Proof at room temperature 2 to 3 hours.
Bake.
Eat fresh.
How to Make Homemade Croissants, Step by Step
Day 1 Evening – Make the Dough
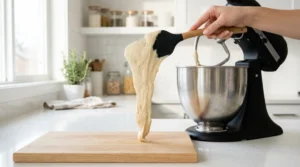
Mix Until Just Smooth: Combine the bread flour, salt, sugar, and yeast in the bowl of a stand mixer fitted with a dough hook. Add the cold milk and mix on low speed for 2 minutes until a shaggy dough forms. Add the softened butter and increase to medium speed. Mix for 5 to 7 minutes until the dough is smooth and pulls cleanly away from the bowl sides. The dough should feel slightly tacky but not sticky and should not be warm from the mixing. Over-mixing generates heat which can begin softening the dough before lamination even starts.
Shape the dough into a flat rectangle about 1 inch thick, wrap tightly in plastic wrap, and refrigerate overnight. The dough needs at least 8 hours of cold rest for the gluten to relax and the flavors to develop.
Day 2 Morning – Make the Butter Block
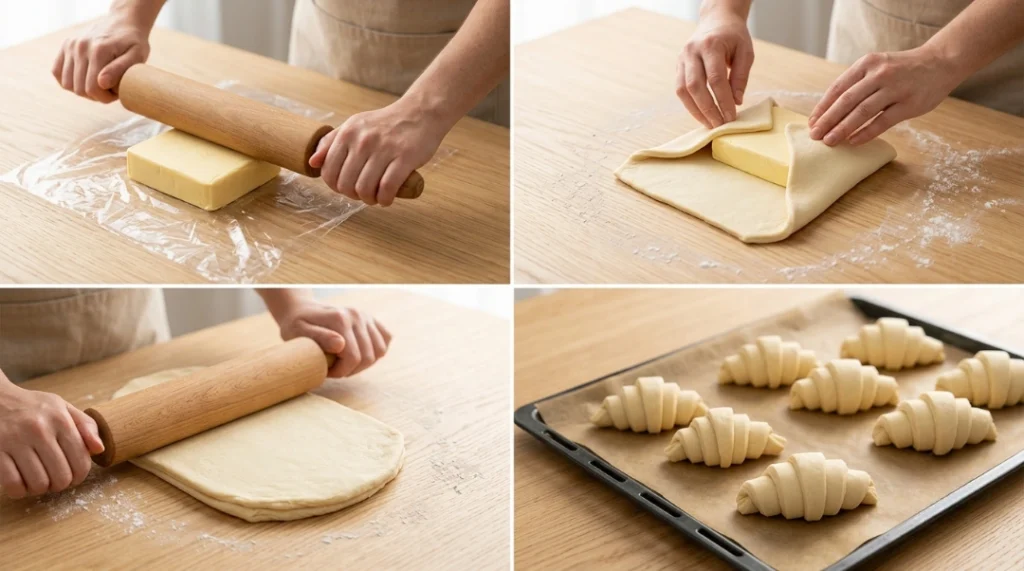
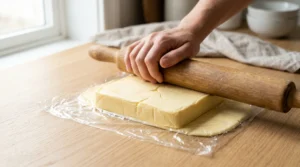
Pound Into a Square: Remove the cold European butter from the fridge. Place it between two sheets of plastic wrap or parchment paper. Using a rolling pin, pound the butter firmly to flatten it, then roll it into a 7-inch by 7-inch square of even thickness throughout. The butter should be cold and firm but pliable, not cracking when you bend it slightly. If it cracks, it is too cold and will break through the dough during lamination. If it feels soft, return it to the fridge for 10 minutes. The ideal butter temperature for lamination is around 60°F (15°C).
Encase the Butter in the Dough
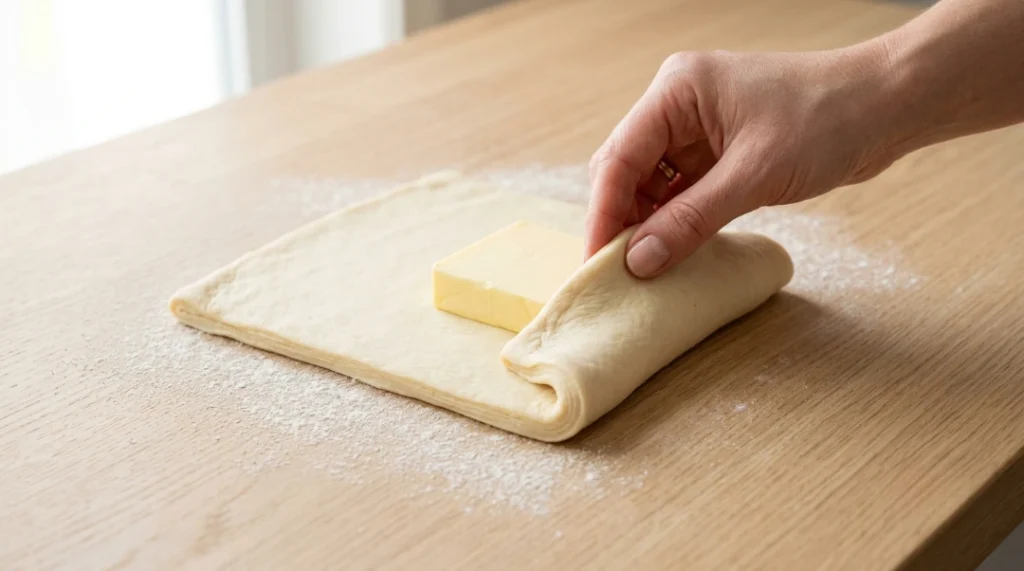
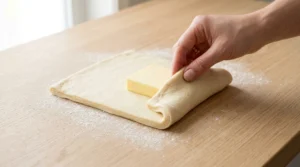
Lock the Butter In: Remove the refrigerated dough and roll it out on a lightly floured surface into a 14-inch by 8-inch rectangle. Place the cold butter square in the center of the dough. Fold the dough edges over the butter like an envelope, sealing all four sides by pressing firmly to eliminate any gaps. Pinch the seams closed so no butter is exposed. Place seam-side down on the floured surface.
Complete Three Letter Folds (With Rests Between)
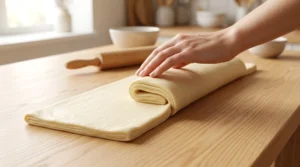
First Fold: Roll the butter-encased dough out into a long rectangle about 24 inches by 8 inches, rolling away from you and back toward you in long, even strokes. Do not press down aggressively since this crushes the layers rather than lengthening them. Fold the dough into thirds like a letter, with the bottom third folded up to the center and the top third folded down over it. This is one fold. Wrap in plastic and refrigerate for 30 minutes. The dough must go back in the fridge after every fold to keep the butter cold and prevent it from merging into the dough.
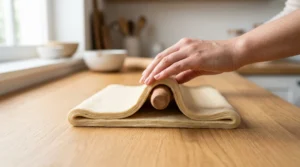
Second Fold: Remove the dough from the fridge and rotate it 90 degrees so the open edge faces you. Roll out into the same long rectangle and fold into thirds again. Wrap and refrigerate for another 30 minutes.
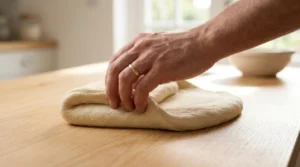
Third Fold: Repeat the rolling and folding one final time. After the third fold, the dough has over 27 layers of alternating butter and dough. Wrap tightly and refrigerate overnight for the second rest.
Day 3 Morning – Shape the Croissants
Roll Thin, Cut Triangles: Remove the laminated dough from the fridge and let it rest at room temperature for 5 minutes until it is just barely pliable but still very cold. Roll out into a large rectangle approximately 20 inches by 10 inches and about 3 millimeters thick. Using a sharp knife or pizza cutter and a ruler, cut the dough into long triangles with a base of about 4 inches and a height of about 8 inches.
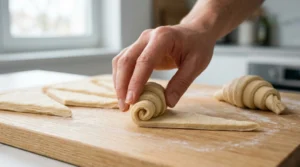
Score and Roll Each Triangle: At the wide base of each triangle, make a small 1-centimeter cut in the center of the base. Gently stretch the triangle slightly from base to tip to lengthen it without tearing. Starting at the base, roll the triangle tightly toward the tip, keeping even tension across the width. The cut at the base prevents the center from puffing up and creates a more even curl as you roll. Tuck the tip underneath the croissant and bend the ends slightly toward each other to form the crescent shape. Place on parchment-lined baking sheets with the tip underneath.
Apply the First Egg Wash
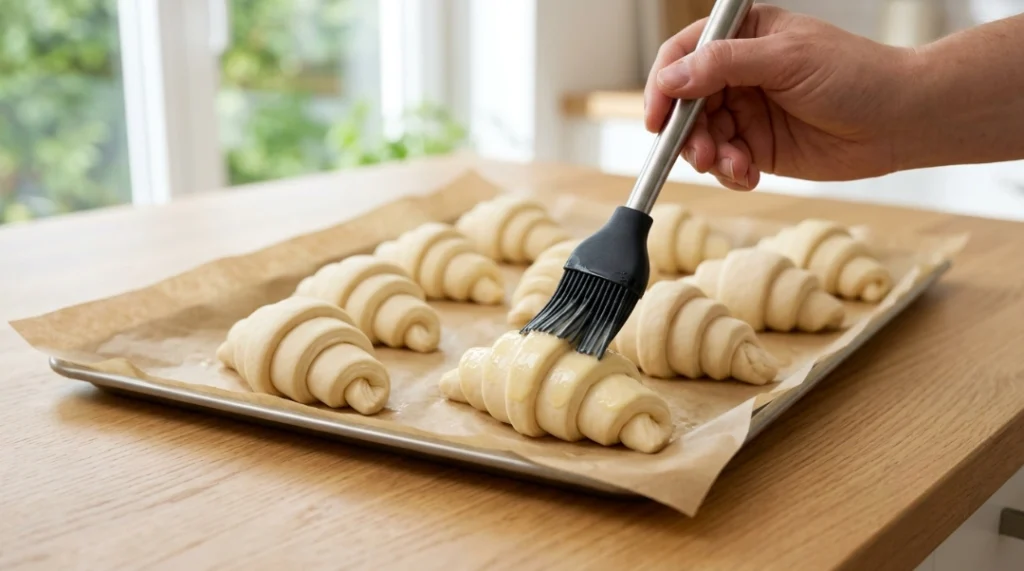
Brush Gently Without Pressing: Whisk together the egg, milk, and pinch of salt until smooth. Using a pastry brush, gently brush the shaped croissants with a light, even coat of egg wash. Avoid getting egg wash on the cut layers at the ends since this seals the layers together and prevents them from fanning out during baking. Refrigerate for 15 minutes to set the egg wash.
Proof at Room Temperature
Watch for the Wobble: Place the baking sheets in a spot in your kitchen that stays below 77°F (25°C). Avoid placing near the oven, a sunny window, or any heat source. Proof for 2 to 3 hours until the croissants look visibly puffed, have increased noticeably in size, and wobble gently when you shake the pan. They should look slightly jiggly, like set gelatin, rather than firm and still.
Apply the Second Egg Wash and Bake
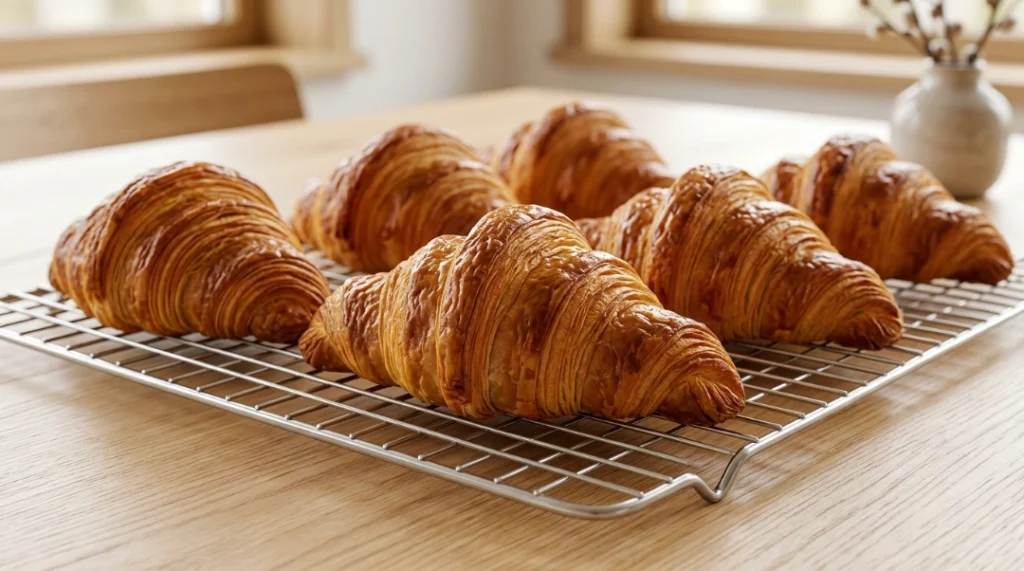
Second Coat for Deep Color: Preheat the oven to 400°F (200°C). Brush the proofed croissants with a second light coat of egg wash. The double application creates the deep, even golden color associated with professional croissants. Bake for 18 to 22 minutes until a rich, deep golden brown all over. The bottoms should be equally golden. Remove from the oven and cool on a wire rack for at least 10 minutes before eating, or eat immediately warm.
J.ZaiB’s Expert Touch Of Homemade Croissants Recipe
Use a kitchen scale for everything. Croissants are one of the recipes where baking by weight rather than volume is not optional but essential. The difference between 480g and 520g of flour is the difference between a pliable, workable dough and a tight, cracking one. If you only own one kitchen scale, use it for this recipe.
If the butter cracks during lamination, stop and warm it slightly. Place your hand flat on the dough for a few seconds, or let it sit at room temperature for 5 minutes. Cracking butter means it is too brittle and cold, and forcing it will create holes in the dough that break the layers. Patience at this moment prevents hours of wasted effort.
Do not skip the overnight rests. Both overnight rests serve real purposes. The first allows the dough’s gluten to relax fully so it does not spring back during lamination and tear. The second allows the layers to rest and firm up after the stress of repeated rolling and folding. Trying to compress the timeline by using shorter rests produces a dough that fights back during shaping and layers that are less distinct.
The ideal proofing environment is 72 to 75°F (22 to 24°C). If your kitchen is warmer, proof for a shorter time and watch closely rather than relying on the time estimate. If your kitchen is cooler, the proof will take longer and the croissants may need closer to 4 hours. The wobble test matters more than the clock.
Quality of butter matters more in this recipe than in almost any other. In a croissant, butter is not just one ingredient among many. It is the structural component that creates every layer and the primary flavor. The same principle behind choosing quality chocolate for our Chocolate Chip Cookies Recipe applies here, but even more strongly. Plugra, Kerrygold, or any European-style butter with 82 percent fat or higher produces a noticeably better result than standard butter.
Variations to Try Of Homemade Croissants Recipe
Almond Croissants
Make a simple almond cream by beating together 50g each of softened butter, sugar, and almond flour with one egg until smooth. Spread the almond cream on the shaped triangles before rolling. Top the shaped croissants with sliced almonds and coarse sugar before baking. The classic French patisserie variation.
Ham and Cheese Croissants
Place a thin slice of good ham and a slice of Gruyere or Emmental cheese on the wide base of each triangle before rolling. The cheese melts inside during baking and the ham provides a salty, savory contrast to the buttery dough.
Chocolate Croissants (Pain au Chocolat)
Instead of cutting triangles, cut the laminated dough into rectangles approximately 4 inches by 5 inches. Place one or two pieces of good dark chocolate at one end of each rectangle. Roll the rectangle from the chocolate end to the other, pressing to seal. Proof and bake the same way as regular croissants. One of the most beloved French pastry variations.
Everything Seasoning Croissants
After the second egg wash, sprinkle each croissant with everything bagel seasoning instead of leaving plain. The sesame, poppy seeds, onion flakes, and garlic create a savory, aromatic crust that bridges the gap between a pastry and a savory roll.
Serving Ideas
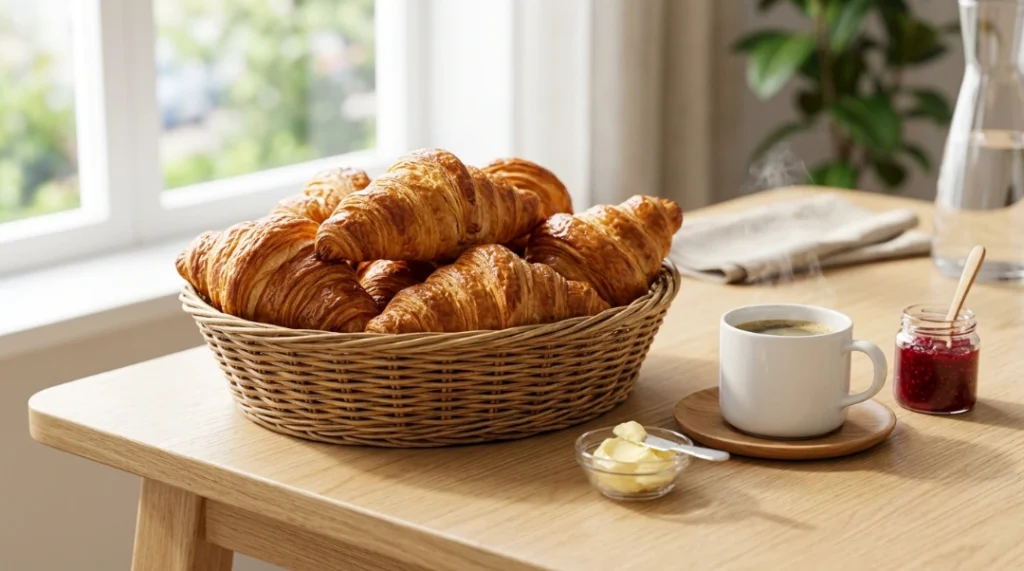
Classic French breakfast: A warm croissant with cold butter and good quality fruit jam, alongside a cup of strong coffee or our Iced Coffee Recipe. This is genuinely one of the best simple breakfasts in the world when the croissants are properly made.
Brunch centerpiece: A basket of mixed croissants, plain and filled, served alongside our Fluffy Pancake Recipe for a weekend brunch spread that covers both European pastry and American comfort food.
Afternoon with lemonade: Serve a plain croissant alongside a glass of our Homemade Lemonade Recipe for a simple afternoon treat. The brightness of the lemonade cuts through the richness of the butter beautifully.
Day-after sandwiches: Croissants that are a day old are perfect for sandwiches. Split and fill with chicken, lettuce, tomato, and a good mayonnaise for one of the best lunch sandwiches possible.
Storage Guide
Room temperature: Freshly baked croissants are at their absolute best within 2 hours of coming out of the oven. They keep at room temperature in an airtight container for up to 2 days, but the texture becomes increasingly soft and the layers lose their definition over time.
Reheating day-old croissants: Sprinkle lightly with water, place on a baking sheet, and heat in a 350°F oven for 5 to 7 minutes. The water turns to steam inside the croissant and refreshes the layers dramatically, producing a result very close to freshly baked.
Freezer, baked: Wrap cooled croissants individually in plastic wrap and freeze for up to 1 month. Thaw at room temperature for 1 hour, then reheat in a 350°F oven for 8 to 10 minutes.
Freezer, unbaked shaped: Place shaped, unproofed croissants on a parchment-lined sheet and freeze until solid. Transfer to a sealed bag. Freeze for up to 1 month. The night before baking, transfer to a parchment-lined sheet and let thaw and proof together in the refrigerator overnight, then at room temperature for 2 to 3 hours until the wobble test passes. Bake as directed.
Troubleshooting Guide
| Problem | Cause | Fix |
|---|---|---|
| No visible layers after baking | Butter melted into dough during lamination | Keep kitchen cooler, refrigerate between every fold |
| Butter leaking out during baking | Dough too thin or butter too soft when encased | Roll dough thicker, use colder butter |
| Dense, bready interior | Under-proofed or butter merged into dough | Proof longer until wobble test passes |
| Croissants did not rise in oven | Over-proofed before baking | Proof at cooler temperature, watch wobble not clock |
| Croissants flat and wide | Butter too warm, spread instead of layered | Work in a cooler environment, chill more often |
| Pale, not golden | Too little egg wash or oven too cool | Double egg wash, check oven temperature with thermometer |
Homemade Croissants Recipe
Ingredients
Equipment
Method
- Mix Until Smooth, Then Chill: Combine flour, salt, sugar, and yeast in the stand mixer bowl. Add cold milk and mix on low for 2 minutes. Add the softened butter and mix on medium for 5 to 7 minutes until the dough is smooth and slightly tacky but not sticky. Do not overmix since this generates heat that warms the dough. Shape into a flat rectangle about 1 inch thick, wrap tightly in plastic wrap, and refrigerate overnight for at least 8 hours.

- Pound Into a Pliable Square: Place the cold European butter between two sheets of plastic wrap. Using a rolling pin, pound it into a 7-inch by 7-inch square of even thickness. The butter should be cold and firm but bend slightly without cracking. If it cracks, it is too cold. Let it sit for 5 minutes and try again. If it is soft and greasy, refrigerate for 10 minutes. The correct butter temperature is around 60°F (15°C).
- Seal All Four Edges: Roll the refrigerated dough into a 14-inch by 8-inch rectangle on a lightly floured surface. Place the butter square in the center. Fold the dough edges over the butter like an envelope, sealing all four sides by pressing firmly. Pinch every seam closed so no butter is exposed.
- First Fold: Roll the dough into a 24-inch by 8-inch rectangle using long, even strokes. Fold into thirds like a letter (bottom up to center, top down over it). Wrap and refrigerate 30 minutes.
- Second Fold: Remove dough, rotate 90 degrees so the open edge faces you. Roll out and fold into thirds again. Wrap and refrigerate 30 minutes.
- Third Fold: Repeat one final time. After the third fold, the dough has over 27 butter layers. Wrap tightly and refrigerate overnight.
- Roll Thin, Cut Triangles, Roll Into Crescents: Remove the laminated dough and let rest at room temperature for 5 minutes until barely pliable. Roll into a rectangle approximately 20 inches by 10 inches and 3 millimeters thick. Cut into triangles with a 4-inch base and 8-inch height. Make a small 1-centimeter cut at the center of each triangle's base. Gently stretch each triangle slightly. Roll from the base toward the tip with firm, even tension. Tuck the tip underneath and bend the ends to form the crescent shape. Place on parchment-lined baking sheets with the tip underneath.
- Brush Lightly, Avoid the Cut Edges: Whisk the egg, milk, and salt together. Brush each shaped croissant with a light coat, avoiding the exposed cut layers at the ends. Refrigerate for 15 minutes to set.
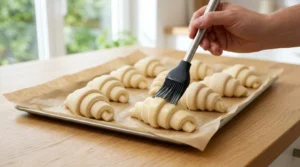
- Room Temperature Only, Watch for the Wobble: Proof in a spot below 77°F (25°C) for 2 to 3 hours. The croissants are ready when they look visibly puffed and wobble gently like soft gelatin when you shake the pan. Never proof in a warm oven since the butter layers will melt.
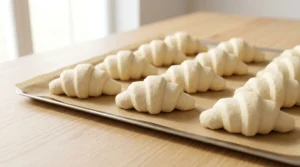
- Second Coat, Then Hot Oven: Preheat oven to 400°F (200°C). Brush with a second light coat of egg wash. Bake for 18 to 22 minutes until deep golden brown all over including the bottoms. Cool on a wire rack for 10 minutes before eating.

Notes
- Kitchen scale is essential. Croissants require precise measurements. Do not use volume measures for this recipe.
- European butter only. Minimum 82 percent fat content. Plugra, Kerrygold, or Lurpak are widely available. Higher fat, lower water content keeps layers distinct during lamination and produces a richer flavor.
- Cold is everything. Refrigerate the dough between every fold. If at any point the butter feels soft or the kitchen is warm, stop and refrigerate before continuing.
- 3-day timeline is recommended. Day 1 evening: dough. Day 2: lamination. Day 3 morning: shape, proof, bake. This produces the best flavor and layer development.
- The wobble test. Properly proofed croissants wobble like gelatin when the pan is gently shaken. Too firm means under-proofed. Collapsed or over-expanded means over-proofed.
- Double egg wash. Applying egg wash twice, once before the refrigerator rest and once before baking, creates the deep, even golden color of professional croissants.
- Troubleshooting: Dense interior means butter merged into dough. Butter leaking means too soft when encased. No rise means over-proofed or under-proofed.
- Freezing unbaked: Shape, freeze on a tray until solid, bag and freeze up to 1 month. Night before baking: thaw in fridge, then room temperature proof until wobble test passes.
- Reheating day-old croissants: Sprinkle lightly with water and heat in a 350°F oven for 5 to 7 minutes. Refreshes the layers dramatically.
- UK/Australia notes: “Bread flour” equals strong flour. “European-style butter” is sold as cultured butter or high-fat butter. “All-purpose flour” equals plain flour (but bread flour preferred here).
- Nutrition values are estimates and vary based on exact butter quantity and croissant size.
NUTRITION
Per 1 croissant, based on 10 croissants
| Nutrient | Amount |
|---|---|
| Calories | ~350 kcal |
| Total Fat | 22g |
| Saturated Fat | 14g |
| Cholesterol | 85mg |
| Sodium | 280mg |
| Total Carbs | 32g |
| Sugars | 6g |
| Fiber | 1g |
| Protein | 6g |
Note: Values are estimates and vary based on croissant size and exact butter quantity used.
Frequently Asked Questions
Why are my homemade croissants dense and bready instead of flaky?
The most common cause is butter that warmed up and merged into the dough during lamination rather than staying in distinct layers. This happens when the kitchen is warm, when you skip the refrigerator rests between folds, or when you handle the dough too much with warm hands. The fix is to refrigerate the dough for at least 30 minutes between every fold and to work quickly in a cool environment.
Can I make croissants without a stand mixer?
Yes. Mix the dough by hand in a large bowl until it comes together, then knead by hand for 8 to 10 minutes until smooth and slightly tacky. The result is identical to using a stand mixer, just more effort. Make sure your hands are cool and do not over-knead since warm hands transfer heat to the dough.
What is the best butter for croissants?
European-style unsalted butter with at least 82 percent fat content. Plugra, Kerrygold, Lurpak, and President are widely available options in the United States. The higher fat, lower water content keeps the butter solid longer during lamination and produces a richer, more intensely flavored croissant.
How do I know when croissants are properly proofed?
The wobble test. Place the shaped croissants on a sheet pan and shake the pan gently. Properly proofed croissants will wobble and jiggle noticeably, like soft gelatin set in a bowl. If they feel firm and do not move, they need more time. If they look visibly deflated or collapsed, they are overproofed.
Can I do the lamination all in one day?
You can condense the process, but the overnight dough rest is strongly recommended for flavor development and gluten relaxation. The minimum workable timeline is 6 hours of total active and rest time on a single day, but the 3-day process produces significantly better results in both flavor and texture.
Why did my butter break through the dough during lamination?
Either the butter was too cold and brittle, or the dough was rolled too aggressively in one direction without rotating. Let the butter warm by 5 degrees before starting, and use long, even strokes from the center outward rather than pressing hard from one end.
The Pastry Worth Every Minute
A great Homemade Croissants Recipe is not difficult. It is patient. It asks you to understand that the layers are more fragile than they look, that cold is your most important tool, and that the three-day process is not excessive but necessary.
Every fold adds more layers. Every refrigerator rest preserves them. The wobble in the pan before baking tells you the yeast has done its job. The steam in the oven does the final work that all the lamination prepared for.
When you pull them out and the kitchen fills with that unmistakable smell, and you break one open to see the honeycomb layers stretching apart like a small miracle of butter and flour and time, you will understand exactly why this is one of the most satisfying things home baking can produce.
Tag us on Instagram @viralfoodhacks706 when yours come out of the oven. The cross-section shot of the layers is always the most stunning! Save this to Pinterest so you always have the full timeline ready for the next weekend you want to attempt something genuinely impressive.