

I was thirteen years old, unsupervised in the kitchen, and absolutely certain that more flour meant a better, thicker cookie. I added an extra half cup. I also used cold butter straight from the fridge because melting it seemed like an unnecessary step.
The cookies baked into dense, pale, cakey discs that bounced when they hit the counter. My sister refused to eat them. My dad said they were “interesting.”
Years later I understand what went wrong. Cold butter does not cream properly with sugar, so no air gets incorporated and the cookie cannot spread correctly. Extra flour means more gluten, which makes the texture tough and cakey rather than chewy. Two small misunderstandings, one thoroughly inedible batch.
This Chocolate Chip Cookies Recipe is built around understanding why each ingredient does what it does, so every decision makes sense rather than just following steps blindly. Brown butter for deeper flavor. Dark brown sugar for chewiness that lasts for days. Chilling the dough for a richer taste and better texture. And the single most important rule in cookie baking: pull them out before they look done.
Why This Is the Best Chocolate Chip Cookies Recipe
Brown butter takes 4 extra minutes and produces a noticeably richer, nuttier flavor that makes people ask what is different about these cookies. Most recipes skip it. This one makes it the foundation of everything.
Dark brown sugar is doing more than sweetening. The molasses in dark brown sugar is hygroscopic, meaning it attracts and holds moisture even after baking. This is the specific reason these cookies stay soft and chewy for days rather than hardening overnight like cookies made with mostly white sugar.
Chilling the dough is not optional. Even 30 minutes of refrigerator time changes the texture and flavor in measurable ways. One hour is better. Overnight is genuinely the best version of this cookie.
Pulling them out early is intentional, not a mistake. Cookies continue cooking on the hot pan after they come out of the oven. A cookie that looks slightly underdone at the oven door will be perfectly set by the time it finishes cooling on the pan. Pull them too late and the center is dry.
A Quick History, Where Chocolate Chip Cookies Come From
The chocolate chip cookie was invented in 1938 by Ruth Wakefield at the Toll House Inn in Whitman, Massachusetts. Ruth ran the inn and was known for serving high-quality, homemade food to her guests. According to Britannica’s entry on the chocolate chip cookie, Wakefield added pieces of a Nestle semi-sweet chocolate bar to her butter cookie dough expecting them to melt fully into the dough, but instead the chocolate held its shape in soft, melted pockets throughout the baked cookie.
The recipe became so popular that Nestle struck a deal with Wakefield to print it on their packaging in exchange for a lifetime supply of chocolate. It remains one of the most made recipes in American baking history, with hundreds of millions of batches produced every year in home kitchens across the country. The recipe has barely changed in nearly 90 years because it was essentially already correct.
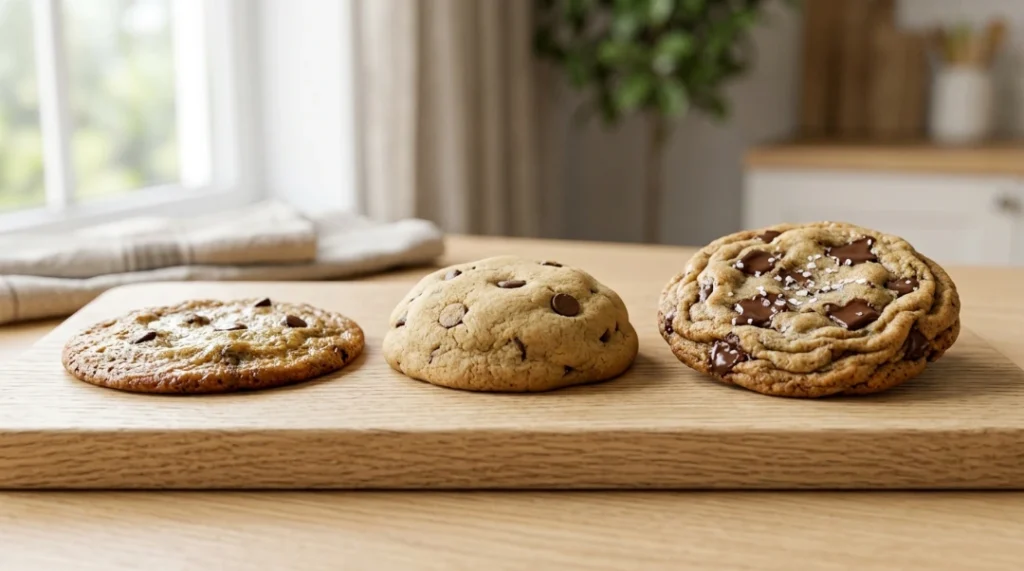
Why Chocolate Chip Cookies Turn Out Flat, Cakey, or Hard
Here is what every ingredient is actually doing, explained simply so you can understand the recipe rather than just follow it.
Why brown sugar makes cookies chewier than white sugar. White sugar is pure sucrose. Dark brown sugar is sucrose with molasses added back in during processing. Molasses is hygroscopic, which means it pulls moisture from the air around it and holds onto that moisture even after baking. A cookie made with mostly dark brown sugar stays noticeably softer and chewier for several days after baking compared to an identical cookie made with white sugar, which dries out and hardens much faster. This is also the same principle behind why our Carrot Cake Recipe uses a high ratio of brown sugar for a cake that stays moist for days.
Why browned butter makes everything taste better. Plain melted butter has a mild, neutral dairy flavor. When you cook butter past its melting point until the milk solids turn golden, hundreds of new flavor compounds form through the Maillard reaction. The result is a rich, nutty, almost toffee-like depth that plain butter cannot replicate. It takes 4 extra minutes and produces a genuinely noticeable improvement in flavor. For the full technique with step-by-step guidance, King Arthur Baking’s brown butter guide is excellent.
Why chilling the dough produces a better cookie. When cookie dough rests in the refrigerator, two important things happen. The flour slowly absorbs all the available moisture in the dough, which means less free liquid spreads during baking and the cookie holds its shape better. The flavors also deepen and develop as the sugars and proteins interact over time, producing a noticeably more complex, butterscotch-forward flavor in the finished cookie. A dough chilled for one hour is noticeably better than one baked immediately. A dough chilled overnight is better still.
Why pulling cookies out early is the right move. Cookies do not stop cooking the moment they leave the oven. The hot pan and the residual heat inside the cookies continue cooking them for several minutes after they come out, which bakers call carryover cooking. A cookie that looks perfectly done in the oven will be overbaked and dry once it finishes cooling on the pan. The correct target is a cookie that looks slightly underdone at the edges and still soft and glossy in the center when it comes out. It will firm up to exactly the right chewy, set texture as it cools.
Why chopped chocolate beats chocolate chips. Chocolate chips are formulated to hold their shape during baking. They contain stabilizers that prevent them from melting fully, which is why you often see intact chip shapes even in a fully baked cookie. Chopped chocolate or chocolate chunks from a bar do not have those stabilizers, so they melt into puddles and ribbons throughout the cookie, creating layers of melted chocolate in every bite. The difference in texture is immediately noticeable and worth the extra 2 minutes of chopping.
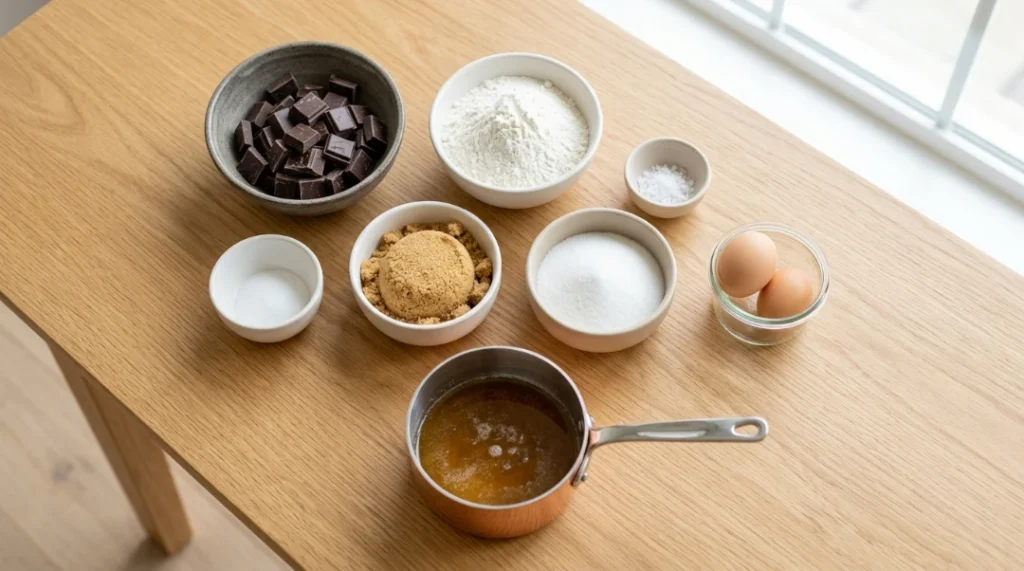
What You Need
For the Chocolate Chip Cookies
- 1 cup (225g) unsalted butter (for browning)
- 1 cup (220g) dark brown sugar, packed (dark, not light)
- ½ cup (100g) granulated white sugar
- 2 large eggs, room temperature
- 1 egg yolk, room temperature (extra richness and chew)
- 2 tsp pure vanilla extract
- 2¼ cups (285g) all-purpose flour (spooned and leveled, not packed)
- 1 tsp baking soda
- 1 tsp fine sea salt
- 1½ cups (255g) chopped dark or semisweet chocolate (or chocolate chips)
- Flaky sea salt for topping (Maldon or similar)
Equipment: Medium saucepan for browning butter, stand mixer or hand mixer, large mixing bowl, baking sheets, parchment paper, cookie scoop, wire cooling rack
Makes: 24 cookies
How to Make the Best Chocolate Chip Cookies Recipe
Brown the Butter
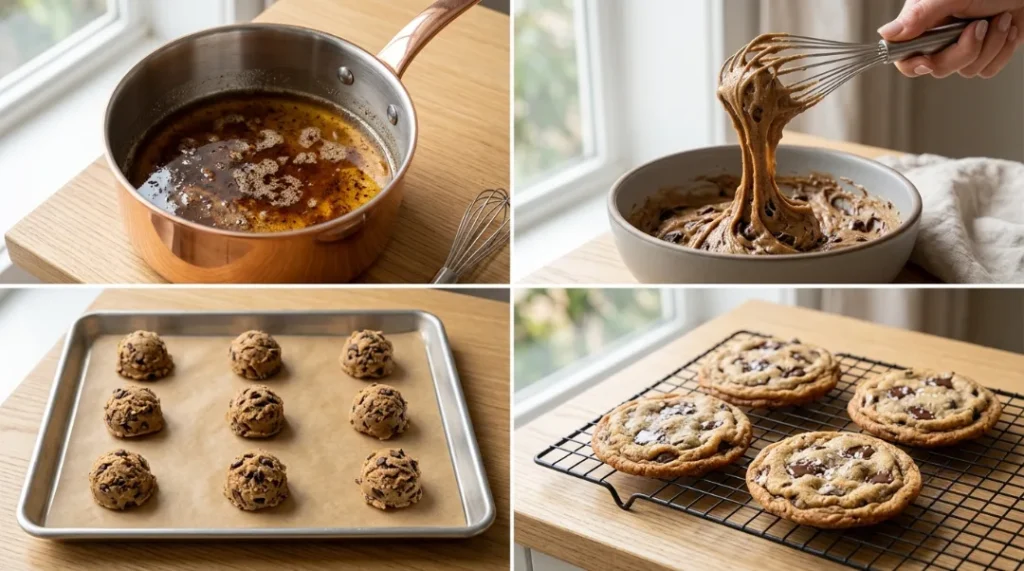
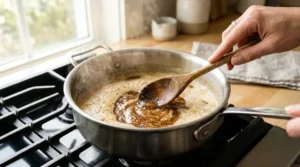
Cook Past the Melting Point: Place the butter in a medium saucepan over medium heat. Stir occasionally as it melts, then continuously once it is fully melted. The butter will foam, the foam will subside, and then you will see golden-brown specks forming on the bottom of the pan. The moment it smells nutty and looks golden, remove it immediately from the heat and pour it into a large mixing bowl or the bowl of your stand mixer. Do not wait even one extra minute once it looks done, since the milk solids on the pan bottom continue browning from the residual heat and can go from golden to burnt very quickly. Let the browned butter cool for 15 minutes before using.
Mix the Sugars and Eggs
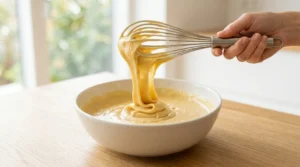
Beat Until Light and Slightly Pale: Add both sugars to the cooled browned butter and beat with a stand mixer or hand mixer on medium speed for 2 full minutes until the mixture looks lighter in color and slightly fluffy. Add the eggs, egg yolk, and vanilla extract. Beat on medium speed for another 2 minutes until the mixture looks smooth and ribbony when the beater is lifted. This beating step incorporates air and helps the cookies develop their texture, so do not rush it.
Add Dry Ingredients
Fold, Do Not Beat: In a separate bowl, whisk together the flour, baking soda, and fine sea salt until evenly combined. Add the flour mixture to the wet ingredients and mix on low speed, or fold by hand with a spatula, just until no dry flour streaks remain. Stop mixing the moment the flour is incorporated. Overmixing develops gluten and produces a tough, chewy-in-the-wrong-way cookie rather than a tender, chewy-in-the-right-way one.
Add the Chocolate
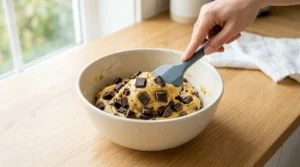
Fold In Gently: Add the chopped chocolate to the dough and fold it in by hand with a spatula using 8 to 10 gentle strokes until evenly distributed.
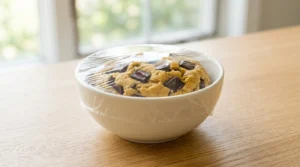
Chill the Dough
Refrigerate for at Least 1 Hour: Cover the bowl tightly with plastic wrap and refrigerate for a minimum of 1 hour, or up to 72 hours. The longer the dough chills, the deeper and more complex the flavor becomes. If you are short on time, even 30 minutes makes a noticeable difference over baking straight away.
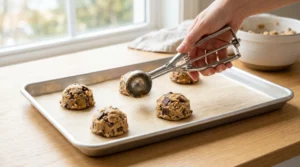
Scoop and Bake
Preheat and Scoop: Preheat oven to 375°F (190°C). Line baking sheets with parchment paper. Scoop the chilled dough into balls of about 2 tablespoons each, using a cookie scoop for even sizing. Place them at least 2 inches apart on the prepared baking sheet.
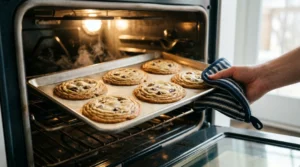
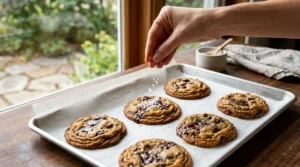
Bake Until Just Set at the Edges: Bake for 10 to 12 minutes until the edges look set and golden but the centers still look slightly underdone and glossy. This is the correct point to pull them. They will continue cooking on the hot pan and look perfectly done once cooled.
Finish and Cool
Add Sea Salt Immediately: As soon as the cookies come out of the oven, sprinkle flaky sea salt over each one while they are still hot. The salt adheres to the surface and slightly melts into the warm chocolate, which is why it goes on after baking rather than before. Letting it bake in the oven simply dissolves it into the dough where it cannot do its job of adding that final pop of contrast.
Let the cookies cool on the baking sheet for 5 full minutes before transferring to a wire rack. They are too soft to move immediately and will fall apart if transferred too soon.
Serve
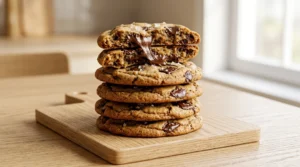
Eat Warm or at Room Temperature: Chocolate chip cookies are at their absolute best within 30 minutes of coming out of the oven, when the chocolate is still slightly melted and the center is perfectly soft. At room temperature they are still excellent for up to 4 days when stored correctly.
Cookie Texture Guide – Customize Your Cookie
| If You Want | Change This |
|---|---|
| Chewier | More dark brown sugar, less white sugar |
| Crispier edges | Use melted butter instead of browned, bake 1-2 min longer |
| Thicker, puffier | Add 2 tbsp extra flour, chill dough overnight |
| Thinner, crispier | Use all white sugar, bake on a warm sheet |
| More flavor depth | Chill dough 24 to 72 hours |
| Gooier center | Underbake by 1-2 minutes, use extra egg yolk |
J.ZaiB’s Expert Touch
Use dark brown sugar, not light. Dark brown sugar contains twice as much molasses as light brown sugar, which means twice the moisture-holding power and a noticeably deeper, more caramelized flavor in the finished cookie. If a recipe simply says “brown sugar,” always choose dark when you want a chewier, more flavorful cookie.
Weigh your flour, do not scoop directly from the bag. Scooping a measuring cup directly into the flour compacts it and can add up to 20 percent more flour than the recipe calls for, producing a dry, tough cookie. Spoon the flour into the measuring cup and level off, or better yet, use a kitchen scale. 285g of flour measures the same way every single time.
Bang the pan on the oven rack halfway through baking. At about the 7-minute mark, lift the pan a few inches and let it drop back onto the oven rack with a firm thud. This deflates any puffed-up air in the centers and creates the rippled, crinkled surface associated with bakery-style cookies. It also encourages the edges to spread and set while the center stays soft.
Two pans, one in the oven at a time. Baking two pans simultaneously on different racks produces uneven cookies because one pan will always be closer to the heating element. Bake one sheet at a time in the center of the oven for the most even color and texture.
Do not skip the flaky salt. A pinch of Maldon or other flaky sea salt on top of a warm, freshly baked chocolate chip cookie is one of the most impactful finishing touches in baking. It creates a contrast between salty and sweet that makes people reach for a second cookie before the first one is even finished.
Variations to Try
Brown Butter Chocolate Chip Cookies: This is already the base recipe. For an even more pronounced brown butter flavor, double the browning time and use only dark chocolate chunks. The nutty, caramel notes become the dominant flavor rather than a background note.
Sea Salt Caramel Chocolate Chip Cookies: Drizzle a small amount of store-bought or homemade salted caramel sauce over the warm cookies right after they come out of the oven, before the flaky salt. The caramel hardens slightly as it cools and adds a chewy, sticky layer on top.
Double Chocolate Chip Cookies: Replace 3 tablespoons of the all-purpose flour with 3 tablespoons of unsweetened cocoa powder. The cookies turn a rich dark brown and taste intensely chocolatey, similar in approach to our Chocolate Fudge Cake Recipe, which also uses cocoa as the base flavor.
Chocolate Chip Cookie Bars: Press the chilled dough into a parchment-lined 9×13-inch pan in an even layer about ½ inch thick. Bake at 350°F for 22 to 25 minutes until the edges are set and the center looks just barely done. Cool completely before cutting into squares. Easier to make for large groups than individual cookies.
Gluten-Free Chocolate Chip Cookies: Substitute the all-purpose flour 1:1 with a quality gluten-free baking blend such as Bob’s Red Mill 1:1. Add ¼ teaspoon of xanthan gum if your blend does not already contain it. Chill the dough for at least 2 hours since gluten-free doughs spread more without chilling.
Birthday Funfetti Chocolate Chip Cookies: Fold in ¼ cup of rainbow jimmies alongside the chocolate chunks at the end. The same wax-coated jimmies principle from our Funfetti Cake Recipe applies here, since jimmies hold their color without bleeding into the dough.
Serving Ideas
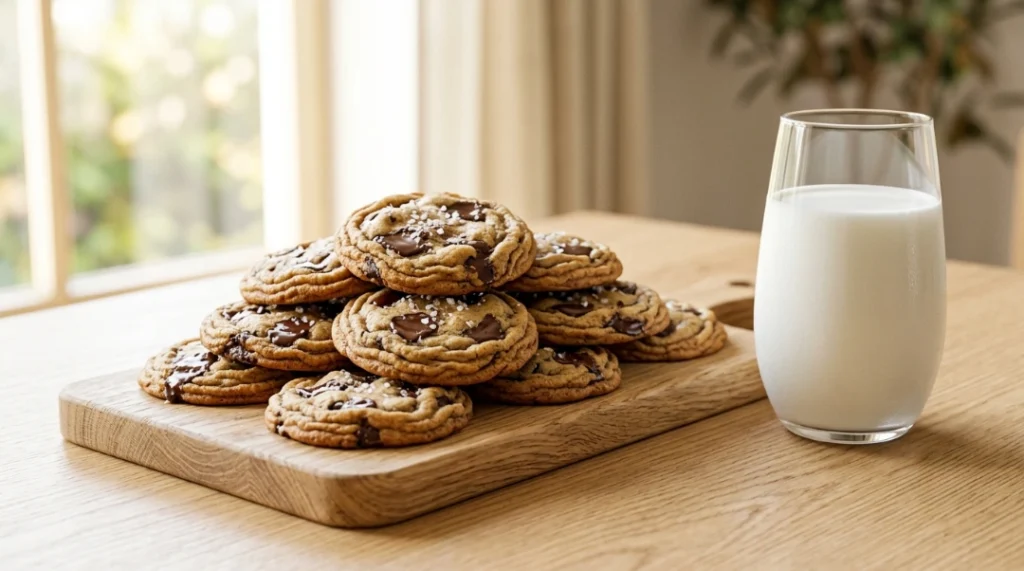
Classic warm from the oven: Three warm cookies, a cold glass of whole milk, and nothing else needed. This is the entire point of this recipe.
Ice cream sandwich: Place a generous scoop of vanilla ice cream between two fully cooled cookies and press gently. Wrap in plastic wrap and freeze for 30 minutes for a cleaner cut. The brown butter flavor in the cookie pairs extraordinarily well with good vanilla ice cream.
Dessert table: Serve alongside our New York Cheesecake for a dessert spread that covers both a composed, elegant dessert and a casual, crowd-pleasing one. Both get eaten first at every gathering.
Gifting: Stack 6 cookies in a cellophane bag, twist the top, and tie with ribbon. Freshly baked chocolate chip cookies in any form are one of the most universally well-received food gifts possible. The flaky sea salt on top signals quality immediately.
Storage Guide
Room temperature: Store in an airtight container with a slice of plain white bread inside the container. The bread releases moisture that keeps the cookies soft and chewy for up to 4 days. Replace the bread slice after 2 days.
Refrigerator: Not recommended. Refrigerator air dries cookies out faster than room temperature storage.
Freezer, baked: Stack cooled cookies between parchment paper layers in a sealed freezer bag. Freeze for up to 3 months. Thaw at room temperature for 30 minutes or warm in a 300°F oven for 5 minutes.
Freezer, raw dough balls: Scoop the dough into balls and freeze on a parchment-lined tray until solid, then transfer to a sealed bag. Freeze for up to 3 months. Bake from frozen, adding 2 to 3 extra minutes to the baking time.
Unbaked dough: Refrigerate for up to 72 hours. The flavor improves with every hour it chills.

Best Chocolate Chip Cookies Recipe
Ingredients
Equipment
Method
- Cook Until Nutty and Golden: Place the butter in a medium saucepan over medium heat and stir as it melts. Once fully melted, continue stirring constantly as it foams and then the foam settles. Golden-brown specks will appear on the bottom of the pan and the butter will smell nutty and rich. The moment this happens, remove from heat immediately and pour into your mixing bowl. Let it cool for 15 minutes before continuing. Do not leave it on the heat even a minute longer once the specks appear, since the residual pan heat continues browning the milk solids.

- Mix Until Light: Add both sugars to the cooled browned butter and beat on medium speed for 2 full minutes until slightly lighter in color. Add the eggs, egg yolk, and vanilla extract and beat for another 2 minutes until the mixture looks smooth and ribbony when you lift the beater. This beating step is important and should not be rushed.
- Fold Gently, Stop Early: Whisk together the flour, baking soda, and fine sea salt in a separate bowl until evenly combined. Add the flour mixture to the wet ingredients and mix on low speed just until no dry flour streaks remain. Stop mixing immediately at that point. Overmixing the flour develops gluten and makes the cookies tough rather than tender.
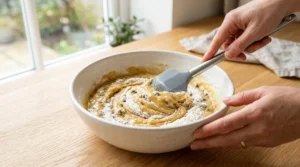
- Fold By Hand: Add the chopped chocolate to the dough and fold in gently with a spatula using 8 to 10 slow, sweeping strokes until evenly distributed through the dough.
- Refrigerate for 1 Hour Minimum: Cover the bowl tightly with plastic wrap and refrigerate for at least 1 hour, or up to 72 hours. The dough becomes firmer as it chills, the flour absorbs all available moisture, and the flavors deepen significantly. The longer it chills within that 72-hour window, the better the cookies taste.
- Preheat, Scoop, and Space Evenly: Preheat the oven to 375°F (190°C). Line baking sheets with parchment paper. Scoop the chilled dough into balls of about 2 tablespoons each and place them at least 2 inches apart on the prepared sheet. Bake one sheet at a time in the center of the oven for the most even results.
- Bake Until Edges Set But Centers Look Underdone: Bake for 10 to 12 minutes until the edges look set and golden but the centers still appear slightly glossy and underdone. This is the correct point to pull them. At the 7-minute mark, lift the pan a few inches and drop it back firmly onto the oven rack to create the rippled, bakery-style surface on the cookies.
- Salt While Hot, Then Rest on the Pan: As soon as the cookies come out of the oven, immediately sprinkle flaky sea salt over each one while they are still hot. Let the cookies rest on the hot baking sheet for 5 full minutes before transferring to a wire cooling rack. Moving them too soon causes them to fall apart since they are still too soft immediately after baking.
- Best Warm, Still Good for Days: Cookies are at their absolute best within 30 minutes of coming out of the oven when the chocolate is still slightly melted and the center is soft. Stored correctly in an airtight container with a slice of bread, they stay soft and chewy for up to 4 days at room temperature.
Notes
- Weigh the flour. Scooping directly from the bag compacts the flour and can add up to 20 percent extra, producing dry, tough cookies. Use a kitchen scale for 285g, or spoon into the measuring cup and level off.
- Dark brown sugar, not light. Dark brown sugar has twice the molasses of light brown sugar, which is what creates and maintains the chewy texture for days.
- Chill time improves everything. Minimum 1 hour, up to 72 hours. Even 30 minutes is better than baking immediately.
- Pull them out early. Cookies look underdone at the oven door but continue cooking on the hot pan for 5 minutes. This carryover cooking is what produces the perfectly chewy center.
- Chopped chocolate vs chips. Chopped chocolate melts into puddles. Chips hold their shape. Both work, but chopped chocolate produces a noticeably better final texture.
- Flaky salt goes on after, not before. Adding it before baking dissolves the salt into the dough where it cannot create the sweet-salty contrast on top.
- Store with bread. An airtight container with a slice of plain white bread keeps cookies soft for up to 4 days. The bread gives up its moisture to the cookies.
- Freezing raw dough. Scoop into balls, freeze until solid on a tray, then bag. Bake from frozen with 2 to 3 extra minutes added.
- UK/Australia notes: “All-purpose flour” equals plain flour. “Baking soda” equals bicarbonate of soda. “Dark brown sugar” is available under the same name. “Flaky sea salt” is available as Maldon or similar brands.
- Nutrition values are estimates and vary based on chocolate type and exact cookie size.
Per 1 cookie, based on 24 cookies
| Nutrient | Amount |
|---|---|
| Calories | ~210 kcal |
| Total Fat | 11g |
| Saturated Fat | 7g |
| Cholesterol | 45mg |
| Sodium | 130mg |
| Total Carbs | 27g |
| Sugars | 17g |
| Fiber | 1g |
| Protein | 2g |
NUTRITION
Note: Values are estimates and vary based on chocolate percentage, exact sugar quantities, and cookie size.
Frequently Asked Questions
Why did my chocolate chip cookies come out flat?
Almost always one of three causes. The butter was too warm or fully melted before beating, which prevents proper air incorporation and causes too much spread. The dough was not chilled before baking, so the butter melted and spread before the structure set. Or the baking sheet was warm from a previous batch, which causes premature spreading. Always chill the dough, use a cool pan for each batch, and check that the butter was creamed at the right temperature.
Why are my chocolate chip cookies cakey instead of chewy?
Too much flour or too many eggs. Flour and eggs both add structure, and too much of either pushes the texture toward cakey rather than chewy. Weigh the flour rather than scooping from the bag, use the extra egg yolk instead of a whole extra egg, and increase the ratio of brown sugar to white sugar.
How long should I chill the chocolate chip cookie dough?
A minimum of 1 hour makes a noticeable difference. 24 hours is significantly better for both texture and flavor. Up to 72 hours is the practical maximum before the dough starts to develop off-flavors from the baking soda. If you only have 30 minutes, use it. Even a short chill is better than none.
Can I use melted butter instead of browned butter?
Yes, but the cookies will taste noticeably different. Melted butter produces a chewier, denser cookie with a more spread-out shape. Browned butter adds a depth of flavor that plain melted butter cannot replicate. If you skip browning, at least melt the butter and let it cool to room temperature before mixing, rather than using it hot.
Why do my cookies harden after one day?
They were overbaked. A cookie that looks done at the oven door is already overbaked. Cookies should come out looking slightly underdone in the center and firm up to the correct texture as they cool. Also ensure you are storing them with a slice of bread in the container, which helps maintain softness.
Can I freeze chocolate chip cookie dough?
Yes. Scoop the dough into balls and freeze on a parchment-lined tray until solid, then transfer to a sealed bag. They keep for up to 3 months. Bake from frozen with 2 to 3 extra minutes added to the baking time.
Does the type of chocolate really matter?
Yes, noticeably. Chopped chocolate from a bar melts into puddles throughout the cookie. Chocolate chips hold their shape due to stabilizers. Both taste good, but the texture difference is real. For the best result, use chopped dark chocolate between 60 and 70 percent cacao. The slight bitterness balances the sweet cookie dough perfectly.
The Cookie That Has Been Made a Billion Times for a Reason
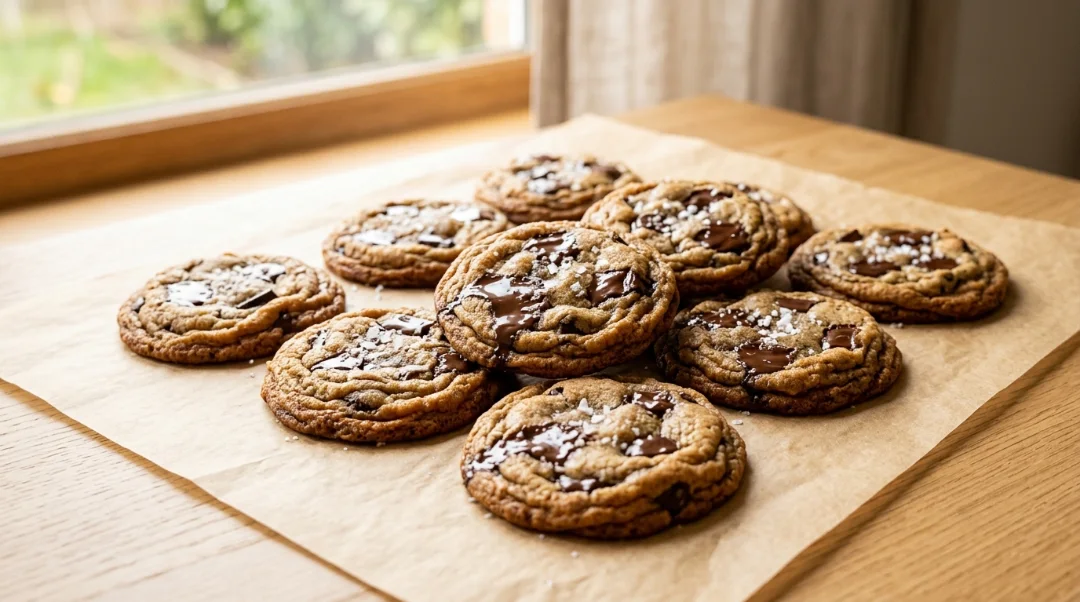
A perfect Chocolate Chip Cookies Recipe has been America’s most baked recipe for nearly 90 years because it gets a fundamental combination exactly right. Buttery, slightly salty dough. Melted pockets of bitter chocolate. A crispy edge that gives way to a soft, chewy center. Nothing complicated. Nothing that needs explaining to anyone who has ever tasted one.
What makes this version different is understanding why every step exists, so you can repeat it reliably and adjust it confidently. Brown the butter. Use dark brown sugar. Chill the dough. Pull them out early. Add the salt after.
Do those five things and this batch will be better than the hockey puck disaster I made at thirteen, better than the version from the yellow bag, and honestly better than most bakeries in a ten-mile radius.
Tag us on Instagram @viralfoodhacks706 when yours come out of the oven. The melted chocolate puddle shot while they’re still warm is always the one that gets saved! Save this to Pinterest so the recipe is always ready for the next cookie craving.