Ingredients
Equipment
Method
Prep
- Preheat oven to 350°F (175°C). Grease two 9-inch round cake pans, line the bottoms with parchment paper circles, then grease the parchment. Set aside. Take butter, eggs, and buttermilk out of the fridge at least 45 minutes before starting — room temperature ingredients are essential.

Make the Cake Batter
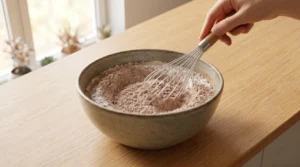
- In a medium bowl, whisk together the flour, natural cocoa powder, baking soda, baking powder, and salt until fully combined. Sift the cocoa if it has any clumps. Set aside.
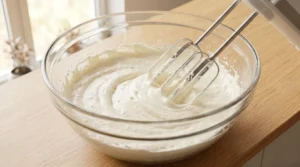
- In a large bowl, beat the softened butter on medium-high speed for 2 minutes until pale and creamy. Add the vegetable oil and granulated sugar. Beat for 3 full minutes until the mixture is very light, fluffy, and almost white in color. Do not rush this step — it builds the structure of your cake.
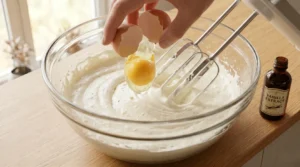
- Add the eggs one at a time, beating well after each addition until fully combined. Add vanilla extract and mix. Scrape down the sides of the bowl between additions.
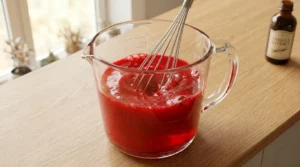
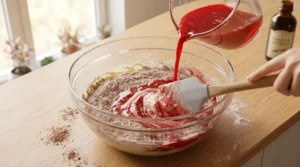
- In a small bowl or measuring cup, combine the buttermilk, white vinegar, and red gel food coloring. Stir until the color is evenly distributed — it should be a vivid red liquid.
- With the mixer on low speed, alternate adding the dry ingredients and the buttermilk mixture — beginning and ending with the dry ingredients (dry in 3 additions, buttermilk in 2). Mix just until each addition is incorporated. Stop mixing the moment you no longer see dry flour streaks. Do not overmix.
Bake
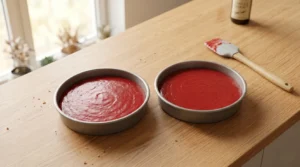
- Divide the batter evenly between the two prepared cake pans. Smooth the tops with a spatula. Bake for 28–33 minutes until a toothpick inserted in the center comes out with just a few moist crumbs. Start checking at 26 minutes. Do not overbake.
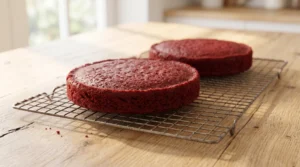
- Let cakes cool in their pans for 10 minutes. Run a knife around the edges and carefully turn out onto a wire rack. Cool completely — at least 1 full hour — before frosting. A warm cake will melt the frosting.
Make the Never-Melt Cream Cheese Frosting
- Beat the COLD block cream cheese alone in a large bowl for 2 minutes until completely smooth and lump-free. Set aside.
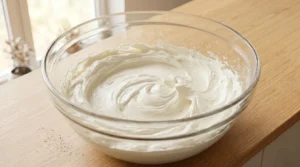
- In a separate bowl, beat the softened butter for 3 minutes until very pale and extremely fluffy. Add the beaten butter to the cream cheese bowl and beat together for 1 minute.
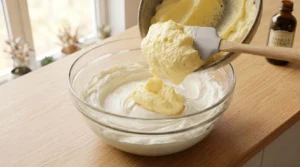
- Add the sifted powdered sugar one cup at a time on low speed, beating well between each addition. Add vanilla extract and salt. Beat on medium-high speed for 2 minutes until frosting is thick, glossy, and holds stiff peaks. If too thick, add heavy cream 1 teaspoon at a time. If too thin, add powdered sugar 2 tablespoons at a time.

Assemble and Frost
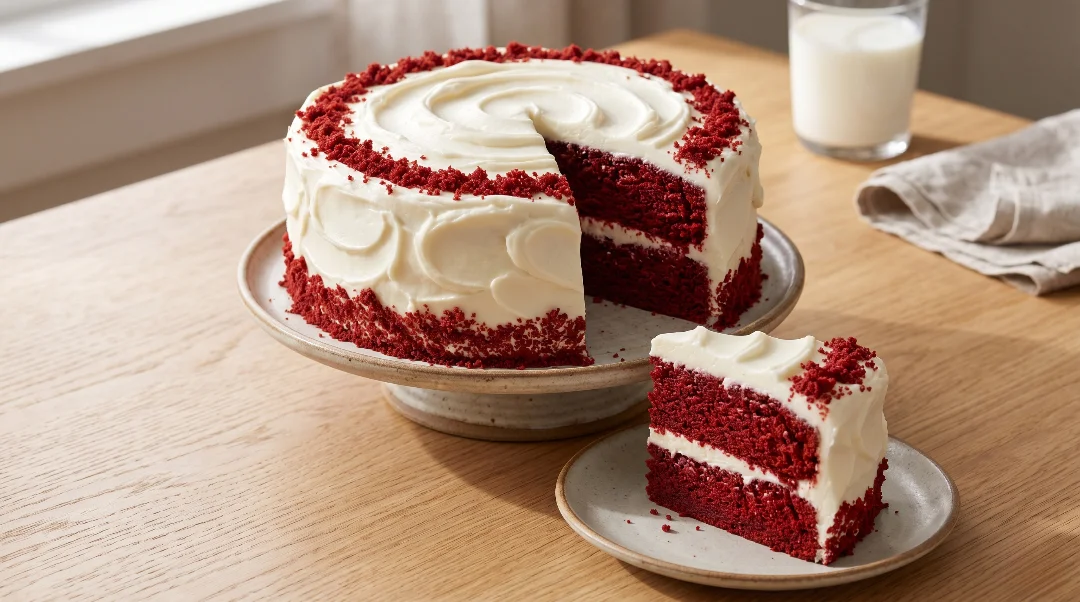
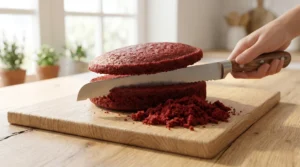
- Using a serrated knife, level the tops of the cooled cake layers if they have domed. Save all trimmed crumbs — do not discard. Crumble them finely for the classic red velvet crumb decoration.
- Place one cake layer on a cake board or serving plate. Spread about 1 cup of frosting evenly across the top using an offset spatula. Place the second layer on top, pressing gently to level.

- Apply a thin crumb coat of frosting all over the top and sides. Refrigerate for 15 minutes until firm.
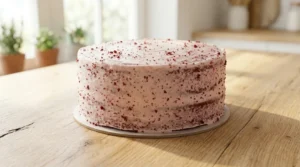
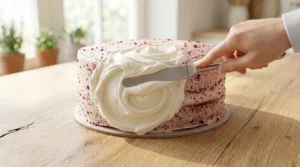
- Apply the final generous layer of frosting over the top and sides. For ultra-smooth sides, use a bench scraper held against the cake while rotating the stand. For a classic look, create swirls and swoops with the offset spatula.
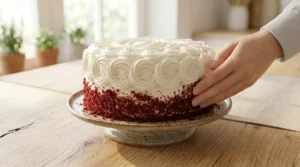
- Immediately press the reserved red cake crumbs gently onto the sides and top of the cake while the frosting is still slightly tacky. Work quickly — once the frosting sets, crumbs will not adhere. Slice with a hot damp knife for clean cuts and serve at room temperature.
Notes
- Natural cocoa ONLY — not Dutch process. This is the most critical rule for Red Velvet Cake. Natural cocoa is acidic and reacts with the baking soda to create the proper rise and velvety texture. Dutch process cocoa is alkaline and neutralized — it will not react the same way and your cake will not turn out correctly. This is the opposite of our Chocolate Fudge Cake which requires Dutch process.
- Gel food coloring — not liquid. Liquid food coloring is mostly water and disrupts the acid-base balance of the batter. You would need several tablespoons to achieve a vivid red, which adds too much liquid. Gel food coloring is highly concentrated — half a teaspoon gives a dramatically more vivid crimson. Find it at any craft store, baking supply store, or Amazon.
- No food coloring? Use 2 tablespoons of beet powder in place of the gel food coloring — add it with the dry ingredients. The color will be a deep natural burgundy-red. The beet flavor is completely undetectable in the finished cake.
- Why is there vinegar in this cake? The white vinegar reacts with the baking soda to help the cake rise and adds to the overall acidity that tenderizes the gluten — creating the signature velvety crumb. You cannot taste it in the finished cake. Do not skip it.
- No buttermilk? Add 1 tablespoon of white vinegar or lemon juice to 1 cup of whole milk. Stir and let sit for 5 minutes — it will curdle slightly. This works perfectly. Full-fat Greek yogurt thinned with a splash of milk also works.
- The never-melt frosting secret. Use COLD block cream cheese and SOFT butter — and beat them separately before combining. Cold cream cheese keeps the frosting structured and stable at room temperature. If both are room temperature, the frosting becomes too soft and slides off the cake.
- Block cream cheese only — not tub. Tub or spreadable cream cheese has too much water content. It cannot hold its structure in frosting and will cause the frosting to become runny and slide off the cake.
- Cake flour upgrade. Substitute 2½ cups of cake flour for the all-purpose flour for an even softer, finer crumb. No cake flour? Mix 2 cups all-purpose flour with ¼ cup cornstarch as a substitute.
- Room temperature ingredients. Cold butter will not cream properly, and cold eggs can cause the batter to curdle. Take everything out of the fridge 45 minutes before starting.
- UK/Australia notes. "All-purpose flour" = plain flour. "Powdered sugar" = icing sugar. "Heavy cream" = double cream. "Granulated sugar" = caster sugar works well.
- Cupcakes. Fill lined muffin tins ⅔ full and bake at 350°F (175°C) for 18–22 minutes. Makes approximately 24 standard cupcakes.
- Storage — Room temp: Under a cake dome, up to 2 days. Refrigerator: Up to 5 days tightly covered — bring to room temperature 45–60 minutes before serving. Freezer (unfrosted layers): Wrapped tightly, up to 3 months. Freezer (frosted whole cake): Up to 2 months — freeze uncovered 1 hour until frosting is firm, then wrap.
- Make-ahead timeline: Bake layers 3 days ahead (freeze). Thaw 1 day before, frost and refrigerate overnight. Remove from fridge 1 hour before serving.
- Nutrition values are estimates. Use a nutrition calculator with your exact brands for precise figures.
Note
- Values are estimates calculated with standard ingredient brands. Actual values vary based on exact ingredients, slice size, and frosting amount. Use a nutrition calculator with your exact brands for precise figures.