Ingredients
Equipment
Method
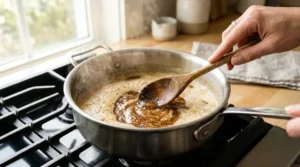
Brown the Butter
- Cook Until Nutty and Golden: Place the butter in a medium saucepan over medium heat and stir as it melts. Once fully melted, continue stirring constantly as it foams and then the foam settles. Golden-brown specks will appear on the bottom of the pan and the butter will smell nutty and rich. The moment this happens, remove from heat immediately and pour into your mixing bowl. Let it cool for 15 minutes before continuing. Do not leave it on the heat even a minute longer once the specks appear, since the residual pan heat continues browning the milk solids.
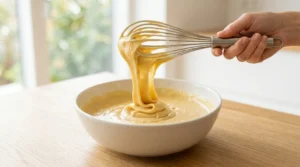
Beat the Sugar and Eggs
- Mix Until Light: Add both sugars to the cooled browned butter and beat on medium speed for 2 full minutes until slightly lighter in color. Add the eggs, egg yolk, and vanilla extract and beat for another 2 minutes until the mixture looks smooth and ribbony when you lift the beater. This beating step is important and should not be rushed.
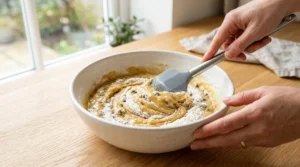
Add the Dry Ingredients
- Fold Gently, Stop Early: Whisk together the flour, baking soda, and fine sea salt in a separate bowl until evenly combined. Add the flour mixture to the wet ingredients and mix on low speed just until no dry flour streaks remain. Stop mixing immediately at that point. Overmixing the flour develops gluten and makes the cookies tough rather than tender.
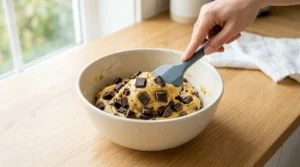
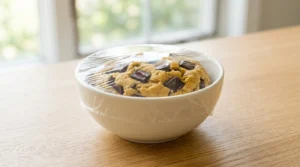
Add the Chocolate
- Fold By Hand: Add the chopped chocolate to the dough and fold in gently with a spatula using 8 to 10 slow, sweeping strokes until evenly distributed through the dough.
Chill the Dough
- Refrigerate for 1 Hour Minimum: Cover the bowl tightly with plastic wrap and refrigerate for at least 1 hour, or up to 72 hours. The dough becomes firmer as it chills, the flour absorbs all available moisture, and the flavors deepen significantly. The longer it chills within that 72-hour window, the better the cookies taste.
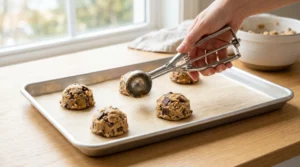
Scoop and Bake
- Preheat, Scoop, and Space Evenly: Preheat the oven to 375°F (190°C). Line baking sheets with parchment paper. Scoop the chilled dough into balls of about 2 tablespoons each and place them at least 2 inches apart on the prepared sheet. Bake one sheet at a time in the center of the oven for the most even results.
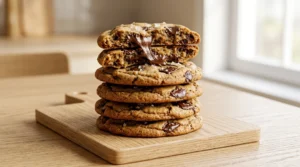
- Bake Until Edges Set But Centers Look Underdone: Bake for 10 to 12 minutes until the edges look set and golden but the centers still appear slightly glossy and underdone. This is the correct point to pull them. At the 7-minute mark, lift the pan a few inches and drop it back firmly onto the oven rack to create the rippled, bakery-style surface on the cookies.

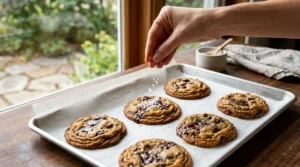
Finish and Cool
- Salt While Hot, Then Rest on the Pan: As soon as the cookies come out of the oven, immediately sprinkle flaky sea salt over each one while they are still hot. Let the cookies rest on the hot baking sheet for 5 full minutes before transferring to a wire cooling rack. Moving them too soon causes them to fall apart since they are still too soft immediately after baking.
Serve
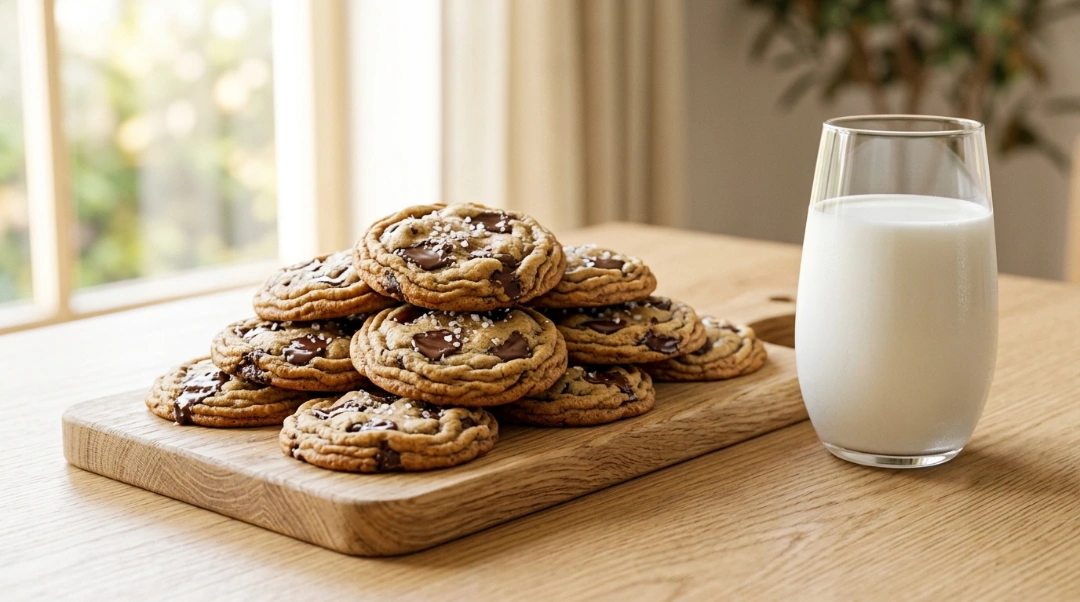
- Best Warm, Still Good for Days: Cookies are at their absolute best within 30 minutes of coming out of the oven when the chocolate is still slightly melted and the center is soft. Stored correctly in an airtight container with a slice of bread, they stay soft and chewy for up to 4 days at room temperature.
Notes
- Weigh the flour. Scooping directly from the bag compacts the flour and can add up to 20 percent extra, producing dry, tough cookies. Use a kitchen scale for 285g, or spoon into the measuring cup and level off.
- Dark brown sugar, not light. Dark brown sugar has twice the molasses of light brown sugar, which is what creates and maintains the chewy texture for days.
- Chill time improves everything. Minimum 1 hour, up to 72 hours. Even 30 minutes is better than baking immediately.
- Pull them out early. Cookies look underdone at the oven door but continue cooking on the hot pan for 5 minutes. This carryover cooking is what produces the perfectly chewy center.
- Chopped chocolate vs chips. Chopped chocolate melts into puddles. Chips hold their shape. Both work, but chopped chocolate produces a noticeably better final texture.
- Flaky salt goes on after, not before. Adding it before baking dissolves the salt into the dough where it cannot create the sweet-salty contrast on top.
- Store with bread. An airtight container with a slice of plain white bread keeps cookies soft for up to 4 days. The bread gives up its moisture to the cookies.
- Freezing raw dough. Scoop into balls, freeze until solid on a tray, then bag. Bake from frozen with 2 to 3 extra minutes added.
- UK/Australia notes: "All-purpose flour" equals plain flour. "Baking soda" equals bicarbonate of soda. "Dark brown sugar" is available under the same name. "Flaky sea salt" is available as Maldon or similar brands.
- Nutrition values are estimates and vary based on chocolate type and exact cookie size.