

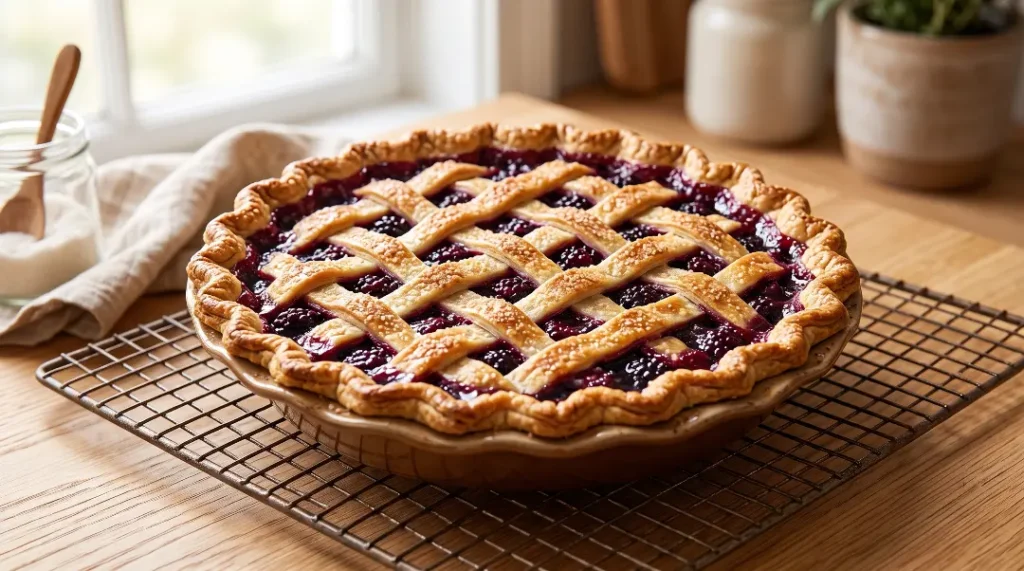
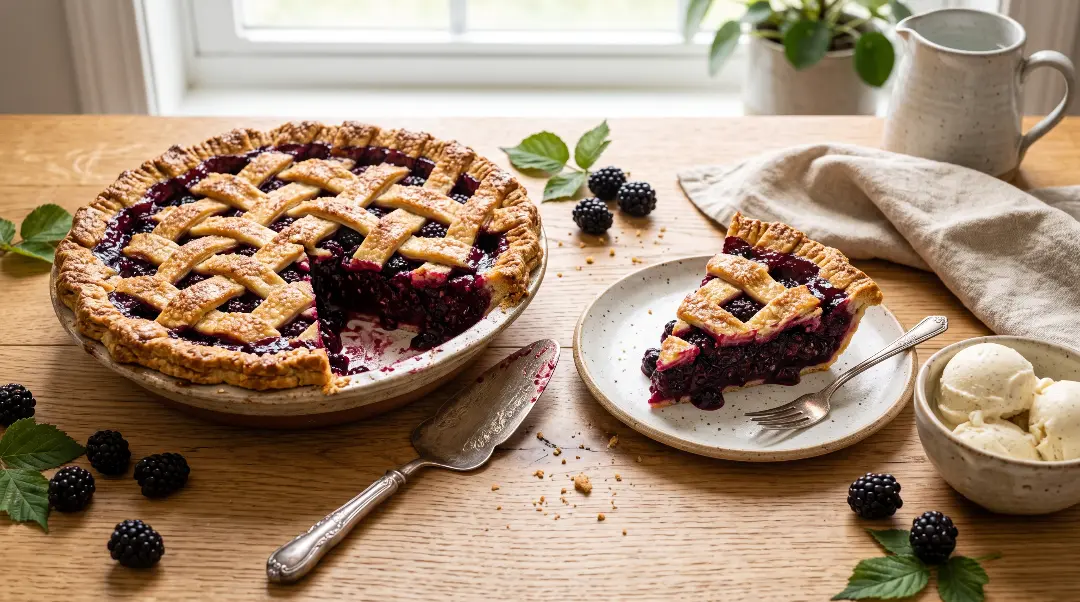
The crust was golden. The lattice was perfect. I had spent the better part of a Saturday afternoon on that pie. I cut the first slice, lifted it out of the dish, and watched the entire filling pour out like dark purple soup across the plate.
I had pulled it from the oven the moment the crust looked done and served it immediately because dinner was getting cold. Two mistakes in one.
What I did not know then is that a blackberry pie needs two things to set properly. The filling has to reach a full, visible bubbling boil inside the pie, not just around the edges, because that is the point at which the cornstarch fully activates and actually thickens the juices. And then the whole pie has to cool for at least two hours after coming out of the oven, because the filling continues setting as the temperature drops. Cut into a hot pie and you will always get soup, no matter how long it baked.
This Blackberry Pie Recipe is built around both of those lessons, plus a full lattice crust tutorial and the exact two-temperature baking method that keeps the bottom crust crisp and the edges from burning. The kind of pie worth spending a Saturday on.
Why This Is the Best Blackberry Pie Recipe
The filling actually sets and holds a clean slice. The bubbling confirmation method in this recipe tells you exactly when to pull the pie from the oven, removing all the guesswork that causes runny filling.
A complete lattice crust tutorial included. Most recipes either skip the technique or rush through it with one sentence. This one walks through the weaving step by step, so even a first-time lattice baker produces a beautiful result.
The two-temperature bake prevents both soggy bottoms and burnt edges. Starting at a high temperature and reducing it partway through baking is the technique that handles both problems at once, and this recipe explains exactly why it works.
Fresh and frozen blackberries are both covered properly. Frozen berries need a slightly different approach, and the common mistake of thawing them first is explained and corrected here.
A Quick History, Where Blackberry Pie Comes From
Blackberries are native chiefly to north temperate regions of the world, with wild blackberries being particularly abundant in eastern North America and along the Pacific coast. They are cultivated in many areas of North America and Europe, and are a fairly good source of iron, vitamin C, and antioxidants. Blackberries are generally eaten fresh, used in preserves, or baked into desserts such as cobblers and pies.
Baking wild-gathered blackberries into pies has been part of American home cooking since before the country itself had a name. Early settlers foraged wild blackberries from the same abundant brambles that still grow along roadsides and fence lines across the eastern United States today, and the combination of those tart, deeply flavored berries with a lard or butter pastry crust became one of the defining summer desserts of American food culture. For more on the blackberry plant and its history, Britannica’s full entry on the blackberry covers both the botany and the cultural significance in detail.
Our own Best Blackberry Jam Recipe covers the science of how blackberry pectin sets preserves, which is part of the same reason fresh blackberries naturally help thicken a pie filling even alongside the cornstarch.
Why Blackberry Pie Goes Wrong and How to Stop It

Here is everything you need to know to get this right, in plain terms.
Why the filling runs, the real explanation. Cornstarch is the thickener in most blackberry pie fillings, and it has one important requirement: it needs to reach boiling temperature to fully activate its thickening power. When you mix cornstarch into the raw berry filling and put it in the oven, it starts thickening partway through baking, but it only reaches its full strength once the filling bubbles vigorously in the center of the pie, not just around the edges, which indicates it has truly reached boiling point throughout. Pulling the pie before the filling is visibly bubbling in the center means the cornstarch never fully activates, and the filling stays thin and runny. This is the number one cause of runny blackberry pie.
Why you must wait before slicing. Even after the filling has properly bubbled and the pie comes out of the oven looking perfect, the filling is still liquid. As the pie cools, the cornstarch and the natural pectin in the blackberries continue setting the filling from a pourable liquid into a sliceable consistency. This process takes a minimum of 2 hours at room temperature, and 3 to 4 hours is better. Slicing into a warm pie guarantees a runny filling regardless of how well the baking went. This is arguably the hardest part of making pie, simply waiting.
Why cold butter makes a flaky crust. When small pieces of cold butter are scattered throughout pie dough, they stay separate from the flour rather than fully blending in. In the oven, those butter pieces melt and release steam, and that steam puffs up the surrounding dough into thin, separate layers. Those layers are what you see and feel as flakiness when you bite in. Warm or melted butter blends fully into the dough and produces a crumbly, dense crust instead of a flaky one. Keeping the butter cold at every step of crust-making is not just a good habit. It is the entire mechanism that creates flakiness.
Why cornstarch works better than flour for berry pie. Flour has some thickening power, but it takes a larger quantity and produces a slightly opaque, starchy-tasting filling. Cornstarch thickens more efficiently with a smaller amount, and it produces a cleaner, glossier filling that tastes purely of fruit rather than starch. For a brightly colored, intensely flavored berry filling like blackberry, cornstarch is the better choice. According to USDA FoodData data on fresh blackberries, fresh blackberries are also naturally rich in pectin, which helps the filling set alongside the cornstarch.
Why a two-temperature bake prevents soggy bottoms and burnt edges. Starting the pie at a high temperature (around 425°F) for the first 15 to 20 minutes does two important things simultaneously. It quickly sets and crisps the bottom crust before the berry juices have fully released and can soak into it, and it gives the top crust and edges a head start on browning. Reducing the temperature afterward (to 350 to 375°F) lets the filling heat through fully and bubble properly without the edges or top burning before the inside is ready.
What You Need
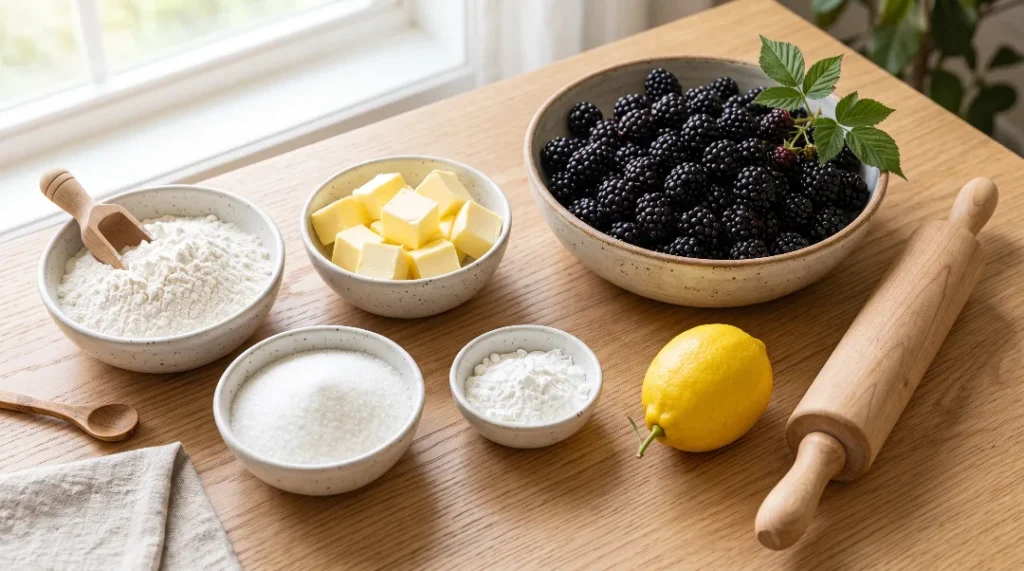
For the All-Butter Pie Crust (Makes 2 crusts)
- 2½ cups (315g) all-purpose flour
- 1 tbsp granulated sugar
- 1 tsp salt
- 1 cup (225g) cold unsalted butter, cut into small cubes (keep in the freezer for 10 minutes before using)
- 6 to 8 tbsp ice water (add gradually, just enough for dough to hold)
For the Blackberry Pie Filling
- 6 cups (about 900g) fresh blackberries (or frozen, see Notes)
- ¾ cup (150g) granulated sugar (adjust based on berry sweetness)
- ¼ cup (30g) cornstarch
- 1 tbsp fresh lemon juice
- 1 tsp lemon zest (optional but adds brightness)
- ¼ tsp ground cinnamon (optional)
- 1 tbsp cold unsalted butter, cut into small pieces (dot over filling before topping crust)
For Finishing
- 1 large egg beaten with 1 tbsp milk (egg wash for golden, shiny crust)
- 1 tbsp coarse or granulated sugar (for sprinkling on top)
Equipment: 9-inch glass or ceramic pie dish, rolling pin, pastry cutter or food processor, pastry wheel or sharp knife for lattice strips, pie shield or aluminum foil strips for crust edges Serves: 8 to 10 slices
How to Make the Best Blackberry Pie Recipe, Step by Step
Make the Pie Crust
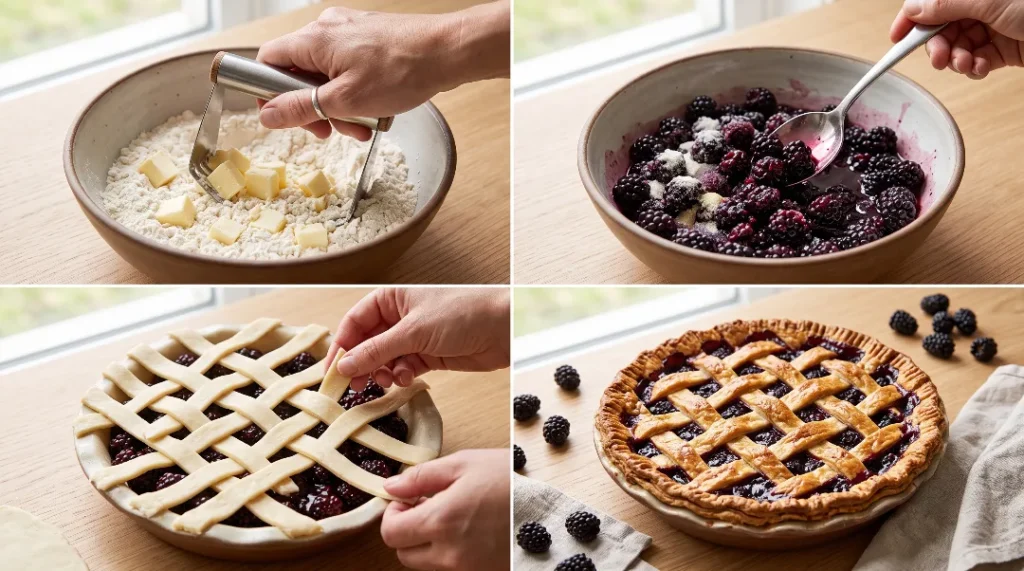
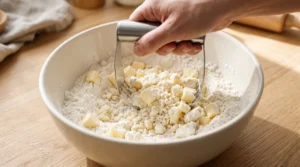
Cut Cold Butter Into the Flour: In a large bowl, whisk together the flour, sugar, and salt until combined. Add the cold, cubed butter pieces all at once. Using a pastry cutter, two forks, or a food processor pulsed in short bursts, cut the butter into the flour until the mixture looks like coarse breadcrumbs with some pea-sized butter pieces still visible throughout. Those visible butter pieces are what will create the flaky layers, so do not overwork the mixture until everything looks uniform.
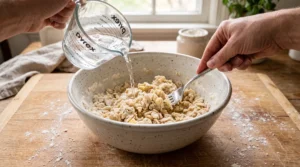
Add Ice Water Gradually: Drizzle the ice water over the flour mixture, one tablespoon at a time, stirring gently with a fork after each addition. Stop adding water the moment the dough just barely comes together when you press a handful of it between your fingers. Too much water makes the crust tough. Divide the dough in half, shape each half into a flat disc, wrap tightly in plastic wrap, and refrigerate for at least 1 hour, or up to 2 days.
Make the Blackberry Filling
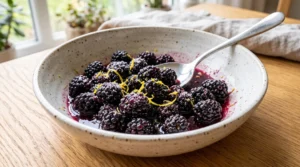
Toss Gently: In a large bowl, combine the blackberries, sugar, cornstarch, lemon juice, lemon zest if using, and cinnamon if using. Toss very gently until the berries are evenly coated. Let the mixture sit for 10 minutes, stirring once, while you roll out the crust. The sugar will begin drawing juice from the berries, which is exactly what you want.
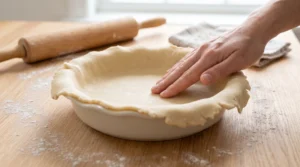
Roll Out the Bottom Crust
Line the Pie Dish: Remove one disc of chilled dough from the refrigerator. On a lightly floured surface, roll it out from the center outward into a circle about 12 inches in diameter and roughly ⅛ inch thick. Work quickly, since warming the dough too much softens the butter pieces. Carefully fold the rolled dough in half, then in quarters, transfer it to the 9-inch pie dish, and unfold it. Press it gently into the base and sides of the dish, leaving about a 1-inch overhang around the edge. Place the lined dish in the refrigerator while you prepare the lattice.
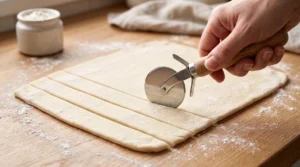
Make the Lattice Top
Roll and Cut Strips: Remove the second dough disc from the refrigerator. Roll it out into a rectangle roughly 12 inches by 14 inches. Using a pastry wheel, pizza cutter, or sharp knife, cut the dough into strips about 1 inch wide. You need approximately 10 to 12 strips in total.
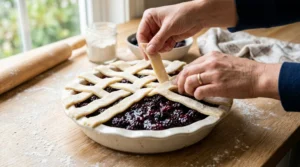
Weave the Lattice Step by Step: Pour the blackberry filling into the chilled bottom crust. Dot the small pieces of cold butter evenly over the top of the filling. Now, lay 5 or 6 dough strips going in one direction across the top of the pie, spacing them evenly apart. Fold back every other strip, halfway toward you. Lay one strip going crosswise, perpendicular to the first set, in the space where the folded strips were. Unfold the folded strips back over the new perpendicular strip. Now fold back the strips you did not fold the first time. Lay another perpendicular strip, spacing it evenly from the first. Unfold those strips. Repeat this over-under weaving across the entire pie until all strips are used. Trim any excess dough from the edges, fold the overhang of the bottom crust up over the lattice ends, and press to seal. Crimp the entire edge with your fingers or a fork to create a decorative border.
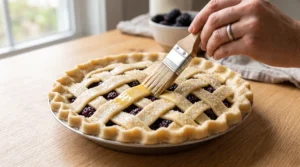
Egg Wash and Sugar
Brush and Sprinkle: Brush the entire lattice and crimped edge evenly with the beaten egg and milk mixture. Sprinkle coarse sugar over the top. The egg wash is what creates the deep golden color and sheen on the finished crust, and the coarse sugar adds a satisfying crunch to every bite.
Bake the Pie
Start Hot, Then Lower: Place the pie on a rimmed baking sheet to catch any drips. Bake at 425°F (220°C) for the first 20 minutes. This high-heat start crisps the bottom crust and sets the edges before the filling has released all its juice. Without opening the oven door, reduce the temperature to 375°F (190°C) and continue baking for 40 to 50 more minutes.
Watch for the Bubbling: The pie is done when the filling is bubbling visibly and actively in the center of the pie, not just near the edges. The crust should be deep golden brown. If the edges begin browning too quickly before the filling bubbles in the center, place a pie shield or strips of aluminum foil around the edges to protect them and continue baking until the center filling bubbles.
Cool Completely Before Slicing
This Step Cannot Be Rushed: Remove the pie from the oven and transfer it to a wire cooling rack. Let it cool at room temperature for a minimum of 2 hours, and 3 to 4 hours is better. The filling is still liquid when it comes out of the oven and sets as it cools. Slicing too early will always produce a runny filling regardless of how well the pie baked.
Serve
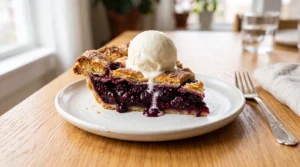
Slice With a Sharp Knife: Once fully cooled, cut the pie with a sharp knife, wiping the blade clean between cuts. Serve each slice with a scoop of vanilla ice cream or a generous spoonful of freshly whipped cream. The contrast between the cold, creamy topping and the room-temperature tart berry filling is one of the best combinations in summer dessert.

J.ZaiB’s Expert Touch
Use a glass or ceramic pie dish, not a dark metal one. Glass and ceramic conduct heat more slowly and evenly than dark metal pans, which means the bottom crust crisps without burning and you can see through the dish to check the browning from underneath. A dark metal pan runs hotter and can over-brown the bottom before the filling is ready.
Do not thaw frozen blackberries before baking. This is the most common mistake when using frozen berries. Thawing releases a large amount of juice before the pie even goes in the oven, making the filling much wetter than it should be and almost guaranteeing a runny result. Use frozen berries straight from the freezer, increase the cornstarch by 1 additional tablespoon, and add about 10 extra minutes to the baking time.
Include a few slightly underripe, firmer berries in the filling. The same principle from our Best Blackberry Jam Recipe applies here. Berries that are slightly underripe contain more natural pectin, which helps the filling hold together as it cools alongside the cornstarch. A purely overripe batch of berries, which have lower pectin, can result in a softer set even when the cornstarch does its job correctly.
Chill the assembled, unbaked pie for 15 minutes before putting it in the oven. After assembling the lattice and brushing with egg wash, a quick chill in the refrigerator re-firms the butter in the dough and helps the lattice hold its woven shape rather than softening and spreading. This is the step that makes the lattice look sharp and defined in the finished pie.
Save a small amount of the raw berry mixture to taste before adding to the crust. This tells you if the filling needs more sugar or more lemon. Berries vary enormously in sweetness from batch to batch and from season to season, and a filling that tastes slightly too tart raw will taste better once baked, but a filling that already tastes right raw can turn overly sweet once the sugar concentrates during baking.
Variations to Try
Blackberry and Apple Pie: Replace 2 cups of the blackberries with peeled, thinly sliced tart apples such as Granny Smith. The apple adds a firmer texture and a different sweetness that balances the tartness of the blackberries beautifully, and the combination sets more reliably because of the apple’s high natural pectin content.
Blackberry Crumble Top Pie: Instead of making a lattice top, combine 1 cup of rolled oats, ½ cup of flour, ½ cup of brown sugar, 6 tablespoons of cold butter cut into pieces, and a pinch of cinnamon, working the butter in with your fingers until the mixture is crumbly. Scatter over the filled bottom crust instead of the lattice. Bake as directed. Faster to assemble and equally delicious.
Mini Blackberry Hand Pies: Roll the crust thinner, cut into 4-inch rounds, add a spoonful of filling to one half, fold over, press to seal, and crimp with a fork. Brush with egg wash and bake at 375°F for 22 to 25 minutes until golden. Perfect for parties and gatherings where slicing a full pie is impractical.
Blackberry and Peach Pie: Replace 2 cups of the blackberries with 2 cups of peeled, sliced fresh peaches. The peach softens the tartness of the blackberries and the combination looks stunning cut open, dark purple and orange together. A summer county fair classic.
Gluten-Free Blackberry Pie: Substitute the all-purpose flour in the crust with a quality gluten-free baking blend such as Bob’s Red Mill 1:1 or King Arthur Measure for Measure, and use cornstarch as the thickener in the filling as written, since cornstarch is naturally gluten-free. Add 1 teaspoon of xanthan gum to the crust if your blend does not already contain it, to help the dough hold together when rolling.
If you love berry desserts and want to explore a broader range, our Types of Pie Guide covers the full spectrum of classic American pie styles and is a great starting point for planning your next baking project.
Serving Ideas
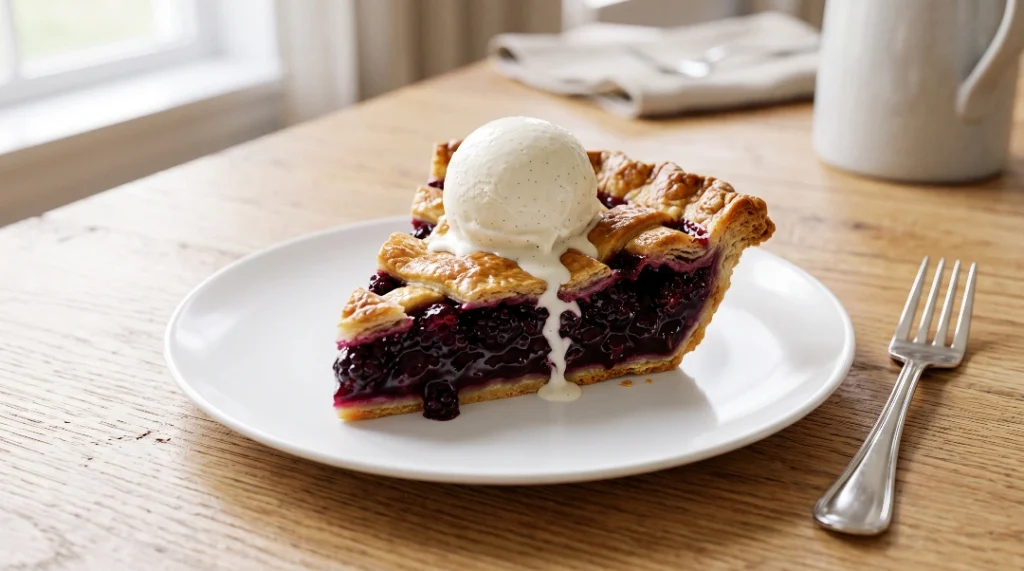
Classic summer serving: One thick slice of fully cooled blackberry pie, a generous scoop of good vanilla ice cream, and nothing else needed. The cold creaminess of the ice cream against the tart, jammy blackberry filling is one of the best flavor combinations in American baking.
Paired with whipped cream: Freshly whipped heavy cream, barely sweetened and flavored with a small amount of vanilla, is the lighter alternative to ice cream and lets the flavor of the blackberries come through more clearly.
As a dinner party dessert: Serve at the table still in the pie dish so guests can see the full lattice top before slicing. Bring a separate bowl of lightly sweetened whipped cream for people to help themselves. Simple, beautiful, and completely crowd-pleasing.
Alongside a no-bake dessert: For a summer dessert table, pair this Blackberry Pie Recipe with our New York Cheesecake for a spread that covers both baked and no-bake categories, giving every guest a choice.
Storage Guide
Room temperature: Loosely covered with plastic wrap or foil, fully cooled blackberry pie keeps at room temperature for up to 2 days. The crust stays crispest on day one.
Refrigerator: Cover tightly and refrigerate for up to 5 days. Bring to room temperature before serving, or warm individual slices in a 300°F oven for about 10 minutes to refresh the crust texture.
Freezer, baked: Wrap the fully cooled baked pie tightly in plastic wrap and then foil. Freeze for up to 3 months. Thaw overnight in the refrigerator, then warm in a 350°F oven for 15 to 20 minutes before serving.
Freezer, unbaked: Assemble the pie completely, including the lattice top and egg wash, but do not bake it. Wrap tightly in plastic wrap and freeze. Bake directly from frozen, adding 15 to 20 extra minutes to the total bake time.
Best Blackberry Pie Recipe
Ingredients
Equipment
Method
- Cut Cold Butter Into the Flour: In a large bowl, whisk together the flour, sugar, and salt until evenly combined. Add the cold, cubed butter pieces all at once. Using a pastry cutter or two forks, cut the butter into the flour until the mixture looks like coarse breadcrumbs with some pea-sized butter pieces still visible. Those visible butter pieces are what create the flaky layers in the finished crust, so stop before everything looks perfectly uniform.

- Add Ice Water and Chill: Add ice water one tablespoon at a time, stirring gently with a fork after each addition. Stop adding water the moment the dough just barely comes together when you press a handful between your fingers. Too much water makes a tough crust. Divide the dough in half, shape each into a flat disc, wrap in plastic wrap, and refrigerate for at least 1 hour.
- Toss and Rest: In a large bowl, gently toss the blackberries with the sugar, cornstarch, lemon juice, lemon zest, and cinnamon if using until the berries are evenly coated. Let the mixture sit for 10 minutes while you roll out the crust. The berries will begin releasing juice, which is exactly what you want.
- Work Quickly with Cold Dough: On a lightly floured surface, roll one disc of chilled dough from the center outward into a 12-inch circle, about ⅛ inch thick. Fold in half, then in quarters, transfer to the 9-inch pie dish, and unfold. Press gently into the base and sides, leaving a 1-inch overhang around the edge. Return the lined dish to the refrigerator while you prepare the lattice.
- Cut the Strips: Roll the second dough disc into a 12 by 14-inch rectangle. Cut into strips about 1 inch wide using a pastry wheel or sharp knife. You need 10 to 12 strips total.
- Weave the Lattice: Pour the blackberry filling into the chilled bottom crust. Dot the small pieces of cold butter evenly over the filling. Lay 5 to 6 strips going in one direction across the filling, spaced evenly. Fold back every other strip halfway toward you. Lay one strip going crosswise, perpendicular to the first set. Unfold the folded strips over the new perpendicular strip. Fold back the strips you did not fold the first time. Lay another perpendicular strip, spaced evenly. Continue this over-under weaving until all strips are used. Trim the edges, fold the bottom crust overhang up over the lattice ends, press to seal, and crimp the entire edge with your fingers or a fork.
- Brush, Sprinkle, Then Bake: Brush the entire lattice and crimped edge with the beaten egg and milk mixture. Sprinkle coarse sugar evenly over the top. Place the pie on a rimmed baking sheet. Bake at 425°F (220°C) for 20 minutes. Without opening the oven, reduce the temperature to 375°F (190°C) and continue baking for 40 to 50 more minutes, until the crust is deep golden brown and the filling is bubbling actively and visibly in the center of the pie, not just near the edges. If the edges start browning too quickly before the center filling bubbles, place a pie shield or foil strips around the edges and continue baking until the center bubbles.
- Wait Before Slicing: Transfer the pie to a wire cooling rack. Let it cool at room temperature for a minimum of 2 hours, ideally 3 to 4 hours. The filling is still liquid when it comes out of the oven and continues setting as it cools. Slicing too early will always result in a runny filling. Once fully cooled, slice with a sharp knife and serve with vanilla ice cream or freshly whipped cream.
Notes
- Why the filling must bubble in the center: Cornstarch only fully activates its thickening power at boiling temperature. Bubbling just at the edges means the center has not yet reached that temperature. Wait for the center to bubble actively before pulling the pie from the oven.
- Why you must wait before slicing: The filling sets as it cools. Slicing a hot or warm pie always produces a runny filling, regardless of how well it baked. Minimum 2 hours at room temperature, 3 to 4 hours for the cleanest slices.
- Frozen blackberries: Do NOT thaw before using. Use straight from frozen. Add 1 extra tablespoon of cornstarch. Add 10 extra minutes to the total bake time.
- Cold butter is non-negotiable for a flaky crust. Warm or room temperature butter blends fully into the flour and produces a crumbly, dense crust instead of flaky layers. Keep butter cold at every step.
- Glass or ceramic pie dish recommended. These conduct heat more gently and evenly than dark metal pans. Glass also lets you see the bottom crust browning through the dish.
- Chill the assembled pie 15 minutes before baking to re-firm the butter in the lattice and keep the woven pattern sharp and defined.
- Crust edge browning: Cover edges with a pie shield or foil strips partway through baking if they are browning faster than the filling is setting.
- Natural pectin in blackberries helps the filling set as it cools alongside the cornstarch, which is why including a few slightly underripe berries helps the pie set more firmly.
- Storage: Room temperature up to 2 days loosely covered. Refrigerator up to 5 days tightly covered. Baked pie freezes up to 3 months, wrapped tightly. Unbaked assembled pie also freezes well, bake from frozen with extra time.
- UK/Australia notes: “All-purpose flour” equals plain flour. “Cornstarch” equals cornflour. “Granulated sugar” equals caster sugar. “Coarse sugar” equals demerara or raw sugar.
- Nutrition values are estimates and vary based on exact sugar quantity and serving size.
NUTRITION
(Per 1 slice, based on 9 slices, with crust)
| Nutrient | Amount |
|---|---|
| Calories | ~390 kcal |
| Total Fat | 18g |
| Saturated Fat | 11g |
| Cholesterol | 60mg |
| Sodium | 200mg |
| Total Carbs | 55g |
| Sugars | 24g |
| Fiber | 5g |
| Protein | 4g |
Note: Values are estimates and vary based on exact butter quantity in crust, sugar amount used, and serving size.
Frequently Asked Questions
Why is my blackberry pie runny after baking?
Almost always one of two reasons. Either the filling did not bubble visibly in the center of the pie during baking, which means the cornstarch never fully activated, or the pie was sliced too soon before the filling had time to set as it cooled. Both problems have easy fixes: bake until the center filling bubbles actively, not just the edges, and then wait a minimum of 2 hours, ideally 3 to 4 hours, before slicing.
Can I make blackberry pie with frozen blackberries?
Yes, with two adjustments. Do not thaw the frozen berries before using them. Thawing releases too much juice and makes the filling very wet. Use the berries straight from frozen, add 1 extra tablespoon of cornstarch to the filling, and add about 10 minutes to the total baking time since the frozen berries take longer to heat through and reach the bubbling temperature.
How do I keep the pie crust edges from burning?
Either use a purpose-made pie shield, which is a ring-shaped silicone or metal guard that sits over the crust edges, or simply tear strips of aluminum foil and press them gently around the edges of the crust about halfway through baking. Remove the shield during the last 10 minutes if you want the edges to brown slightly more.
How do I know when blackberry pie is done baking?
The crust should be deep golden brown and the filling should be bubbling visibly and actively in the center of the pie, not only near the crust edges. If you see only edge bubbling, the center filling has not yet reached boiling temperature and the cornstarch has not fully activated. Continue baking and protect the edges with foil if they are already deep brown.
Can I make the pie crust ahead of time?
Yes. The pie dough discs can be wrapped tightly in plastic wrap and refrigerated for up to 2 days or frozen for up to 3 months. Thaw frozen dough overnight in the refrigerator before rolling. The fully assembled, unbaked pie can also be refrigerated for up to 24 hours before baking.
What can I use instead of cornstarch in blackberry pie filling?
All-purpose flour works as a substitute, using 6 tablespoons in place of the 4 tablespoons of cornstarch, but the filling will look slightly cloudier and may taste a little starchier. Tapioca starch works at the same quantity as cornstarch and produces a beautifully clear, glossy filling. Some bakers use a combination of both for added reliability.
Why is my pie crust tough instead of flaky?
The most common cause is overmixing after adding the water, which develops too much gluten in the flour and makes the dough tough and elastic. Mix only until the dough just barely holds together when pressed. The second cause is warm butter, which blends fully into the flour instead of staying in separate pieces that create flaky layers. Keep butter cold throughout the entire process.
The Summer Pie Worth Every Minute
A perfect Blackberry Pie Recipe requires patience at two specific moments: when the filling is bubbling in the center of the oven, and when the pie is cooling on the rack and you desperately want to cut into it. Both feel difficult. Both make the difference between a pie you are proud of and a plate of beautiful purple soup.
Wait for the center to bubble. Wait for it to cool. Use cold butter in your crust. Watch the egg wash turn that lattice the color of a summer sunset.
And when you finally cut that first clean slice and it holds its shape on the plate, dark and glossy and jammy in the best possible way, with the crust shattering just slightly at the point of the fork, you will understand exactly why this is the pie worth spending a Saturday on.
Tag us on Instagram @viralfoodhacks706 when your lattice comes out of the oven. The golden crust photos are always the most beautiful! Save this to Pinterest so every blackberry season has a plan.