
There’s nothing quite like enjoying fresh homemade sushi it feels special, tastes incredible, and surprisingly, it’s much easier to make than most people think. I still remember the first time I tried rolling sushi at home. Honestly, I expected a disaster but once I nailed the rice and chose a few simple fillings, it turned into a fun (and even relaxing) kitchen experiment.
In this guide, we’ll explore some easy Sushi Recipes for beginners, starting with the classic California Roll (America’s most popular sushi) and a few other simple variations. These are perfect if you’re craving a light dinner, want an impressive party snack, or just feel like experimenting with homemade sushi at home.
👉 Love Asian comfort food? Don’t miss our Easy Shrimp Fried Rice Recipe . And if you’re curious about the cultural side of Japanese cuisine, check out this Authentic Japanese Sushi guide for some deeper insights.
So, grab your rolling mat, gather your ingredients, and let’s dive into these beginner-friendly Sushi Recipes that anyone can master!
What is Sushi?
Sushi Recipes might seem fancy or even a little intimidating at first, but at its core, it’s actually quite simple. It’s all about perfectly seasoned rice paired with nori (seaweed) and fresh or cooked fillings like crab, salmon, tuna, or crisp vegetables.
There are several types of sushi:
- Maki – classic rolls wrapped in seaweed and rice.
- Nigiri – hand-pressed rice topped with slices of fish or other toppings.
- Sashimi – thinly sliced raw fish, served without rice.
Why Sushi Rice Is the Real Secret
Here’s something most beginner guides skip entirely — and it’s the reason your first homemade sushi attempt might not taste quite like the restaurant version. It all comes down to the rice.
Not just any rice. Short-grain Japanese rice is specifically rich in a starch called amylopectin, which is highly branched and gelatinizes when heated. This is what gives sushi rice that signature gentle clinginess — grains that hold together just enough to roll and bite cleanly, without turning gummy or mushy. Long-grain rice like basmati or jasmine has a completely different starch profile, which is why it stays fluffy and separate after cooking. That’s great for a pilaf, but terrible for sushi.
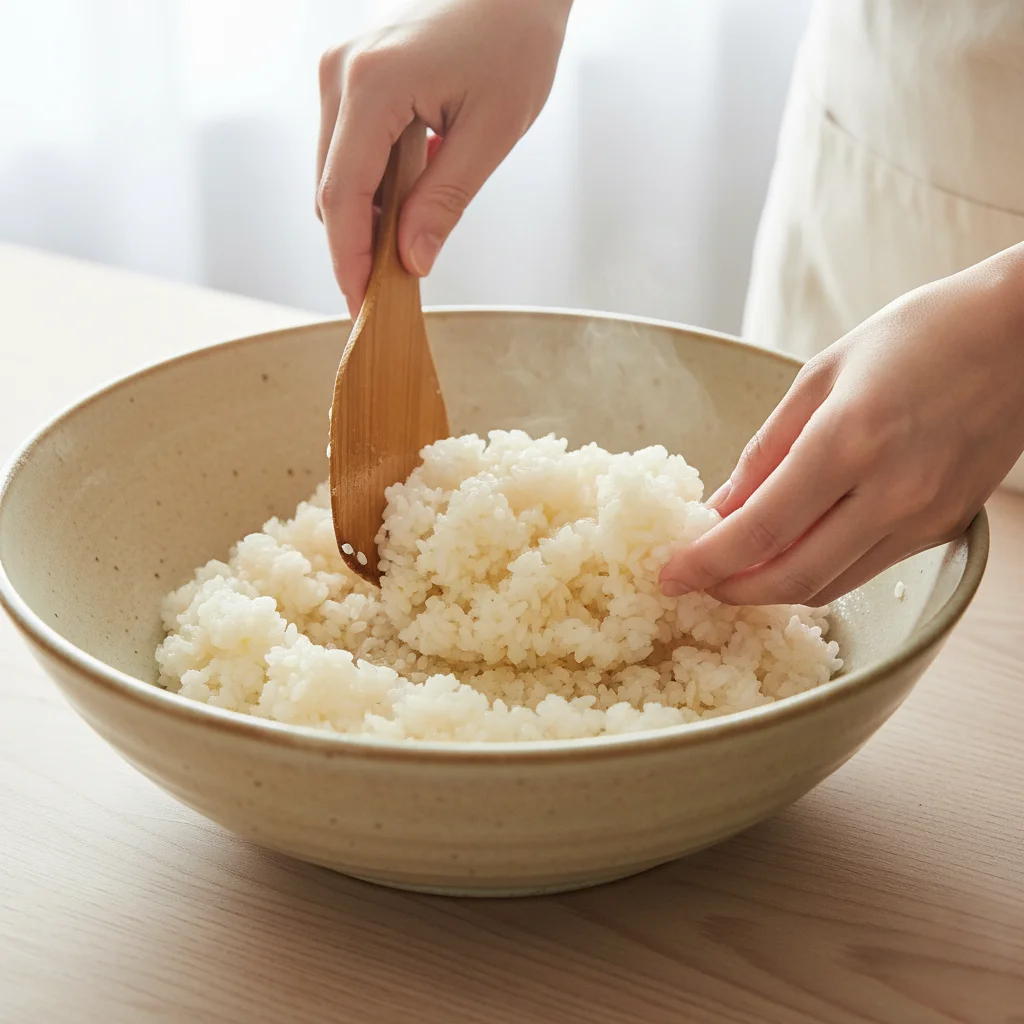
Then comes the vinegar step — and this isn’t just about flavor. When you fold that warm rice vinegar, sugar, and salt mixture into freshly cooked rice, the acidity is actually doing something structural. It slows down starch retrogradation — the process that causes rice to harden and turn chalky as it cools. Without vinegar, your sushi rice would stiffen up within an hour. With it, the rice stays glossy, pliable, and perfectly tender at room temperature. The sugar locks in moisture, and the salt balances the sharpness of the vinegar.
This is also why sushi is always served at room temperature, not cold. Refrigerating sushi rice causes that retrogradation to accelerate — the grains firm up, the texture suffers, and the whole roll becomes stiff and dense. Always make your rice fresh and use it within 4–6 hours for the best results.
Master the rice, and you’ve already won half the battle.
J.ZaiB’s Expert Touch — Tips That Actually Make a Difference
I’ve made enough sushi rolls at home to know exactly where beginners go wrong — and where a few small adjustments completely change the result. Here’s what I’ve learned:
Fan the rice while you season it. This sounds fussy, but it actually matters. Fanning the rice as you fold in the vinegar mixture cools it down faster and creates that signature glossy sheen you see on restaurant sushi rice. A regular kitchen fan, a folded piece of cardboard, or even a magazine works fine. The goal is to evaporate excess surface moisture while the vinegar absorbs in.
Use a wooden or plastic bowl — never metal. Metal bowls react with the acidity of the rice vinegar and can give your rice a slightly metallic taste. A large wooden bowl or any non-reactive bowl is the right call here.
Wet your knife between every single cut. Not just before you start — between every slice. A dry knife drags through the rice and squishes the roll instead of cutting cleanly. Keep a damp cloth right next to your cutting board and wipe the blade after each cut. This one habit is the difference between rolls that look homemade and rolls that look restaurant-quality.
Room temperature rice only — always. Never spread warm rice onto the nori. Warm rice releases steam that makes the nori go limp and soggy before you’ve even finished rolling. Let your rice cool to room temperature first, then assemble. Patience here pays off.
Roll from your wrists, not your palms. When you’re using the bamboo mat, most beginners push with their whole hand and end up with an uneven cylinder. Instead, curl your fingers over the mat and roll using your wrists in short, firm, forward motions. Reposition and press a second time to tighten. This gives you a compact, even roll every time.
Popular Sushi Variations for Beginners
If you’ve mastered the California Roll, here are a few more sushi recipes you can easily try at home:
- Spicy Tuna Roll – Fresh tuna mixed with a touch of spicy mayo and cucumber.
- Veggie Roll – A colorful mix of avocado, cucumber, and carrot.
- Philadelphia Roll – Creamy and rich with smoked salmon, cream cheese, and cucumber.
- Shrimp Tempura Roll – Crunchy fried shrimp paired with buttery avocado.
Each of these rolls is beginner-friendly, customizable, and a great way to expand your sushi-making skills.
Sushi vs Sashimi: What’s the Real Difference?
Sushi is all about seasoned rice combined with fillings like fish, seafood, or vegetables, often wrapped in nori (seaweed). Sashimi, on the other hand, is thinly sliced raw fish or seafood served without rice. If you’re just starting out, sushi rolls (maki) are usually the easiest and most fun way to begin.
Tips for Perfect Homemade Sushi
- Keep your hands slightly wet when handling sushi rice to prevent sticking.
- Always use a sharp knife for clean, neat cuts.
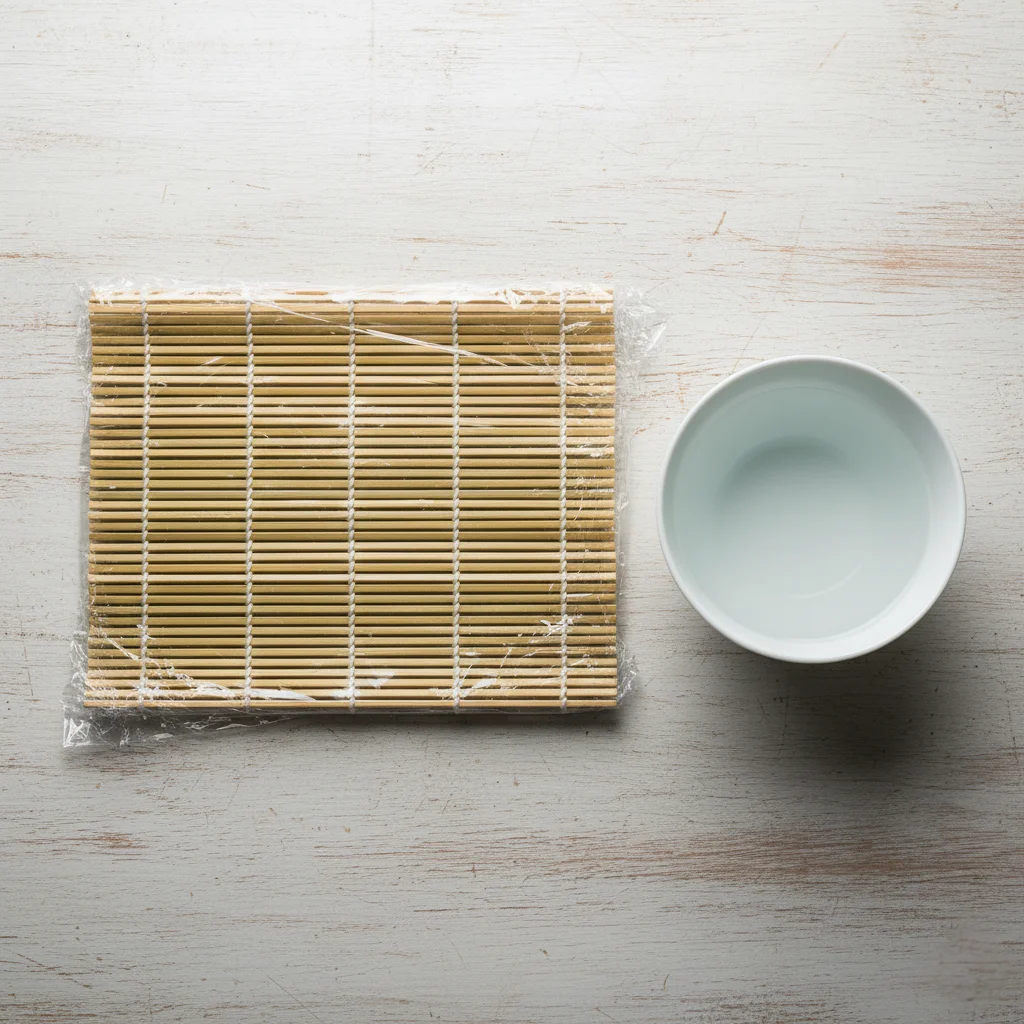
- Wrap your bamboo mat in plastic wrap so the rice doesn’t stick.
- Avoid overstuffing your rolls less filling makes rolling easier and cleaner.
Storage & Make-Ahead Tips for Homemade Sushi
Sushi is always best eaten fresh — ideally within 30 minutes of assembling. But here’s everything you need to know if you’re planning ahead or storing leftovers:
Sushi rice cannot be refrigerated. This is the most important storage rule. Cold temperatures cause the starch in sushi rice to retrograde — meaning it firms up, turns hard, and loses that soft, sticky texture completely. If you must make it ahead, keep the seasoned rice covered with a damp cloth at room temperature for up to 4 hours. Do not put it in the fridge.
Assembled rolls — eat within 1–2 hours. Once your California Roll or veggie roll is assembled and sliced, the nori starts absorbing moisture from the rice and softening. Freshly rolled sushi has that satisfying crunch when you bite through the nori. After an hour or two, the nori goes fully soft. Still delicious, but a different texture. For the best experience, assemble and serve immediately.
If you must refrigerate leftovers: Wrap assembled rolls tightly in plastic wrap (without slicing) and refrigerate for no longer than 24 hours. Before eating, let them sit at room temperature for 15–20 minutes. The rice will still be firmer than fresh, but the flavor will be intact. Add a fresh sprinkle of sesame seeds and serve with soy sauce.
Make-ahead hack for parties: You can prep all your fillings (slice avocado, cucumber, carrot) and make the sushi rice up to 2 hours ahead. Keep the rice covered at room temp. Then assemble and roll right before your guests sit down — it takes less than 10 minutes once everything is prepped.
Avocado tip: If you’re prepping avocado ahead, toss the slices lightly in a little lemon or lime juice to prevent browning.
Common Mistakes to Avoid
Even simple sushi recipes can go wrong if you miss a few basics. Here are the most common mistakes beginners make when preparing homemade sushi and how to avoid them:
- Using the wrong rice type – Regular long-grain rice won’t work. Always use short-grain Japanese rice for the perfect sticky texture.
- Overstuffing the rolls – Too many fillings make the roll fall apart. Less filling creates cleaner, tighter rolls.
- Not sharpening your knife – A dull knife will crush the roll instead of slicing it neatly. Keep your knife sharp for smooth cuts.
- Rolling too loosely – If the roll isn’t tight, it will unravel. Use gentle but firm pressure with the bamboo mat for best results.
With these sushi tips, you’ll avoid the most common homemade sushi mistakes and make rolls that look and taste restaurant-worthy.
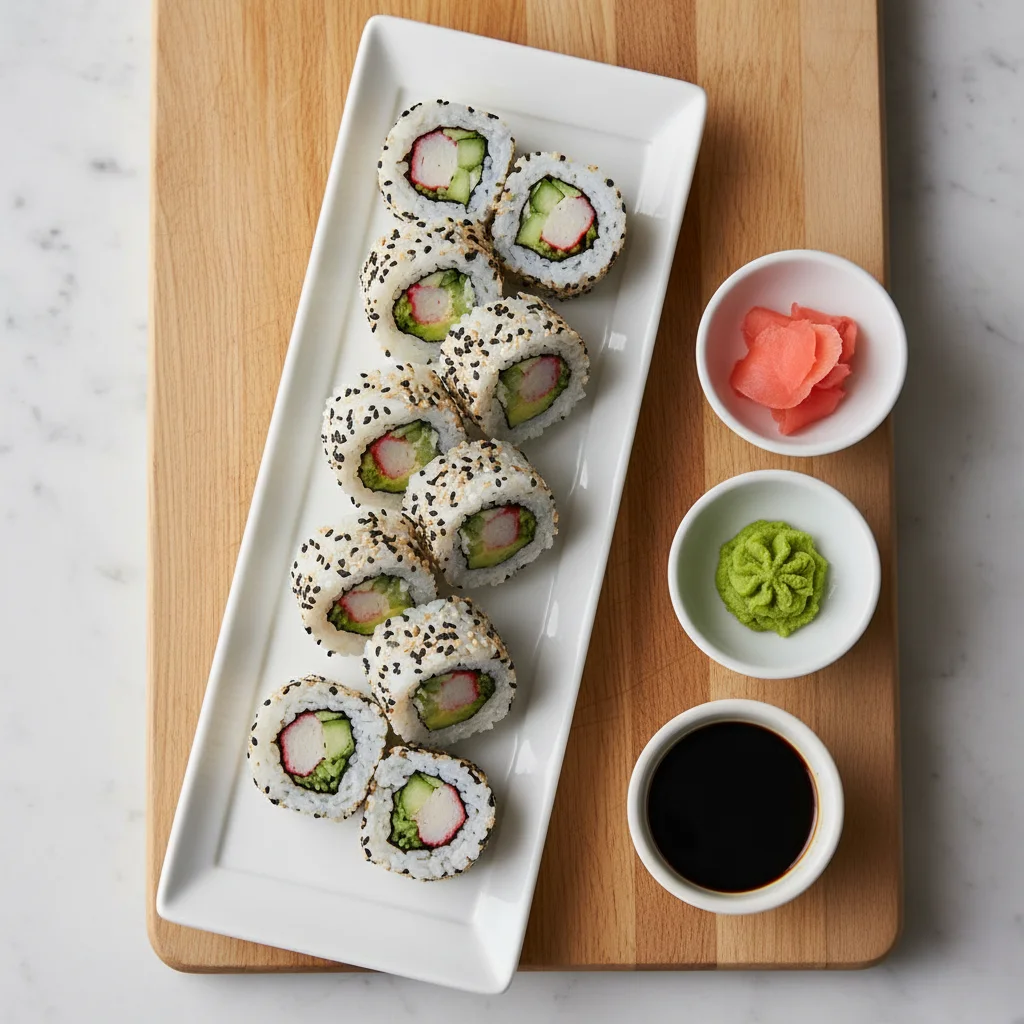
Serving & Enjoying Your Sushi
Once your sushi rolls are ready, presentation and pairing can make the experience even better. Here’s how to enjoy your sushi at home like a pro:
- Classic Pairings – Serve with soy sauce, wasabi, and pickled ginger to balance flavors.
- Presentation Tips – Arrange rolls neatly on a platter, garnish with sesame seeds or thinly sliced veggies, and use small dipping bowls for an elegant touch.
- Drink Pairings – A warm cup of green tea is traditional, while sake or even sparkling water pairs beautifully with sushi.
By paying attention to plating and serving details, your homemade sushi recipes won’t just taste amazing they’ll also feel like a true Japanese dining experience.
Easy Sushi Recipes for Beginners | Step-by-Step Homemade Guide
Equipment
- 1 Bamboo Rolling Mat (Makisu)
- 1 Sharp knife For clean cuts.
- 1 Rice Cooker or Pot For cooking the rice.
- 1 Plastic Wrap To keep the mat clean.Export to Sheets
Ingredients
For the Sushi Rice
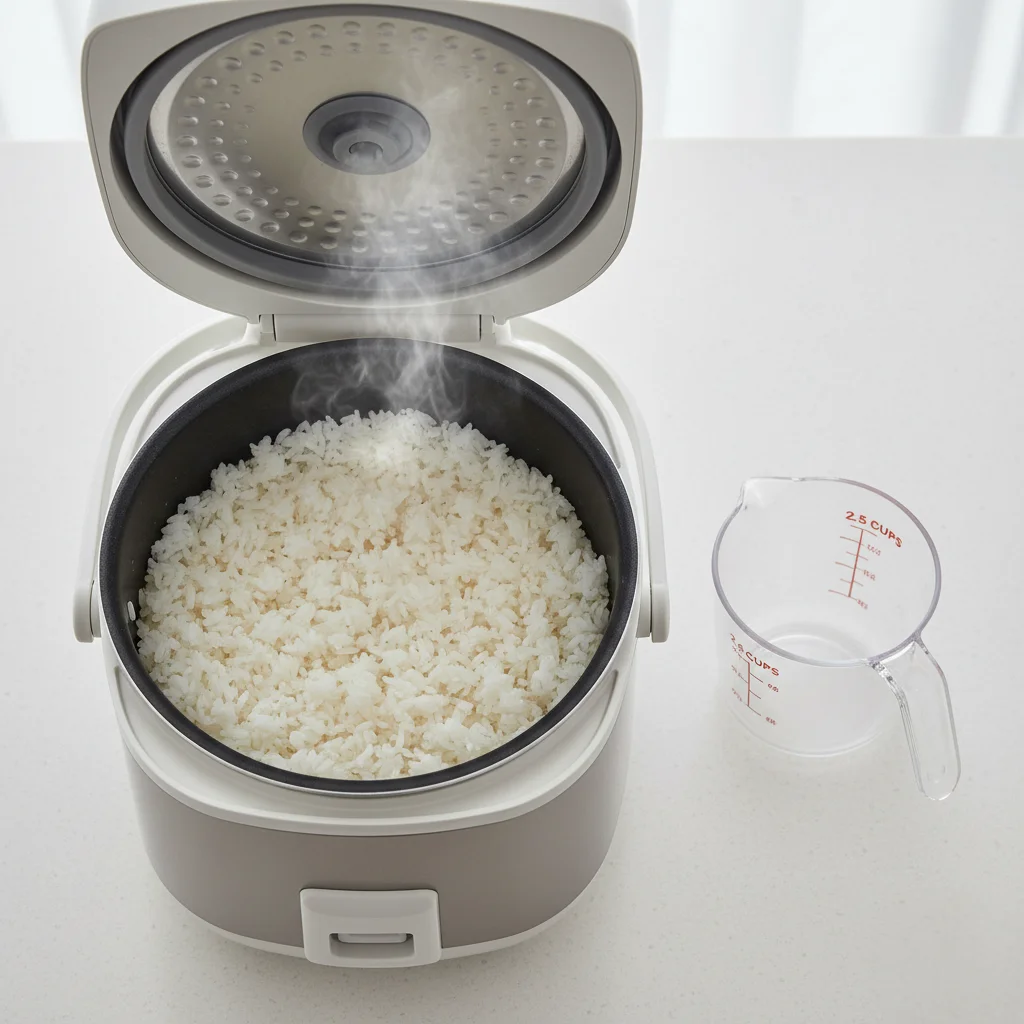
- 2 cups Sushi Rice (short-grain Japanese rice)
- 2.5 cups Water
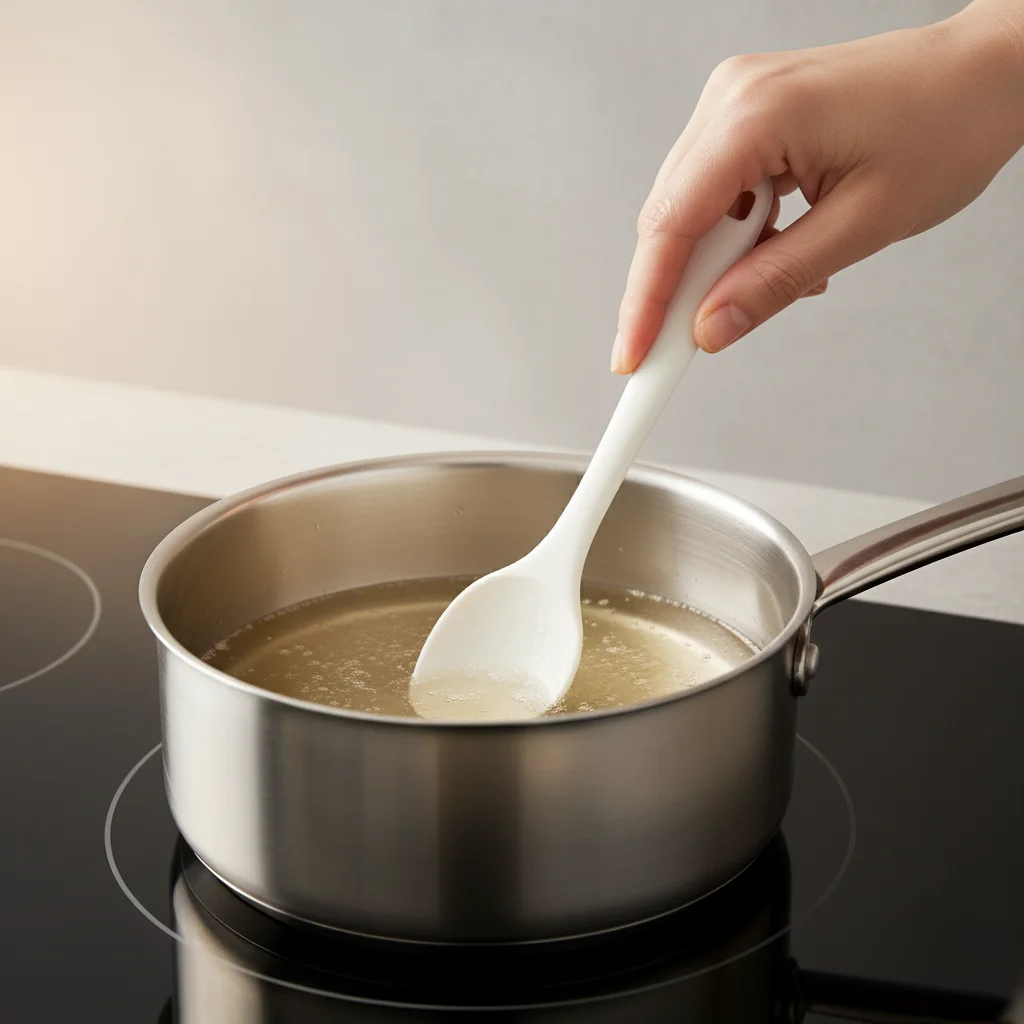
- 0.25 cup Rice Vinegar
- 2 tbsp Sugar
- 1 tbs Salt
For the California Roll
- 4 sheets Nori (seaweed)
- 1 Cucumber cut into thin strips
- 1 Avocado sliced
- 1 cup Imitation Crab Meat or real crab if available
- Sesame Seeds (optional, for garnish)
Instructions
Prepare the Sushi Rice
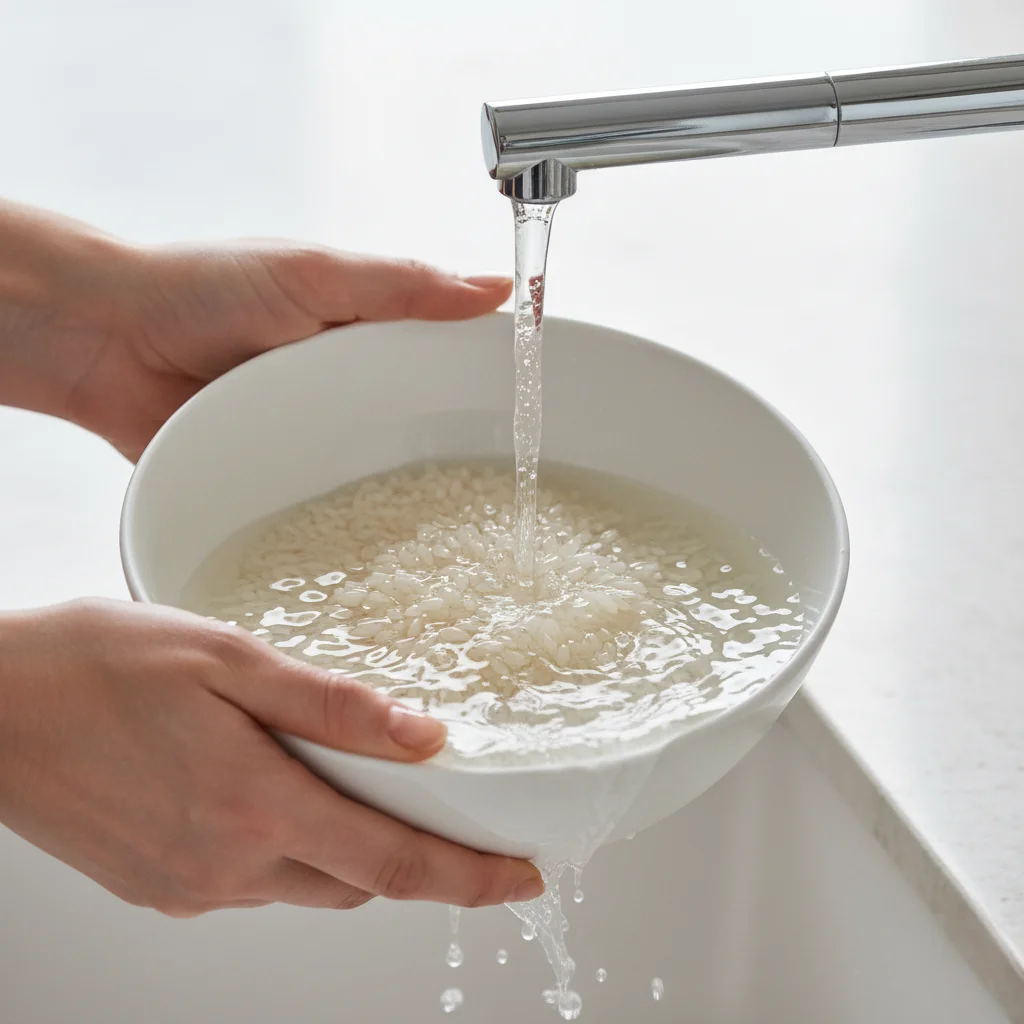
- Rinse the rice under cold water in a bowl until the water runs clear.

- Cook the rice with 2.5 cups of water, either in a rice cooker or on the stove according to package directions.
- While the rice is cooking, prepare the vinegar seasoning. Gently heat the rice vinegar, sugar, and salt in a small pan until the sugar and salt have completely dissolved. Do not let it boil.
- Once the rice is cooked, transfer it to a large, non-metallic bowl. Gently fold the vinegar mixture into the warm rice with a paddle or spatula. Let the rice cool down to room temperature.
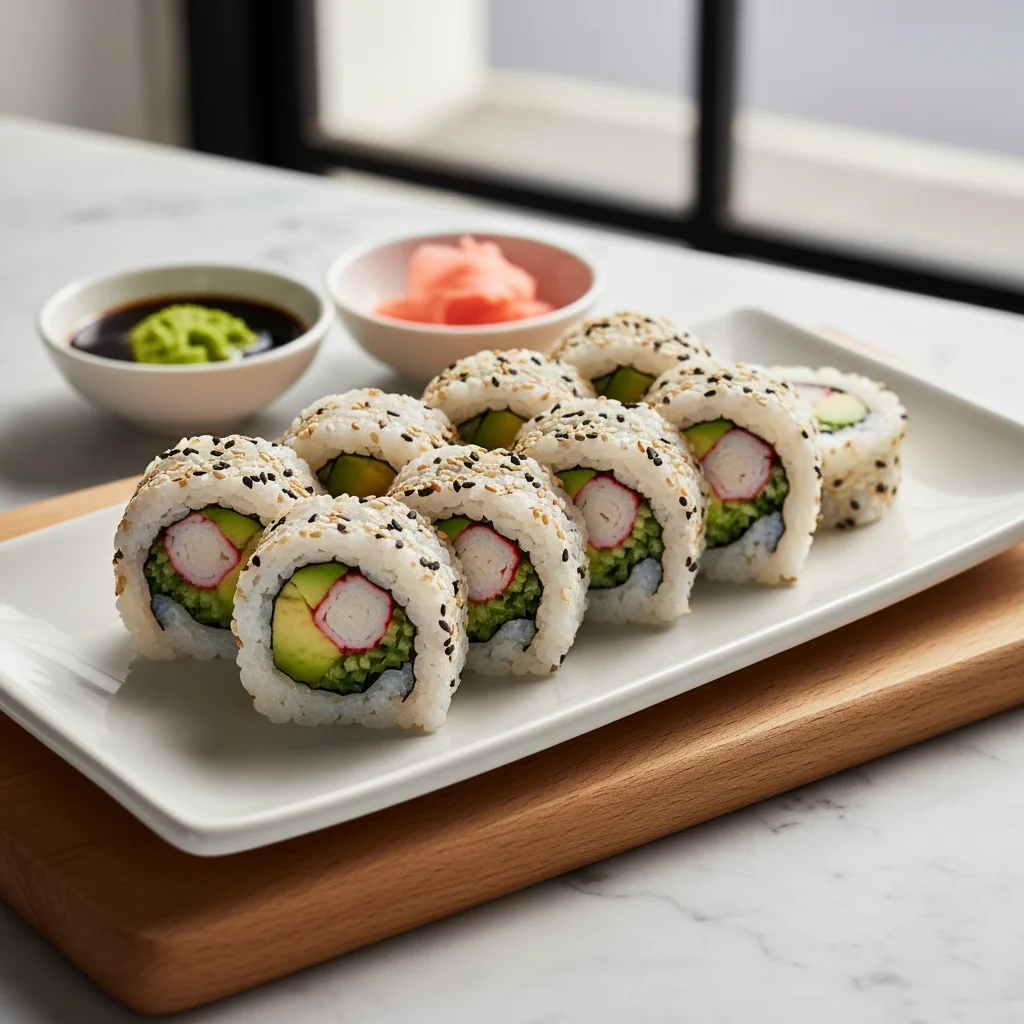
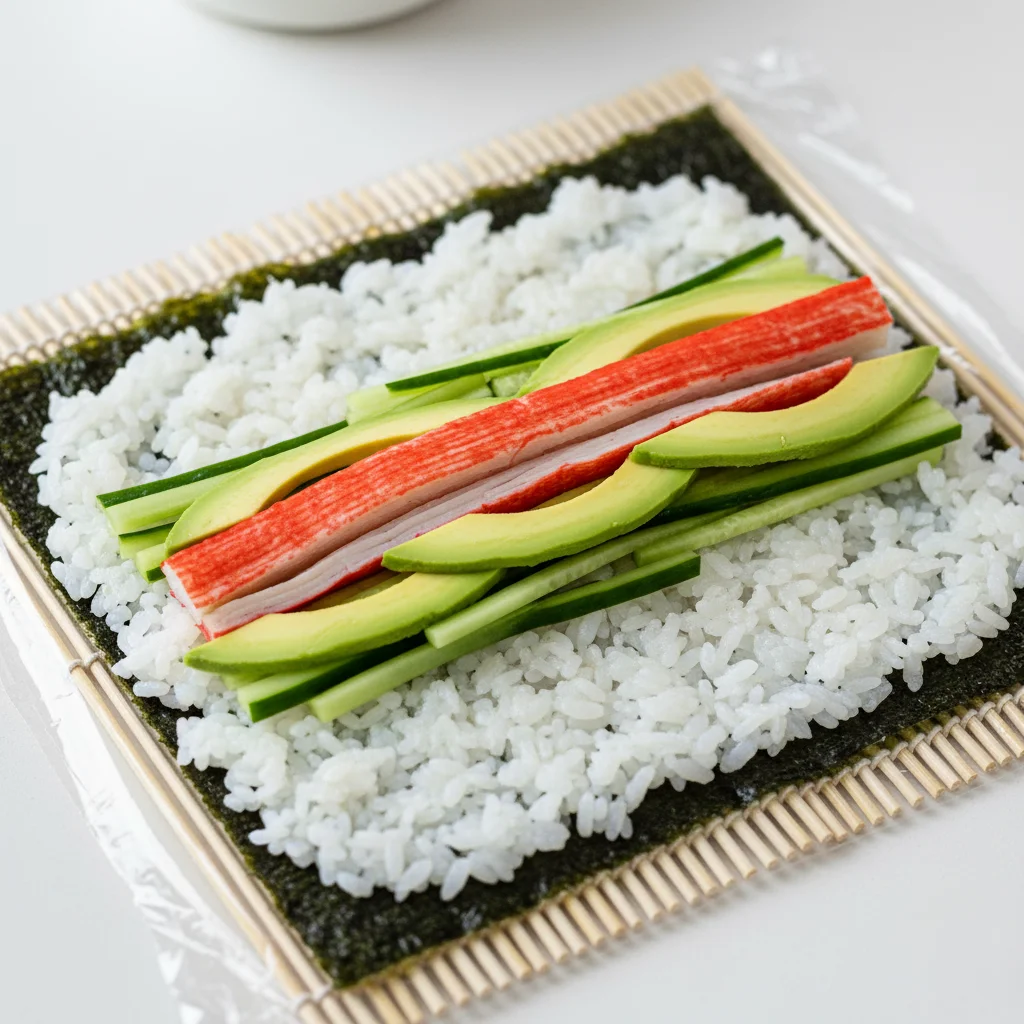
Assemble the California Roll
- Prepare your station. Wrap your bamboo mat in plastic wrap for easy cleanup. Have a small bowl of water ready for your hands.
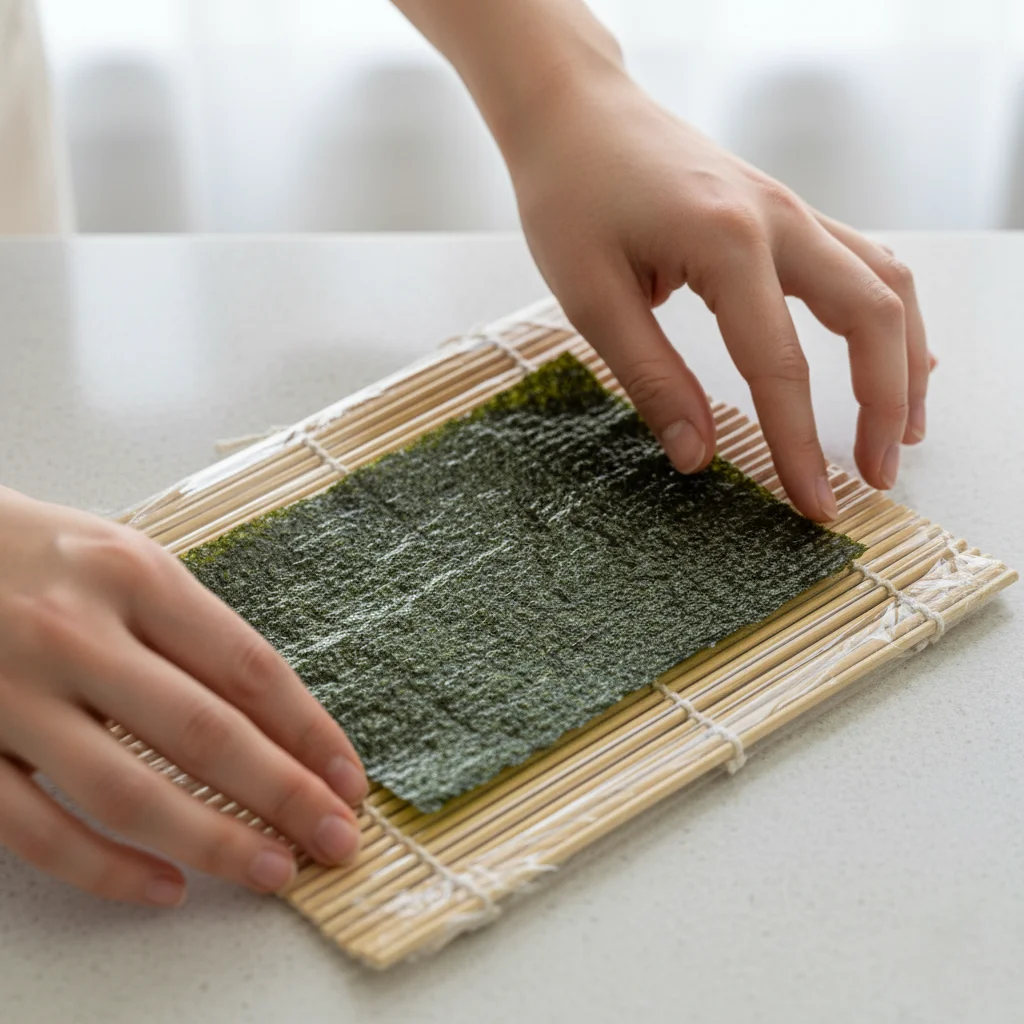
- Place the nori on the bamboo mat with the shiny side facing down.
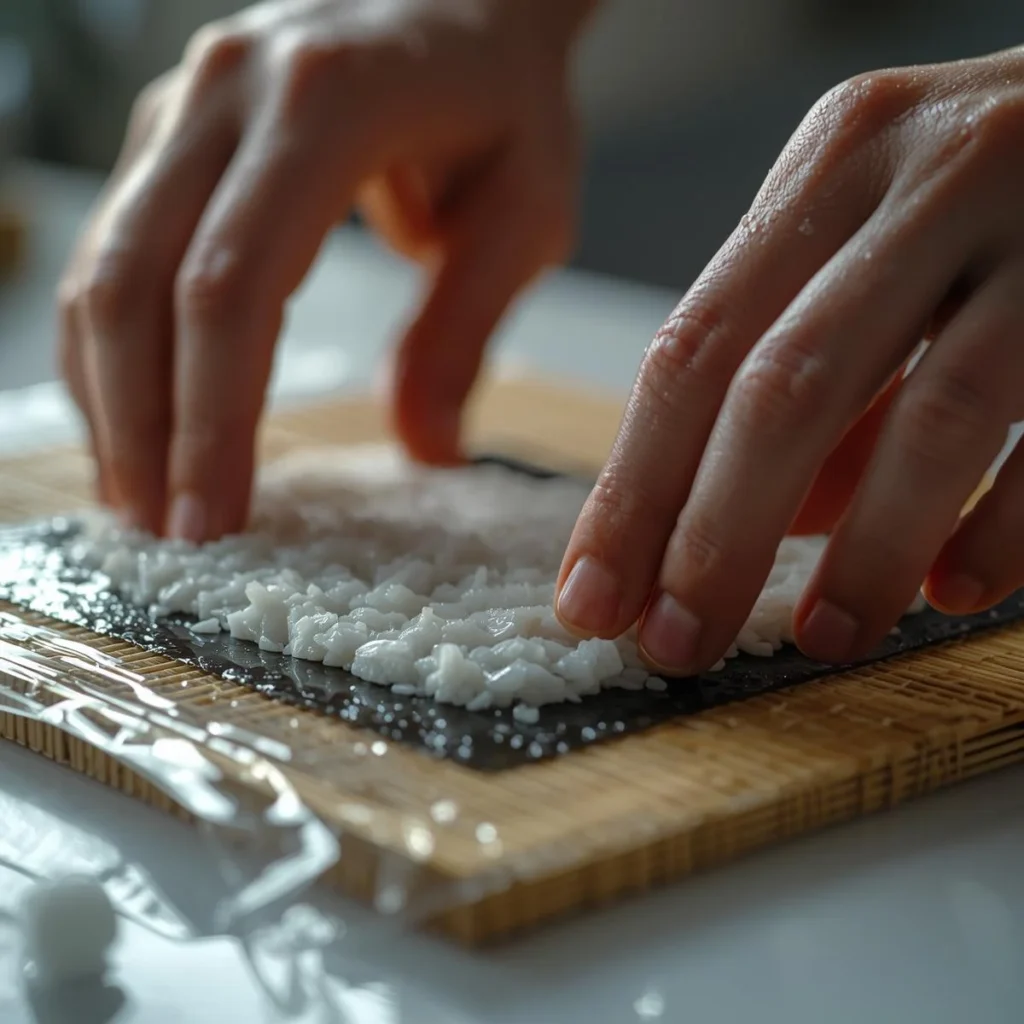
- Spread the rice. Wet your hands in the bowl of water to prevent sticking. Take a handful of sushi rice and spread a thin, even layer over the nori, leaving a 1-inch border at the top edge.
- Add the fillings. Arrange a line of imitation crab, cucumber strips, and avocado slices horizontally across the center of the rice. Do not overfill!
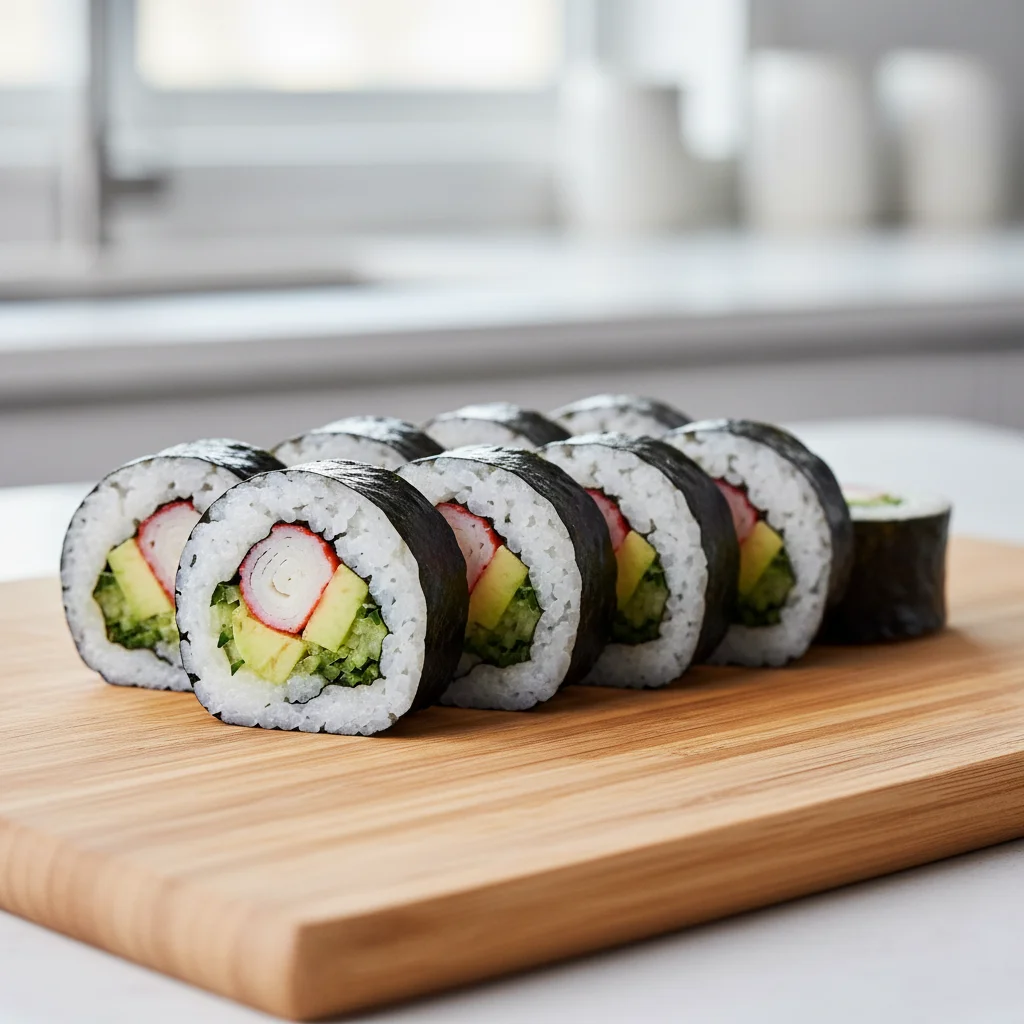
Roll and Slice
- Roll the sushi. Begin rolling the mat from the bottom edge, tucking the filling in tightly as you go. Use the mat to press and form a firm, round cylinder.
- Seal the roll. Lightly wet the top border of the nori with a little water to help it seal shut.
- Slice the roll. Place the finished roll on a cutting board. Using a very sharp and slightly wet knife, slice the roll into 6-8 equal pieces.
- Serve. Garnish with sesame seeds and serve immediately with soy sauce, wasabi, and pickled ginger.


Notes
FAQs
Q: What’s the difference between traditional Japanese sushi and American-style sushi?
A: From my experience, Japanese sushi is all about keeping things light and simple just rice, fish, and a little wasabi. American sushi, on the other hand, feels more creative and playful. Rolls like the California Roll or Philadelphia Roll often add cream cheese, sauces, or tempura for extra flavor. Both are delicious, but they give you totally different vibes.
Q: What are the best sushi knives for beginners?
A: Honestly, you don’t need a fancy knife when you’re starting out. A sharp chef’s knife works great I used that for my first rolls and it did the job. But if you want to level up, a Japanese yanagiba knife is a game-changer. It’s designed to slice sushi cleanly without squishing the rice or fillings.
Q: What is the easiest sushi for beginners?
A: The California Roll is hands down the best place to start with sushi recipes. It’s simple, forgiving, and doesn’t use raw fish just crab (or imitation crab), avocado, and cucumber. When I made it the first time, I was surprised at how restaurant-quality it looked with very little effort.
Q: Can I make sushi without seaweed?
A: Yep, and I’ve tried it a few times when I ran out of nori. Rice paper works surprisingly well, and thin cucumber slices make for a fresh, crunchy wrap. Soy wrappers are another option if you want something closer to the classic look without the seaweed flavor.
Q: Is sushi healthy?
A: For the most part, yes. Sushi recipes are naturally balanced protein from fish, fiber from veggies, and carbs from rice. The only thing I watch out for is sauces (spicy mayo, eel sauce) and fried fillings, since they add extra calories. If you stick to classic rolls or sashimi, it’s one of the cleanest meals you can make.
Q: Do I need a bamboo mat?
A: A bamboo mat definitely makes rolling easier I bought mine for just a couple of bucks and it’s still my go-to. But don’t stress if you don’t have one. I’ve rolled sushi using a kitchen towel wrapped in plastic, and it worked just fine. Over time, though, a bamboo mat is worth having if you enjoy making sushi regularly.
Ready to Roll? Your Homemade Sushi Journey Starts Here
There’s a reason sushi has fans all over the world — it’s one of those rare dishes that’s genuinely fun to make, beautiful to look at, and incredibly satisfying to eat. And now you know it doesn’t require a culinary degree, expensive equipment, or years of practice. Just good rice, a few fresh fillings, and a little patience.
Start with the California Roll. Get comfortable with the rice and the rolling technique. Then try our Easy Veggie Roll Sushi Recipe when you’re ready to mix things up — it’s the perfect next step and a great option for vegetarian guests. More sushi variations are coming to Viral Food Hacks soon, so keep this page bookmarked.
When you make your first Easy Sushi Recipe at home, I want to see it! Tag me on Instagram @viralfoodhacks706 — your rolls might just inspire someone else to give it a try. And if this guide helped you, save it to your Pinterest boards so you can find it again the next time sushi night hits.
Now grab that bamboo mat and get rolling. 🍣