

We’ve all been there. You bake a cake expecting a tropical paradise, but one bite reveals the truth: it’s dry and crumbly. If you are looking for the ultimate Moist Coconut Cake Recipe that actually delivers on its promise, you have found it.
It’s frustrating to waste good ingredients on a disappointing result. The good news? It’s usually not your fault—it’s the recipe. Most standard sponge recipes rely too much on milk and not enough on fat.
That is why at ViralFoodHacks, we tested multiple variations and found that swapping regular milk for canned coconut milk makes all the difference. This moist coconut cake recipe is designed to give you that soft, bakery-style texture without being complicated.
Why This Is the Best Moist Coconut Cake Recipe
It Actually Stays Moist Thanks to the high fat content from the coconut milk and sour cream, this cake retains moisture much better than standard butter cakes. It solves the biggest problem bakers face with typical moist coconut cake recipes—dry leftovers.

Authentic Flavor (No Fake Extract Taste) By using real coconut milk in the batter and the frosting, you get a deep, natural tropical flavor that doesn’t taste like suntan lotion.
Simple Pantry Ingredients You don’t need hard-to-find items. Aside from the canned coconut milk, you likely have everything else in your kitchen right now to make this easy moist coconut cake recipe.
The “Magic” Ingredients (The Science of Moisture)
How do we keep this cake soft for days without it becoming greasy? It’s all about the temperature and type of your ingredients. (Full amounts in the recipe card below!)

The Moisture Makers (The Real Secret)
- The Liquid: Canned Coconut Milk (Not Boxed) The Science: Don’t use the watery “drinking milk” from a carton. We need fat. According to the team at Serious Eats, using high-fat canned coconut milk is essential because the fat coats the flour proteins, preventing them from forming tough gluten networks. This guarantees a tender crumb.
- The Softener: Sour Cream The Science: This is our secret weapon against dry cake. Experts at King Arthur Baking rely on sour cream because its acidity helps “tenderize” the gluten strands in the batter. Result? A cake that is velvety and dense (in a good way), rather than airy and dry.
The Structure (The Fluffiness)
- The Binder: Egg Whites Only The Reason: We skip the yolks for this layer cake. Why? Egg yolks add yellow color and heaviness. By using only the whites (whipped gently), we incorporate air, making the cake look “Snowball White” and taste lighter. Important: Make sure they are at room temperature so they whip up properly!
The Flavor Boosters
- Coconut Extract + Vanilla: Real coconut flavor can be subtle. To get that bakery-style punch, we use a splash of Coconut Extract paired with Vanilla. This makes the flavor “pop” without needing tons of sugar.
Step-by-Step Instructions
Follow these simple steps to master this moist coconut cake recipe at home.
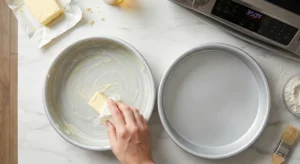
Step 1: Prep and Preheat Preheat your oven to 350°F (175°C). Grease two 9-inch cake pans and line the bottoms with parchment paper.
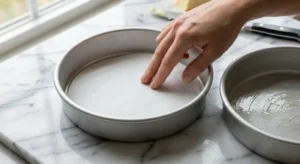
- Note: Don’t skip the paper—it ensures a perfect release every time.
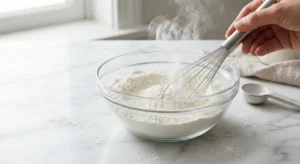
Step 2: Whisk the Dry Ingredients In a medium bowl, whisk together the flour, baking powder, baking soda, and salt. This removes lumps and aerates the flour for a lighter texture.
Step 3: Cream Butter and Sugar Beat the softened butter and sugar on high speed for 3-4 minutes. The mixture should look pale and fluffy. This step builds the air bubbles that make the cake rise.
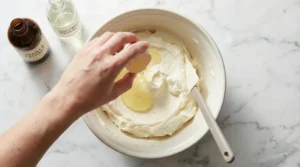
Step 4: Add Whites & Extracts Add the egg whites one at a time, followed by the vanilla and coconut extracts. Mix until just combined.
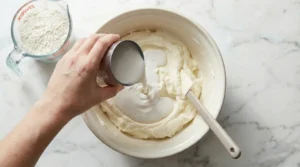
Step 5: The “Wet & Dry” Method Lower the mixer speed. Add 1/3 of the flour mixture, then 1/2 of the sour cream & coconut milk. Repeat until everything is added.
- Key Tip: Stop mixing as soon as the flour disappears. Overmixing is the enemy of any moist coconut cake recipe.
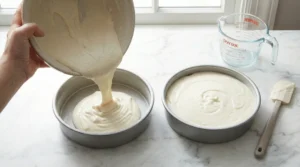
Step 6: Bake Pour batter into pans and bake for 24-28 minutes. A toothpick inserted in the center should come out with a few moist crumbs.
Pro Tips for Success
Here are a few secrets to ensure your moist coconut cake recipe turns out perfect every single time.
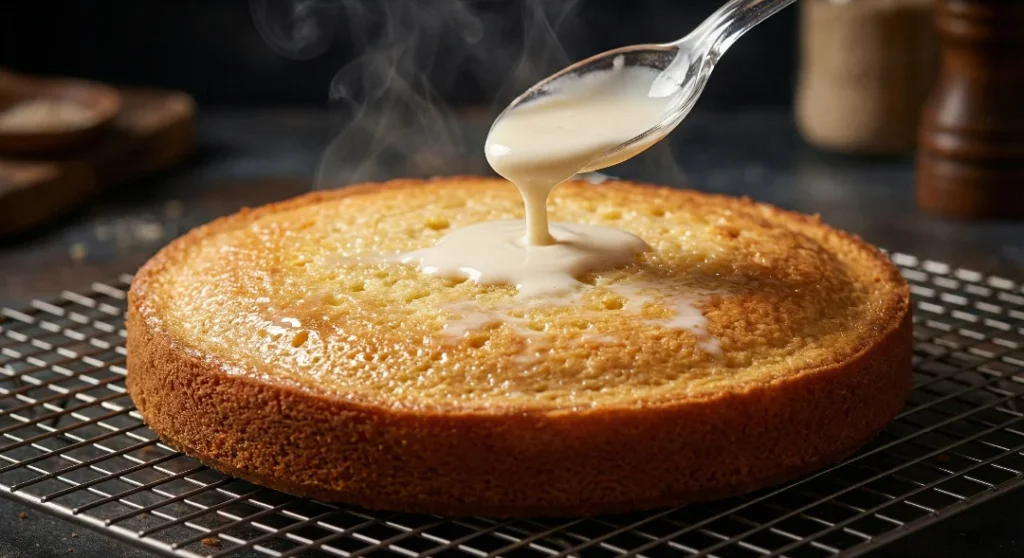
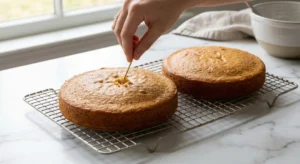
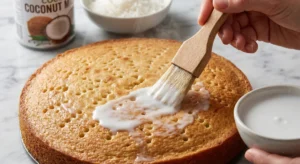
The “Moisture Trap” Hack As soon as the cakes come out of the oven (while hot), poke holes with a toothpick and brush the tops with 1-2 tablespoons of coconut milk. The warm sponge absorbs the liquid instantly, locking in moisture.
Fixing Runny Frosting If your Cream Cheese Frosting gets too soft while mixing, place the bowl in the fridge for 20 minutes. The butter will firm up, making it pipeable again.
Toast Your Coconut Safely Toasting coconut in the oven burns easily. Instead, use a dry non-stick skillet on the stove over medium heat. Stir constantly for 2-3 minutes until golden.
Variations & Serving Ideas
Want to customize your moist coconut cake recipe? Try these twists:
- 🍍 Piña Colada Twist: Add a thin layer of crushed pineapple (drained well) between the cake layers for a zesty kick.
- 🍋 Lemon Coconut: Rub 1 tablespoon of lemon zest into the sugar before creaming. The citrus oils brighten up the creamy coconut flavor.
- ☕ Perfect Pairing: Serve a slice with a hot coffee or our Thick Hot Chocolate. The bitterness of the coffee/cocoa balances the sweet frosting perfectly.

Storage & Freezing
In the Fridge: Since the frosting contains cream cheese, this cake must be refrigerated. According to safety guidelines cited by Southern Living, desserts with cream cheese should not sit out at room temperature for more than 2 hours. Store it in an airtight container for up to 5 days.
The “Cut Edge” Tip: If you’ve sliced the cake, press a piece of plastic wrap directly against the exposed cut side. This prevents the air from drying out the crumb inside the fridge.
Freezing: You can freeze individual slices! Place them on a tray to freeze until hard (about 1 hour), then wrap tightly in plastic wrap. Thaw in the fridge overnight when a craving strikes.

The Most Decadent Moist Coconut Cake Recipe (Velvety Soft!)
Ingredients
Equipment
Method
- Preheat: Preheat your oven to 350°F (175°C). Grease two 9-inch round cake pans generously with butter.

- Line: Place a round piece of parchment paper at the bottom of each pan. This guarantees your layers will pop out perfectly without breaking.
- Whisk Dry: In a medium bowl, whisk together the flour, baking powder, baking soda, and salt. This aerates the flour for a lighter crumb.
- Cream: In a large bowl (or stand mixer), beat the softened butter and sugar on High Speed for 3-4 minutes. The mixture should look pale white and fluffy. This step forces air into the batter.

- Add Wets: Lower the speed. Add the egg whites one at a time, mixing well. Add the sour cream, vanilla extract, and coconut extract. Mix until just combined.

- Combine: Turn the mixer to Low Speed. Add 1/3 of the flour mixture, then 1/2 of the canned coconut milk. Repeat (Flour > Milk > Flour).
- Don’t Overmix: Stop mixing the second you see the white flour streaks disappear. Overmixing creates gluten, which leads to a hard cake.
- Bake: Pour the batter evenly into the two pans. Bake for 24-28 minutes.
- Test: Insert a toothpick in the center. It should come out with a few moist crumbs attached (not wet batter).
- The Hack: Remove from the oven. While the cakes are still hot, gently poke holes in the top with a toothpick. Brush the Reserved Coconut Milk over the warm cakes. This locks in moisture instantly. Let cool completely in the pans.
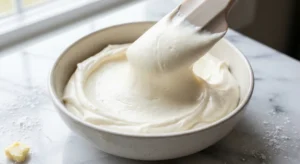
- Whip Frosting: Beat the butter and cold cream cheese until smooth (2 mins). Slowly add powdered sugar and extracts. If it’s too stiff, add 1 tbsp coconut milk.
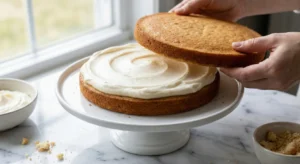
- Snowball Effect: Place one layer on your stand. Spread a thick layer of frosting. Top with the second layer. Frost the top and sides completely.
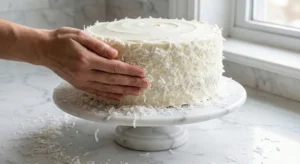
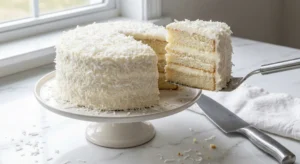
- Decorate: Press the sweetened shredded coconut all over the cake using your hands to create the fluffy “Snowball” look. Refrigerate for 20 minutes before slicing.
- Serve: Slice into generous wedges. For the cleanest cuts, wipe your knife with a warm towel between slices. Serve slightly chilled or at room temperature and enjoy your masterpiece!
Notes
- Coconut Milk Rule: Do NOT use the drinking coconut milk found in the dairy aisle. You must use Full-Fat Canned Coconut Milk (usually in the Asian section) for the fat content that keeps the cake moist.
- Room Temp is Key: Ensure your butter, sour cream, and eggs are at room temperature. If they are cold, the batter will curdle.
- Storage: Store leftovers in the fridge for up to 5 days. Press plastic wrap against the cut section to prevent it from drying out.
- Sour Cream Sub: If you don’t have sour cream, use full-fat plain Greek Yogurt (1:1 ratio).
Frequently Asked Questions
Can I use sweetened shredded coconut in the batter?
It is better to stick to unsweetened for the batter to control the sugar level. If you only have sweetened, reduce the granulated sugar in the recipe by ¼ cup.
I don’t have Sour Cream. What can I use?
Full-fat plain Greek Yogurt works as a perfect 1:1 substitute. Avoid regular milk or low-fat yogurt, as they are too watery.
Why did my cake sink in the middle?
This often happens if the oven door is opened too early (letting cold air in) or if the eggs were over-beaten, causing the batter to rise too fast and then collapse.
Can I make the cake layers ahead of time?
Absolutely. In fact, chilled layers are easier to frost! Bake the layers, let them cool completely, wrap them in plastic wrap, and store them in the fridge overnight. Assemble the next day

Final Thoughts
Making a bakery-quality coconut cake doesn’t have to be a gamble. By following this moist coconut cake recipe, you are guaranteed a soft, decadent dessert that everyone will love.
Give this recipe a try for your next celebration (or just a Tuesday treat).
Tried this recipe? I’d love to see how it turned out! Tag us on Instagram @viralfoodhacks so we can share your creation.
Telefon Mobil Apple Iphone 17 Pro Max Reviews Iphone 17 Air Specifications Release Date Iphone 17 Release Date Apple Rumor 2025 What Is The Price Of The Iphone Air Iphone 17 Pro Max What New Features What Case To Get For Iphone 17 Pro Apple Iphone 17 News Today September 2025 Reuters
Если собираетесь поездку в Париж, точно посетите территории как руанский собор и собор Парижской Богоматери (Нотр-Дам де Пари), чтобы уловить историю и архитектуру города. Для прогулок прекрасно подойдут булонский лес, Люксембургский сад и площадь Согласия. Не обойдите вниманием взглянуть на Вандомскую колонну, эйфелеву башню и авеню Монтень — это образец парижских достопримечательностей.
Для энтузиастов искусства и истории призываю заглянуть в музей Орсе и центр Помпиду, а также открыть для себя личностью Коко Шанель и местами, связанными с ней, например, кафе де Флор. Если нуждаетесь в больше информации и ценные советы по району Монпарнас и другим округам Парижа, смотрите здесь [url=https://parisgid5.ru]булонский лес[/url] . Там же увидите данные про музеи, катакомбы Парижа и блошиные рынки — всё то, что даст возможность лучше спланировать свои прогулки.
Ремонт бытовой техники является незаменимым в условиях текущей экономики потому что он помогает избежать ненужных трат . Кроме того, ремонт бытовой техники также способствует уменьшению количества отходов потому что он способствует повторному использованию деталей. Таким образом, ремонт бытовой техники является не только финансово эффективным, но и ориентированным на сохранение природы.
Стоит отметить, что ремонт бытовой техники предполагает наличие определенных умений и опыта . Большинство людей не имеют такого опыта и умений , поэтому они часто ищут помощи у специалистов по ремонту бытовой техники . Профессиональные специалисты могут эффективно и оперативно устранить любые неисправности .
## Раздел 2: Типы ремонта бытовой техники
Существует множество типов ремонта бытовой техники, в зависимости от вида неисправности . Один из наиболее распространенных видов ремонта – это восстановление функциональности изношенных частей. Также часто выполняется инспекция и корректировка настроек. Кроме того, ремонт бытовой техники может включать в себя и другие виды услуг.
Инспекция является первоочередным этапом в ремонте бытовой техники потому что она дает возможность выявить источник проблемы . После проверки работоспособности ремонтник может начать устранять неисправность . Ремонт бытовой техники может быть произведен как в ремонтной мастерской, так и на месте неисправности.
## Раздел 3: Преимущества ремонта бытовой техники
Ремонт бытовой техники обладает несколькими достоинствами . Одним из главных достоинств является возможность сэкономить деньги потому что ремонт обходится дешевле, чем покупка новой техники . Помимо этого, ремонт бытовой техники также дает возможность сэкономить время потому что ремонт можно произвести в максимально короткий период.
Также ремонт бытовой техники помогает сохранить природные ресурсы потому что он способствует повторному использованию деталей. Более того, ремонт бытовой техники также продлевает срок эксплуатации техники .
## Раздел 4: Заключение и перспективы
Ремонт бытовой техники является востребованной и развитой сферой . Он дает не только возможность сэкономить деньги, но и оказать положительное влияние на природу . Таким образом, ремонт бытовой техники является не только финансово эффективным, но и ориентированным на сохранение природы.
В будущем ремонт бытовой техники будет только набирать популярность потому что все больше людей начинают понимать важность сохранения ресурсов . Таким образом, ремонтники бытовой техники будут иметь хорошие перспективы. Будущее ремонта бытовой техники светлое и перспективное .
ремонт бытовой техники рядом [url=http://www.servisnyj-centr-ekaterinburg.ru]https://servisnyj-centr-ekaterinburg.ru/[/url]
ремонт бытовой техники в екб [url=https://remont-tehniki-na-domu-ekaterinburg.ru/]https://remont-tehniki-na-domu-ekaterinburg.ru/[/url]