

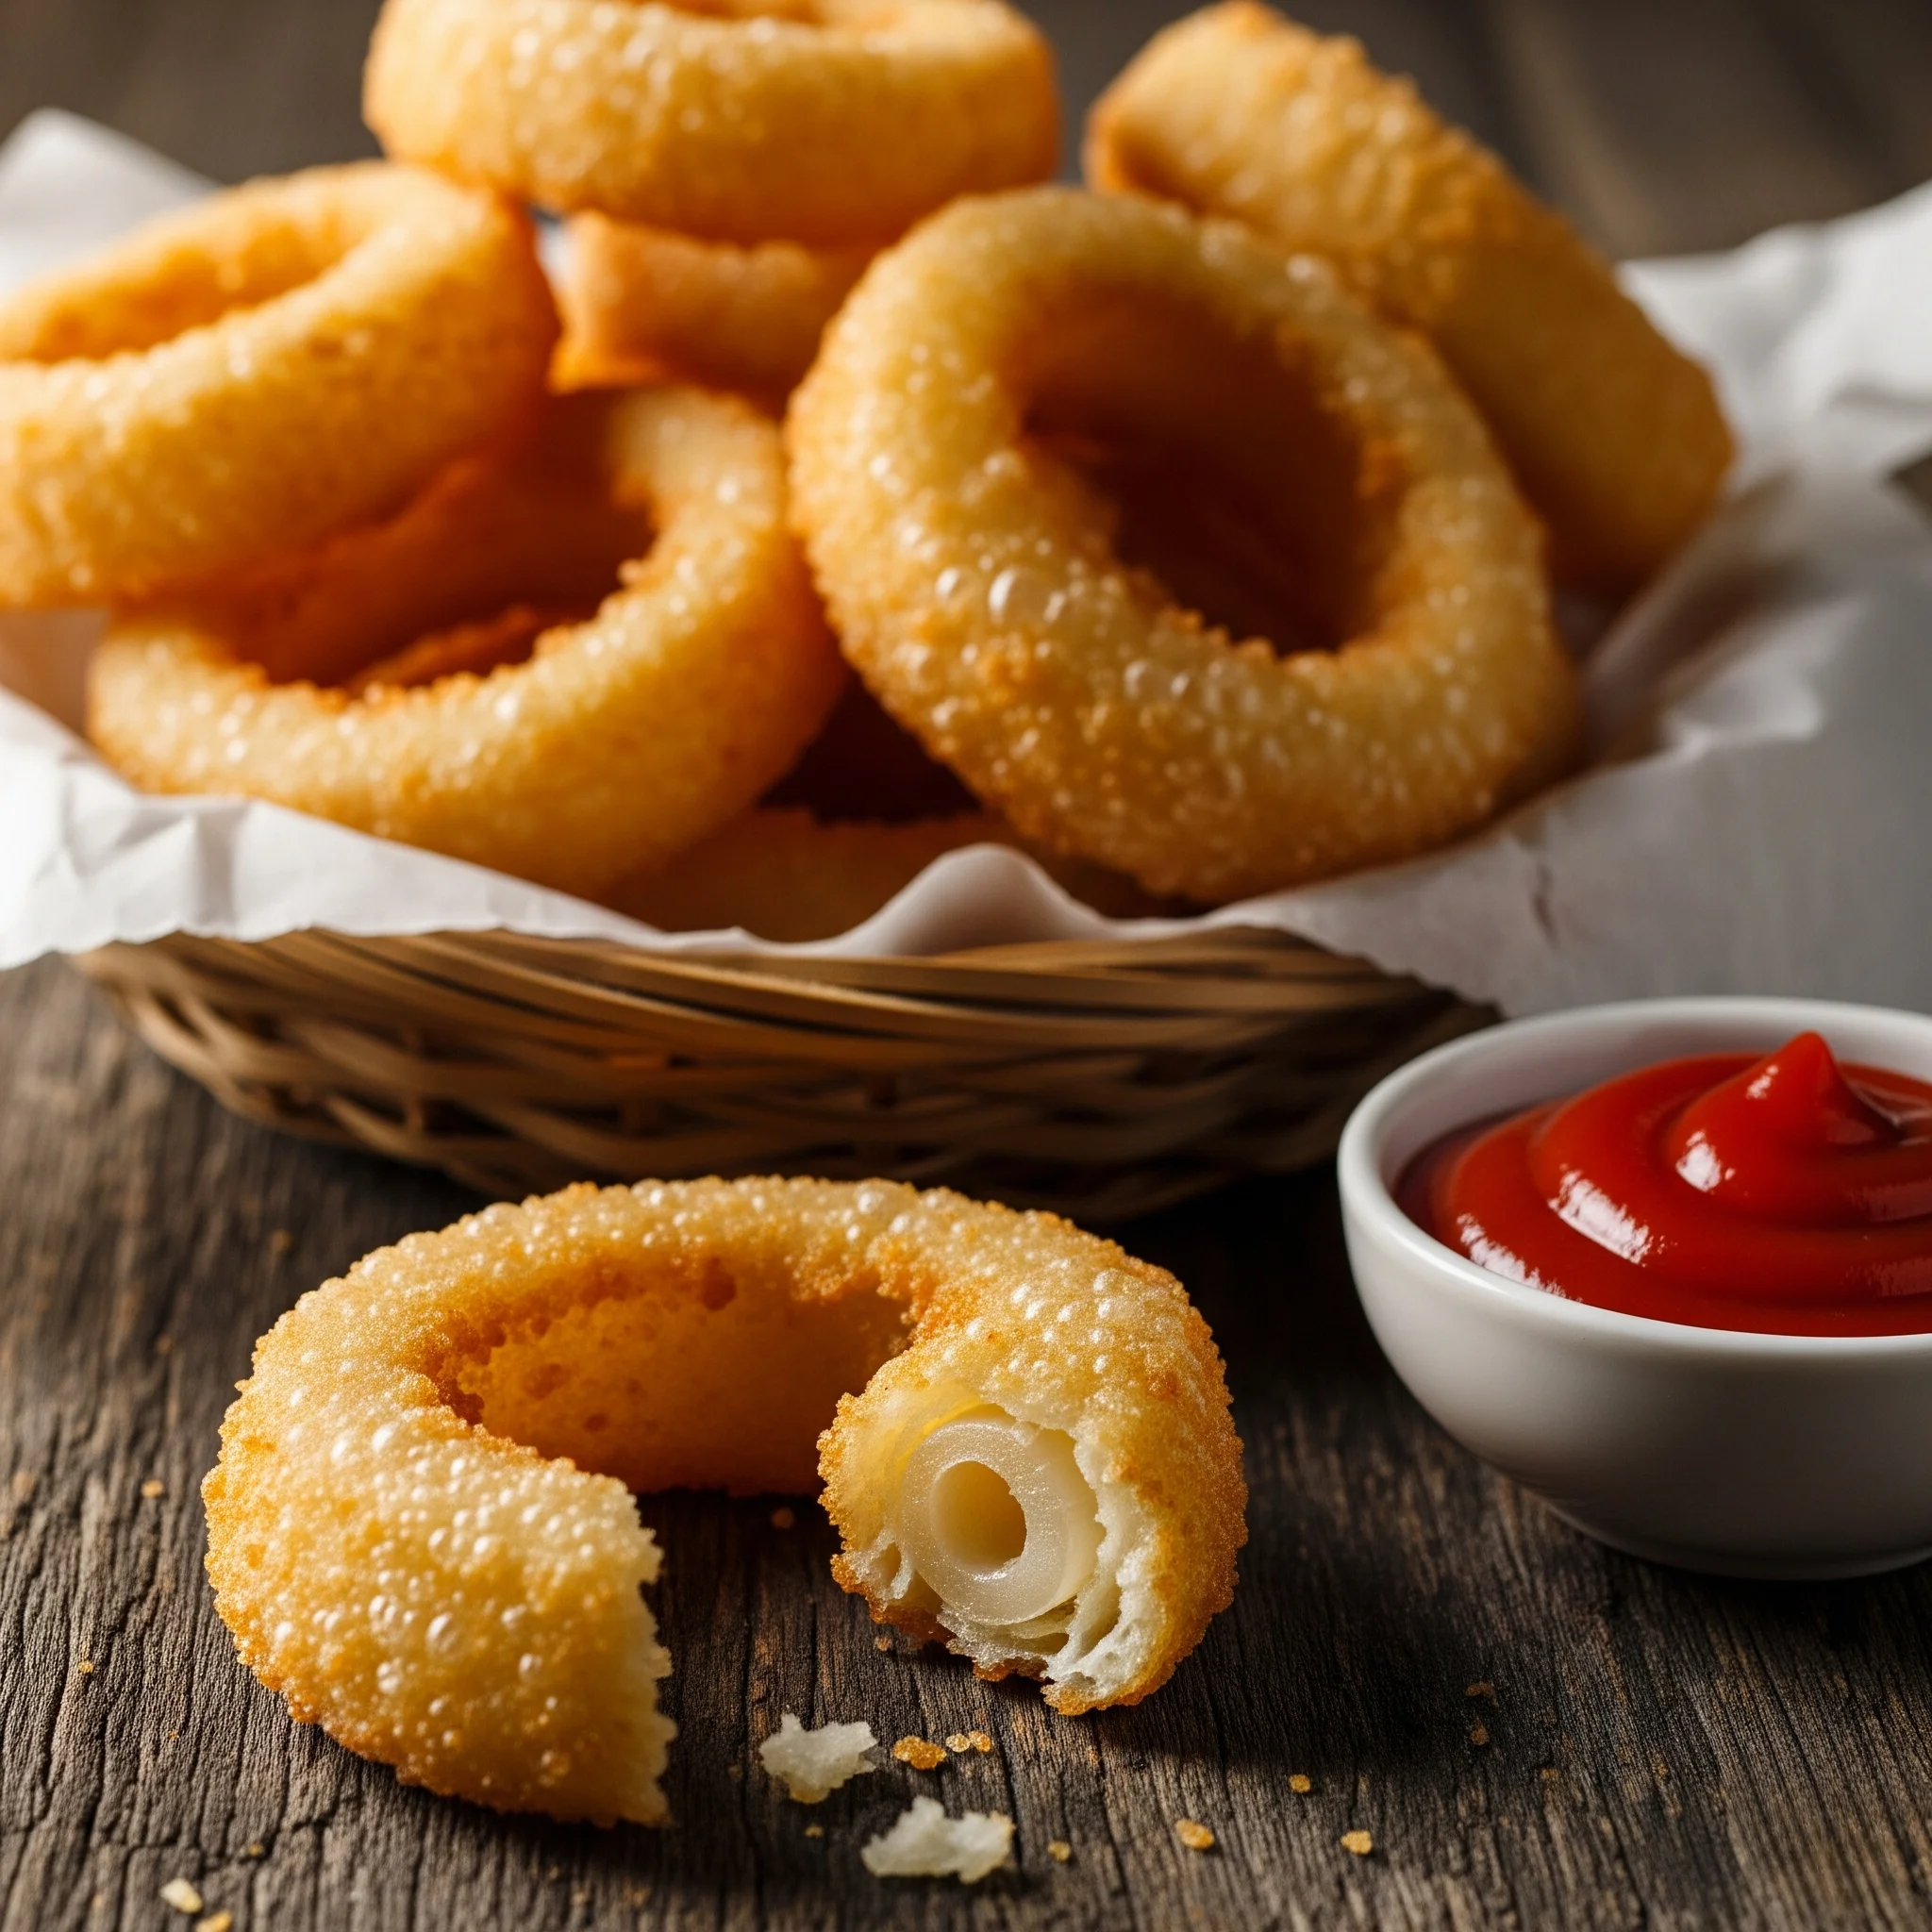
This Crispy Onion Rings recipe is honestly the result of years of kitchen fails and soggy disasters and now it’s the easiest way to make restaurant-style Crispy Onion Rings at home. I always wanted to recreate that restaurant-style onion ring at home you know, the kind that gives a loud crunch with every bite. But no matter what I tried, the batter would slide off, the rings would get greasy, and within minutes they’d lose that crunch. Super frustrating, right?
After countless experiments (and a lot of onions), I finally discovered the secret. And let me tell you this method actually works. It’s foolproof, crispy every single time, and better than anything I’ve ordered at a restaurant. Today, I’m sharing all my little hacks with you, so you can skip the trial-and-error and go straight to the good part: perfectly golden, crunchy onion rings at home.
So, if you’re ready to say goodbye to soggy onion rings and hello to a plate full of crispy, golden perfection, let’s get started! These crispy onion rings are the kind of comfort food you’ll want again and again!
What Exactly Are Onion Rings?
Crispy Onion rings are one of the most loved appetizers in the world source: Wikipedia, served in diners, parties, and restaurants everywhere. They’re made by slicing an onion into rihe result? A sweet, tender onion inside with a crispy, crunchy coating on the outside a match made in snack heaven and one of the best fried snacks you can ever make at home.
Why These Crispy Onion Rings Are Better Than Takeout
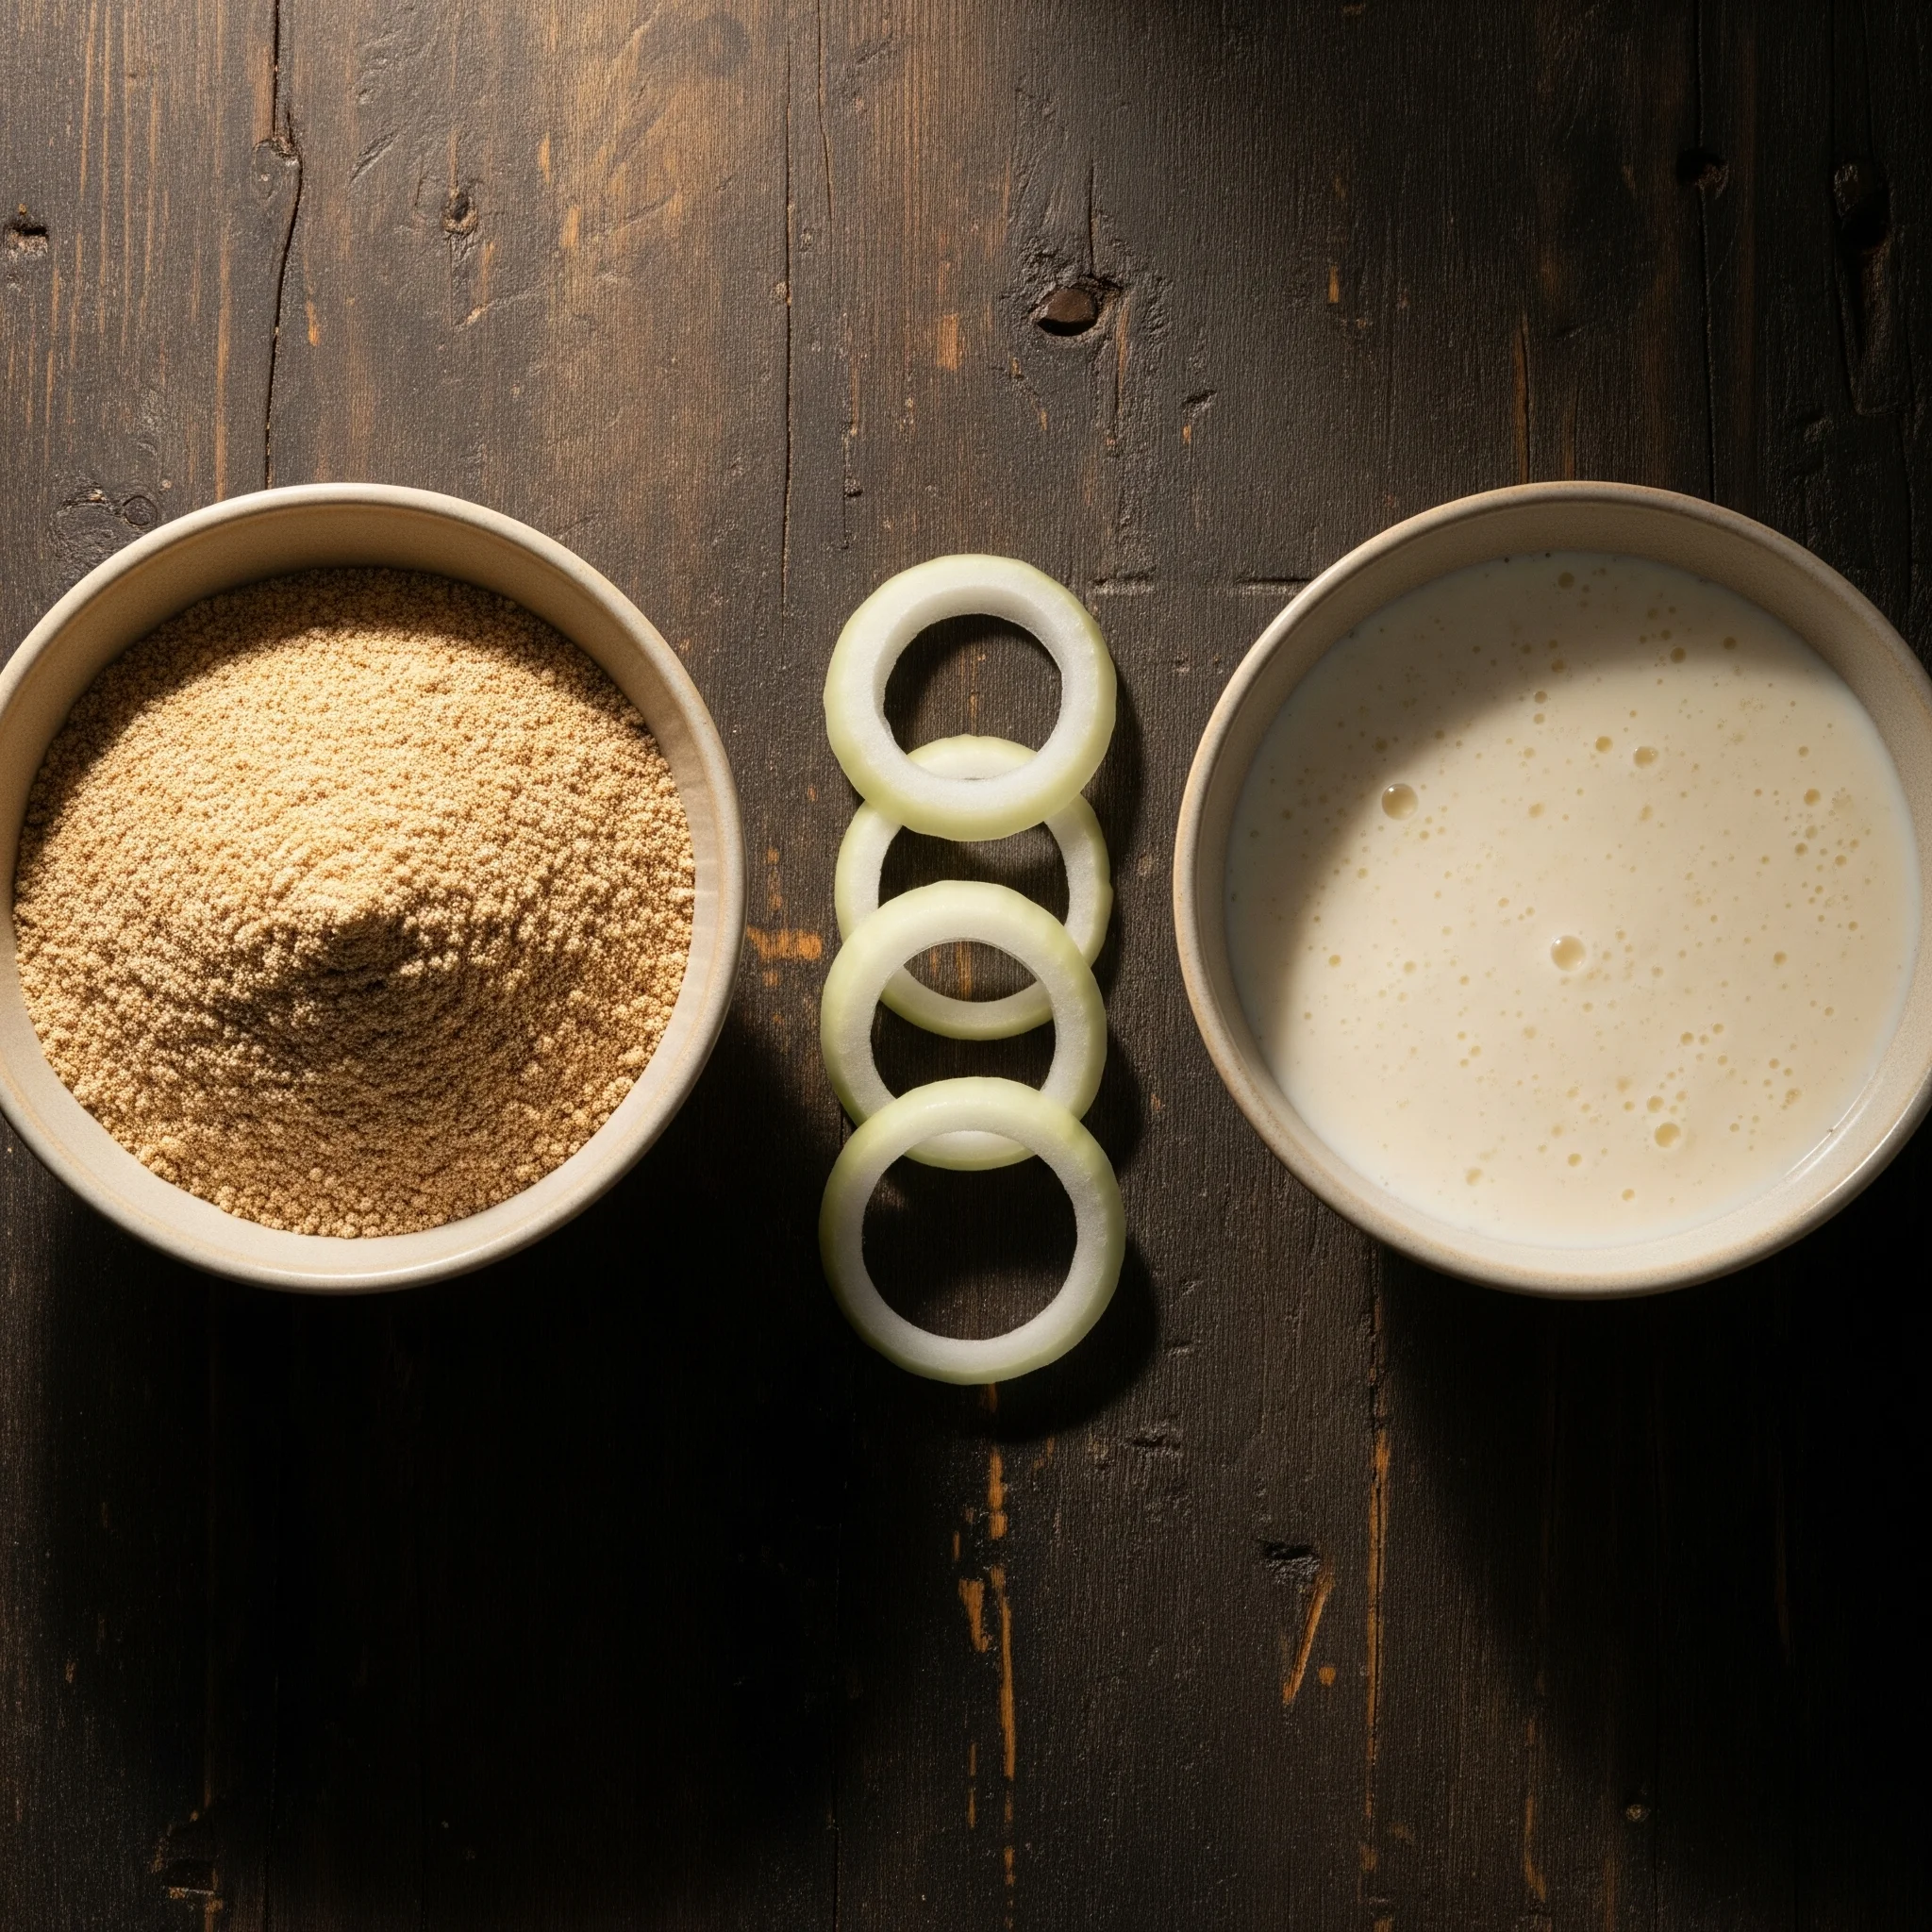
The Batter Trick: The magic is in the batter. By combining flour and cornstarch, you get a lighter, crispier texture. And when you mix it with super cold sparkling water, the batter puffs up beautifully in hot oil.
Double Coating Hack: First dredge the onion rings in flour before dipping into the batter. This little step ensures the coating actually sticks and doesn’t slide off while frying.
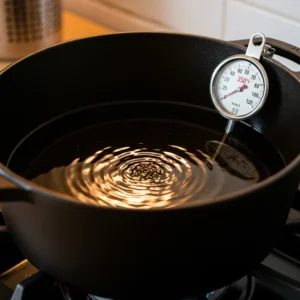
Perfect Oil Temperature: Frying at just the right heat makes all the difference. Too cold, and your rings will be greasy. Too hot, and they’ll burn. Keep it steady, and you’ll have golden onion rings every time.
Follow these simple hacks and you’ll enjoy the best Crispy Onion Rings every single time
Easy Crispy Onion Rings Recipe (Perfectly Golden & Crunchy
Ingredients
Equipment
Method
- Prep the Onions: Slice the onion into ½-inch thick rounds. Carefully separate the rounds into individual rings.

- Prep the Onions: Slice the onion into ½-inch thick rounds. Carefully separate the rounds into individual rings.

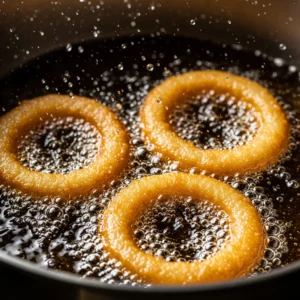
- Heat the Oil: In a heavy-bottomed pot, heat about 2 inches of oil over medium-high heat until it reaches 350°F / 175°C.
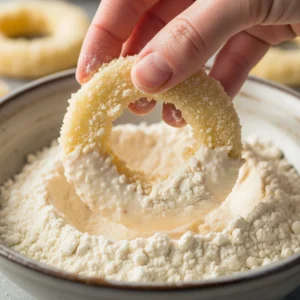
- Coat the Rings (The "Double Dip" Hack): Working one ring at a time, first dredge it in the flour mixture, then dip it completely in the buttermilk, and finally dredge it back into the flour mixture for a thick coating.
- Fry Until Golden: Carefully place 3-4 coated rings into the hot oil. Do not overcrowd the pan. Fry for 2-3 minutes per side, until they are deep golden brown and crispy.
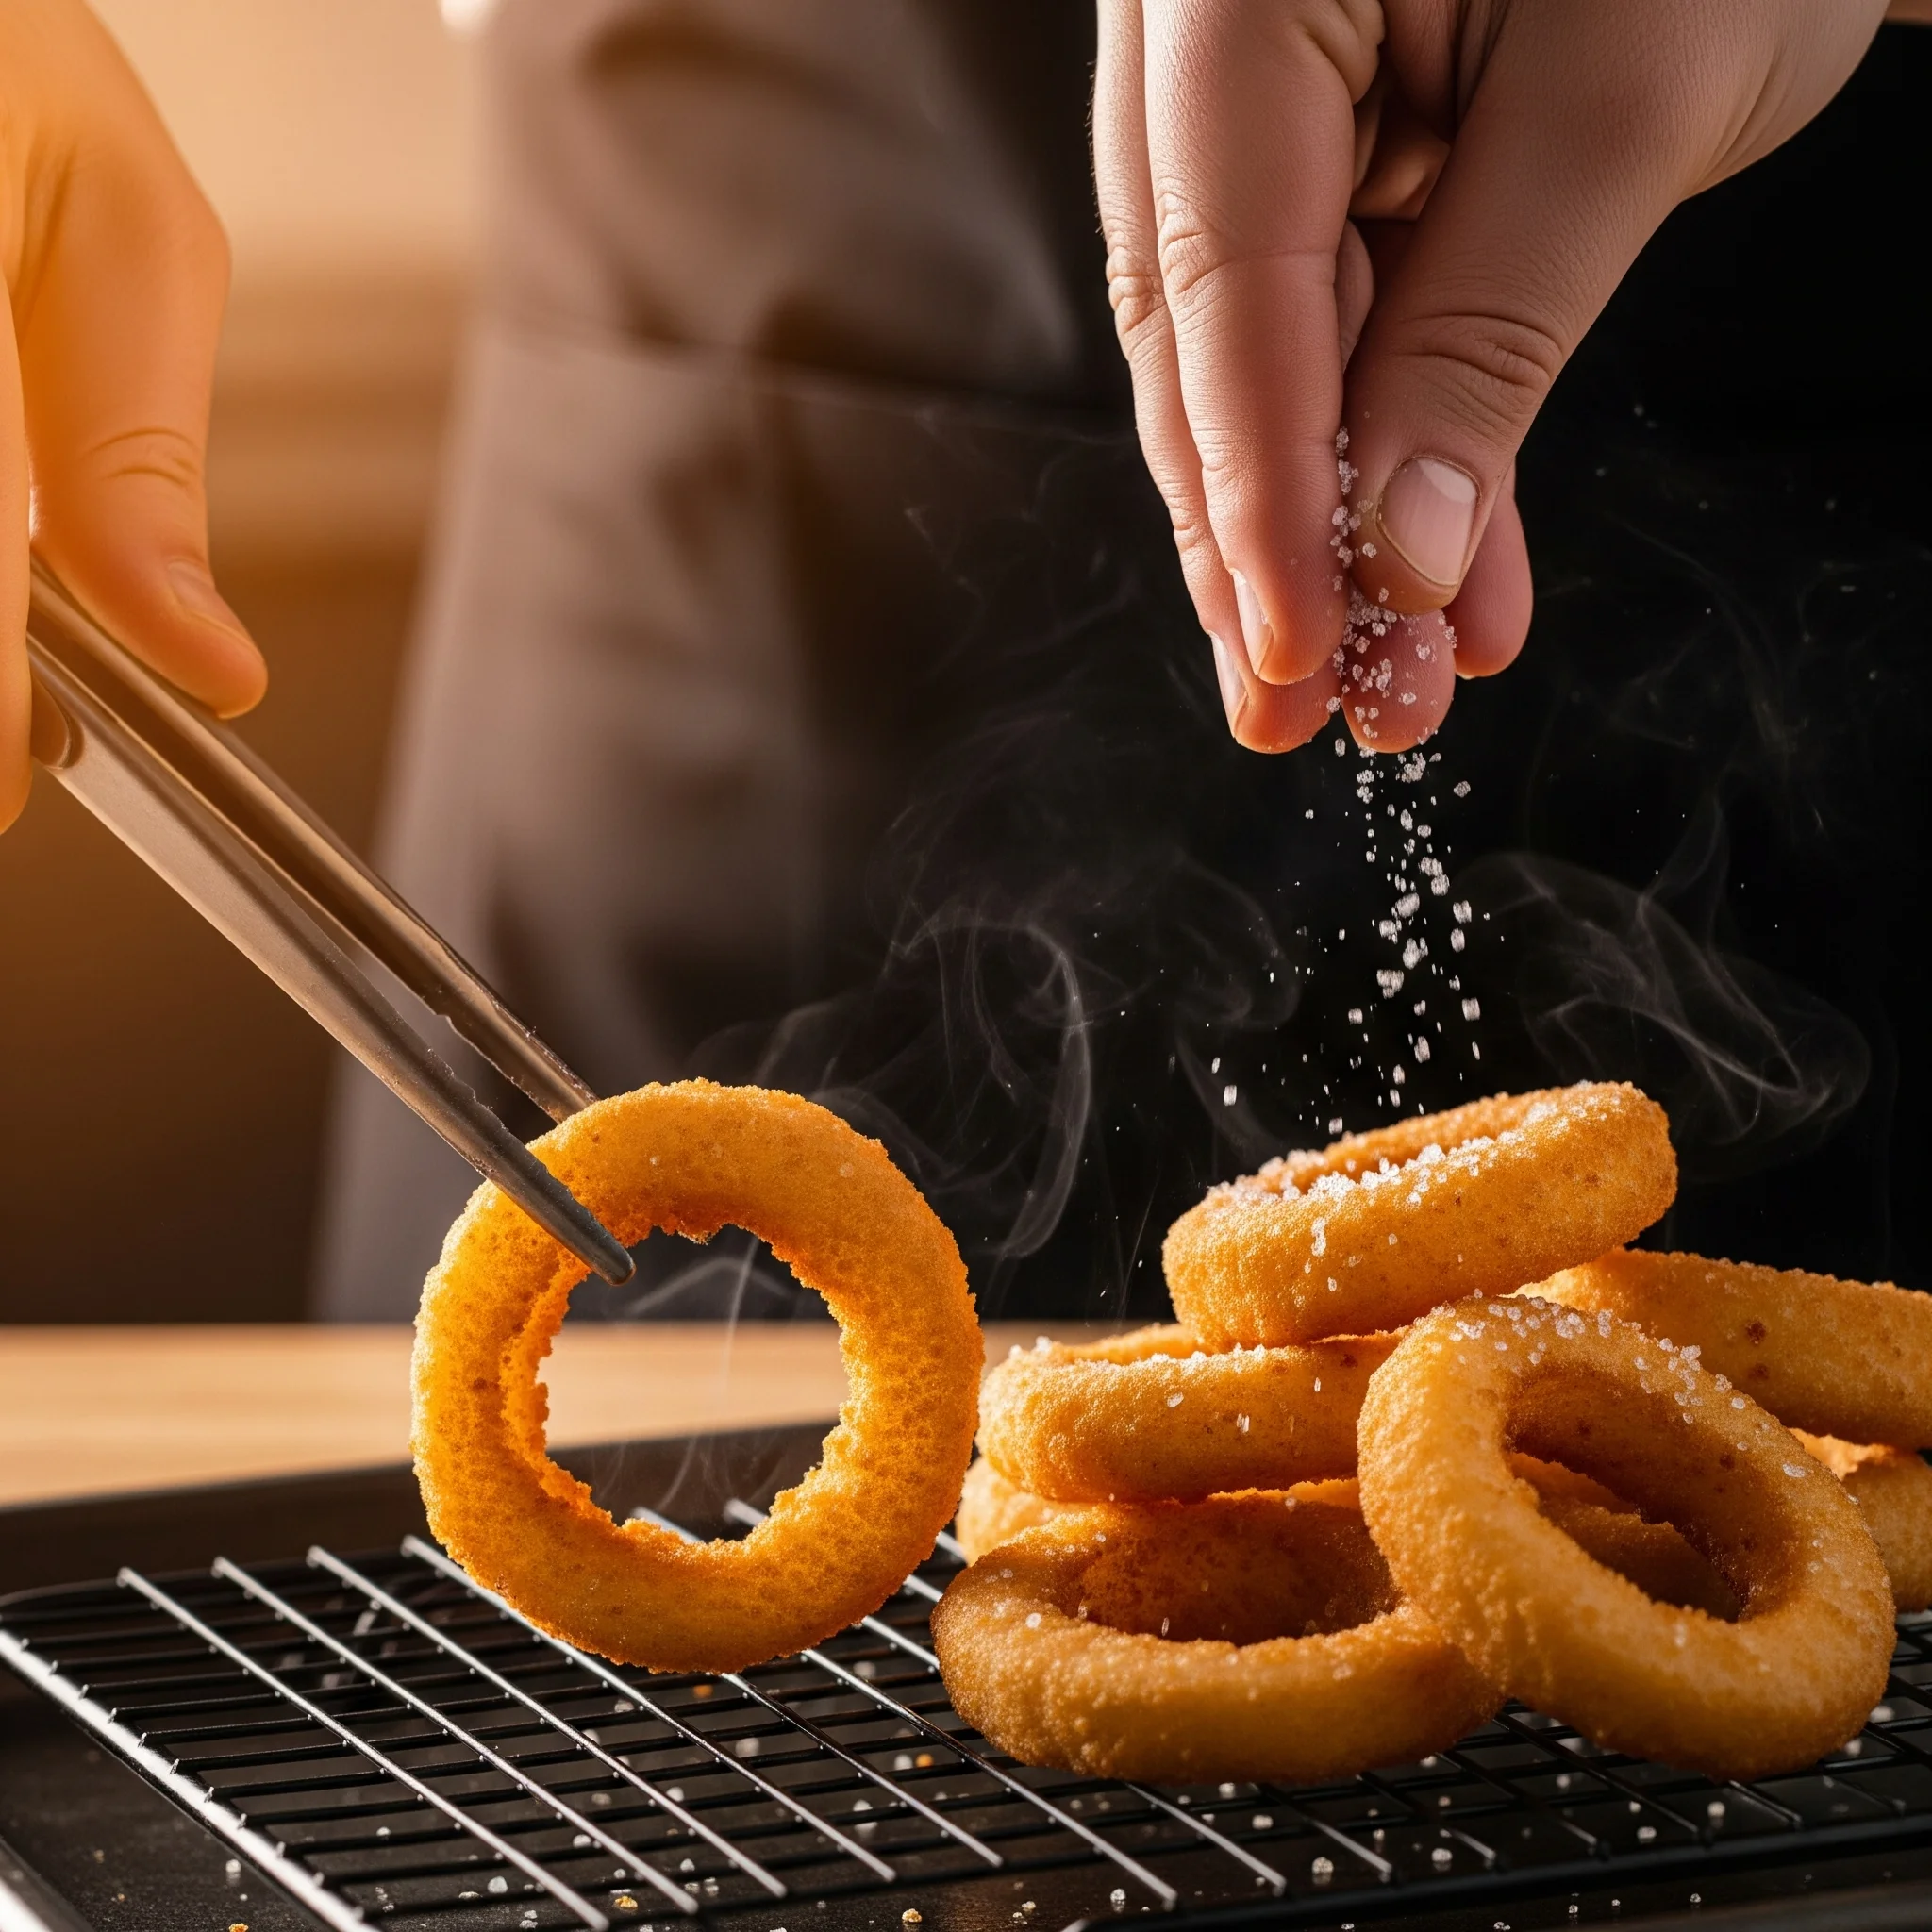
- Drain and Salt: Using tongs, remove the onion rings from the oil and place them on a wire rack to drain. Immediately sprinkle with salt while they are still hot. Serve immediately.

Notes
- The Ultimate Crispy Hack: The secret to a shatteringly crisp coating is the combination of cornstarch in the flour and using ice-cold sparkling water or beer for the batter. The cold liquid and the bubbles create a light, airy batter that fries up incredibly crunchy.
- Make the Batter Stick: The “double dip” method is key. Dredging the onion rings in the dry flour mixture before dipping them in the wet batter and again after gives the batter something to grip onto, so it won’t slide off in the fryer.
- No Buttermilk? No Problem! If you don’t have buttermilk, you can easily make a substitute. Simply add one tablespoon of lemon juice or white vinegar to one cup of regular milk and let it sit for 5 minutes before using.
- Keep Them Crispy: To keep a large batch warm and crispy while you fry, you can place the finished onion rings on a wire rack in an oven preheated to 200°F (95°C).
- Storing & Reheating: Onion rings are best enjoyed fresh. To store leftovers, place them in an airtight container in the fridge. To bring back the crunch, reheat them in an air fryer or a hot oven at 375°F (190°C) for 5-7 minutes. Never use a microwave.
Storing & Reheating Tips
Got leftovers? Don’t ruin them in the microwave that’s the fastest way to lose the crunch.
- To Store: Let them cool completely, then keep in an airtight container in the fridge for up to 2 days.
- To Reheat: Pop these Crispy Onion Rings in the air fryer at 375°F (190°C) for 4–5 minutes or in the oven at 400°F (200°C) for about 7 minutes. They’ll come back just as crunchy as fresh!
Frequently Asked Questions
Q: How do you keep onion rings from getting soggy?
A: Always fry at the right temperature (around 350°F / 175°C) and place them on a wire rack instead of paper towels. This keeps air circulating so they don’t steam and turn soft.
Q: Can I bake onion rings instead of frying?
A: Yes! For a healthier twist, bake them at 425°F (220°C) for 15–20 minutes. Spray lightly with oil and flip halfway. They won’t be as crispy as fried, but still delicious.
Q: What’s the best oil for frying onion rings?
A: A neutral oil with a high smoke point like canola, peanut, or vegetable oil works perfectly.
Q: Can I make Air Fryer Onion Rings?
A: Absolutely! Coat your rings, spray them with oil, and cook at 375°F (190°C) for 10–12 minutes. Flip halfway through, and you’ll get golden, crunchy Crispy Onion Rings without deep frying.
According to Healthline, onions are also packed with antioxidants, so you get flavor with benefits
More Crispy Recipes You’ll Love
Easy Crispy Chicken Samosas; The ultimate party food starter
Crispy Chicken Burger; Juicy on the inside, crunchy on the outside.
Did you make this Crispy Onion Rings recipe? Let us know how it went! Please leave a comment and a star rating below. You can also share your masterpiece with us on Instagram @viralfoodhacks with the hashtag #viralfoodhacks. We love seeing your creations!
browse this bazaar site – Spent a moment on the site and the content was easy to grasp.