

If you are struggling with limited oven space this holiday season, these stovetop honey glazed carrots are the perfect solution. Let’s be honest: The biggest source of stress on Easter morning is trying to cook a large main course while finding room for your side dishes. It often feels like playing a game of Tetris in your kitchen.
Add in the tedious chore of standing at the sink peeling a mountain of carrots, and it is enough to make any host panic. That is exactly why I rely on this 10-minute, oven-free method. Say goodbye to the peeler and hello to the easiest holiday side dish you will make.
Why This Stovetop Method Works
These stovetop honey glazed carrots are a lifesaver for busy hosts. By using a skillet on the stove, you free up your oven space completely. Even better, we use pre-washed baby carrots, which means zero peeling and zero prep time. From the fridge to the table, it takes exactly 10 minutes to create a glossy, delicious side dish.
The Ingredients You Will Need
You only need a few simple pantry staples to make this recipe work. Here is what to grab:

- Baby Carrots: I use pre-washed baby carrots because they require zero prep and eliminate the need for peeling. If you prefer, you can use regular whole orange or rainbow carrots—just peel and slice them diagonally into even, 2-inch pieces.
- Honey: You can use honey or maple syrup, though I more often use honey. Any variety of honey works, including clover, wildflower, etc.
- Butter: Butter (or ghee) gives the carrots that glossy, rich finish and helps the glaze thicken.
- Salt: A small pinch of kosher salt balances out the sweetness of the honey and enhances the earthy flavor of the carrots.
- Optional Add-ins: To customize your side dish, stir in a spoonful of brown sugar for deeper caramel notes, or add a minced garlic clove.
- Fresh Herbs: Sprinkle fresh thyme or finely chopped parsley right before serving for a pop of freshness.
The “5+5 Method”
The biggest mistake people make on the stove is ending up with carrots that are either rock hard or completely mushy. The secret to the right tender-crisp bite is my simple “5+5 Method”:
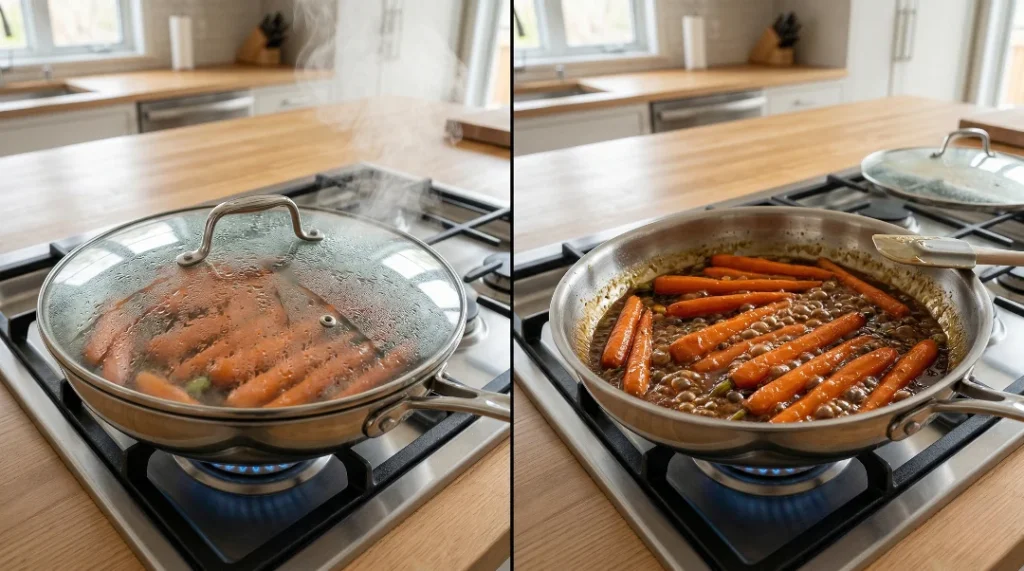
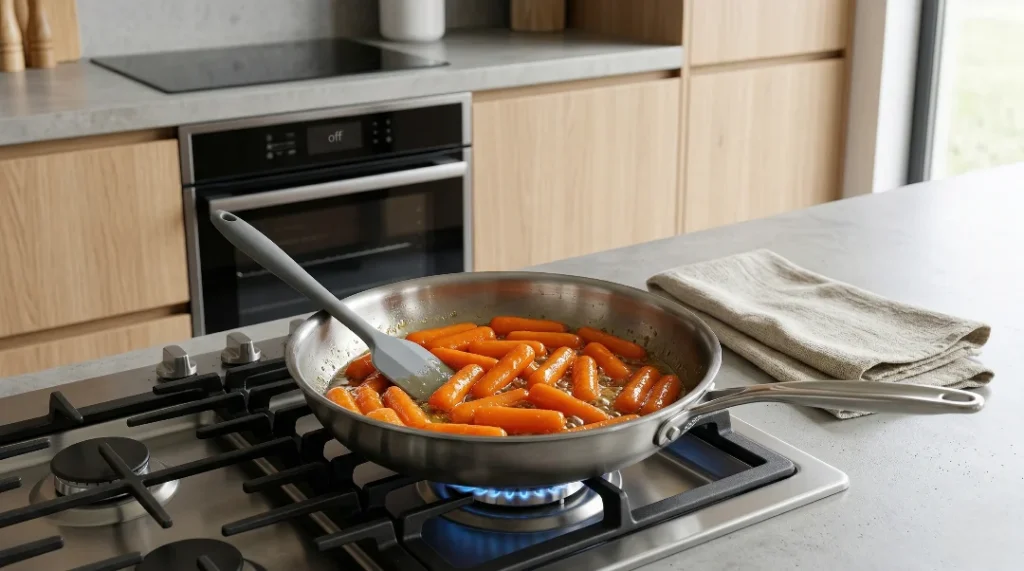
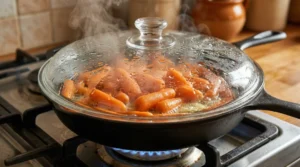
- First 5 Minutes (Covered): Put the carrots, butter, and honey in the skillet, cover with a tight lid, and cook on medium heat. This creates steam, cooking the carrots through to the center without burning the sugars.
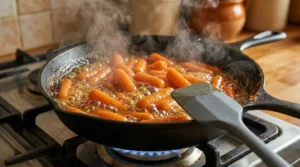
- Last 5 Minutes (Uncovered): Remove the lid and turn the heat to medium-high. The water will evaporate, and the butter-honey mixture will rapidly bubble and thicken into a sticky glaze.
J.ZaiB’s Pro Tip About Honey Glazed Carrots
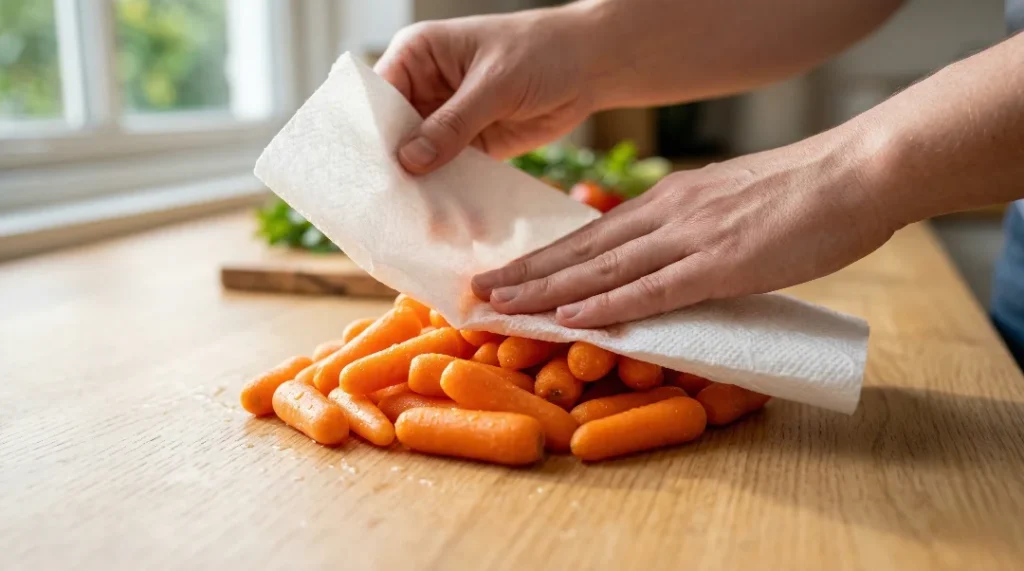
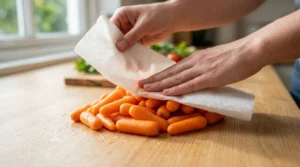
Always pat your baby carrots completely DRY with a paper towel before tossing them into the pan! If you skip this step, the leftover water from the bag will mix with your honey and butter. Instead of a thick, sticky glaze, you will end up with watery, boiled carrots. Dry carrots equal a thick glaze!
Customizations
Once you master the basic stovetop method, you can easily customize this recipe using whatever you have in your pantry:
- Air Fryer Honey Glazed Carrots: Toss the dry carrots in the honey-butter mixture and air fry at 380°F for 12-15 minutes until blistered and tender.
- Maple Honey Glazed Carrots: Swap half of the honey for pure maple syrup for a rich, autumnal flavor profile.
- Garlic Honey Glazed Carrots: Toss in 2 cloves of minced garlic during the last 2 minutes of the uncovered cooking phase.
- Vegan Honey Glazed Carrots: Use a high-quality vegan butter substitute and swap the honey entirely for maple syrup or agave nectar.
- Honey Glazed Carrots and Parsnips: Cut parsnips into baby carrot-sized sticks and cook them right alongside the carrots using the exact same 5+5 method.
Complete Your Easter Menu
These carrots are a colorful side dish to complete your holiday spread. If you want to host a stress-free Easter, serve these glossy carrots alongside our Slow Cooker Leg of Lamb (No-Dry Hack!) and a tray of our Easy Deviled Eggs Recipe (Secret Ingredient!). And to finish the night, slice into The Most Decadent Moist Coconut Cake Recipe (Velvety Soft!) for dessert!

Storage & Reheating
Store any leftover glazed carrots in an airtight container in the fridge for up to 4 days. To avoid mushy leftovers, skip the microwave! Simply reheat them in a skillet over medium-low heat for 3-4 minutes. The heat will revive the butter and honey, making the glaze shiny and sticky all over again.

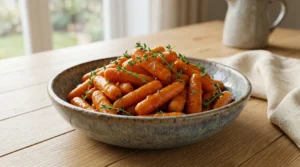
10-Minute Stovetop Honey Glazed Carrots (No Peel!)
Ingredients
Equipment
Method
- Prep the Carrots: Open your bag of baby carrots and pat them completely dry with a paper towel. (Note: This is very important! If the carrots are wet, your glaze will become a watery soup instead of a sticky sauce).

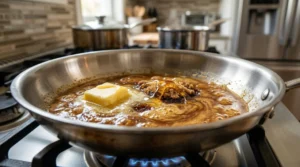
- Start the Glaze: Place a large skillet on the stove over medium heat. Add the butter and honey (and brown sugar, if using). Let them melt together for about 1 minute, stirring gently until smooth.
- Cover and Steam (5 Minutes): Add the dry carrots and salt to the melted butter mixture. Stir them well so every carrot is coated. Put a tight-fitting lid on the skillet and let them cook untouched for exactly 5 minutes. (This steams the carrots so they get soft inside).
- Uncover and Thicken (5 Minutes): Take the lid off. The liquid will look very thin and watery—that is completely normal! Turn the heat up slightly to medium-high. Let the liquid bubble rapidly for another 5 minutes, stirring every minute so the sugars do not burn. (If using minced garlic, stir it in during the last 2 minutes).
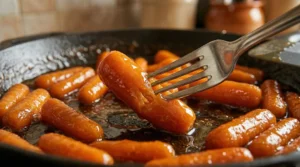
- Check for Doneness: Poke a carrot with a fork; it should go in easily but still have a little bite to it. The liquid should now be reduced to a thick, sticky syrup that coats the carrots.
- Garnish and Serve: Remove the skillet from the heat immediately. Sprinkle with fresh thyme or parsley, give it one final stir, and serve warm!
Notes
- Reheating: To prevent mushy leftovers, do not use the microwave. Reheat the carrots in a skillet over medium-low heat for 3-4 minutes to restore the shiny, sticky glaze.
- Regular Carrots: If using regular whole carrots, peel and slice them diagonally into 2-inch pieces. You may need to increase the covered cooking time to 7-8 minutes to ensure they become tender.
- Vegan Option: Swap the butter for a vegan butter substitute and use pure maple syrup or agave nectar instead of honey.
Troubleshooting FAQs
Do I need to peel carrots for glazed carrots?
Not if you use pre-washed baby carrots! However, if you are using regular whole carrots from the garden or grocery store, it is best to peel them. The outer skin can sometimes taste slightly bitter and has a rough texture that prevents the honey glaze from sticking evenly.
Why are my honey glazed carrots not getting glossy?
This usually happens if the carrots were wet when added to the pan, or if the heat was too low during the cooking process. The butter and honey need medium-high heat to reduce and thicken into a syrup. Always remember to pat your carrots completely dry with a paper towel before cooking.
Why do my carrots turn mushy?
Mushy carrots are the result of over-steaming. If you leave the lid on the skillet for too long, the carrots will boil in their own moisture and lose their structure. Stick strictly to the “5 minutes covered, 5 minutes uncovered” method to maintain a proper tender-crisp bite.
Can I make honey glazed carrots without butter?
Yes. You can substitute the butter with an equal amount of ghee, coconut oil, or a vegan butter alternative. Olive oil also works, but keep in mind that the final glaze will be slightly thinner and less rich than a butter-based glaze.
Are honey glazed carrots healthy?
Yes, carrots are naturally packed with beta-carotene, fiber, and essential vitamins. While this side dish does contain butter and natural sugars from the honey, you can easily control the portions. For a lighter version, simply reduce the butter by half. If you want to learn more about the exact health benefits and vitamin breakdown of root vegetables, you can check the USDA’s official nutritional database.
How many carrots per person?
As a general rule for holiday dinners or gatherings, plan for about 4 to 5 ounces (around 1/4 pound) of carrots per person. A standard 1-pound bag of baby carrots will comfortably serve 4 people as a side dish.
Can I add other vegetables to this recipe?
Absolutely. Parsnips and sweet potatoes (cut into small, uniform cubes) cook beautifully in a honey butter glaze. Just ensure all your vegetables are cut to a similar size so they finish cooking at the exact same time.
Your Turn to Shine!
Free up your oven space and your schedule this holiday season! These stovetop honey glazed carrots are proof that you don’t need to spend hours in the kitchen to create a delicious, high-quality side dish.
Save it for later: Don’t forget to Pin this recipe to your Holiday Sides board on Pinterest so you have it ready for dinner time!
Did you make this? If you try the 5+5 method, snap a quick photo of your glossy carrots and tag us on Instagram (@viralfoodhacks). We love sharing your photos with our community!
Before you go, I would love to know: Do you prefer yours classic, or do you add a pinch of brown sugar? Let me know in the comments below! (And if you need a main course to go with this, check out our Slow Cooker Leg of Lamb to complete your menu!)